

Introduction: Circular Knit Stretch Sensor


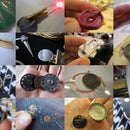

Use a circular knitting machine to knit a stretch sensor with regular and conductive yarns in five minutes! The values of the sensor range from roughly 2.5 Mega Ohm when relaxed, to 1 Kilo Ohm when fully stretched.
The stretch sensing is actually due to the structure of the conductive yarn which is made up of lots of short steel fibers mixed with polyester. Even without knitting the yarn into a structure you can use it as a stretch sensor by simply pulling it taught or relaxing it. But the yarn is not very strong and easy to tear. The knit structure allows you to accumulate more yarn and thus more resistance in less length and also by combining the conductive yarn with regular yarn you can gauge the sensitivity of the sensor by choosing a thicker or thinner yarn - thicker yarn gets more in the way of the conductive yarn making extra contact through the knitted loop structure. Plus knitting creates the stretchy structure giving you some natural tangible feedback.
Circular knitting machines
Circular knitting machines range from 20-250$ in price and differ in diameter, number of needles and spacing of needles. Spool or wire knitters have only four needles and resemble manual knitting dolls, while the knitting machines resemble manual knitting wheels or looms. See these posts on HOW TO GET WHAT YOU WANT for a more detailed summaries of circular knitting machines:
>> http://www.kobakant.at/DIY/?p=1144
and circular knitting looms:
>> http://www.kobakant.at/DIY/?p=2067
Conductive yarn
Conductive yarn is hard to come by, but hopefully soon online shops like www.plugandwear.com will offer such yarns in various thicknesses, conductivity and at a good price. The conductive yarn used in this tutorial is called Nm 50/2 and is made up of 80% Polyurethane and 20% Inox steel fiber and is manufactured by the Austrian company Schoeller (www.schoeller-wool.com) but they only produce and distribute it in industrial quantities of 300KG. See the following post for more information:
>> http://www.kobakant.at/DIY/?p=1978
Circular knit stretch sensor post:
>> http://www.kobakant.at/DIY/?p=1996
Buy a circular knit stretch sensor on Etsy:
narrow >> http://www.etsy.com/view_listing.php?listing_id=37778885
wide >> http://www.etsy.com/view_listing.php?listing_id=37805729
The following Instructable will cover the knitting of stretch sensors using conductive and regular yarn with the following models of circular and spool knitting machines:
- Play Go Knit Knit (17 Euro from Amazon Germany)
- Singer Spool Knitter (19$ from Amazon USA)
Video of the full process of knitting and testing a circular knit stretch sensor using the Play Go Knit Knit circular knitting machine (6 minutes)
Video of the full process of knitting and testing a circular knit stretch sensor using the Singer Spool Knitter (5 minutes)
Video demonstration of both wide (circular knitting machine) and narrow (spool knitter) stretch sensors
Step 1: Materials and Tools

MATERIALS
* conductive yarn
* regular yarn
TOOLS
* circular knitting machine or spool knitter
* scissors
For testing:
* battery
* LED
* 3 crocodile clips
(* or multimeter)
For inflation sensor:
* regular party balloon
Step 2: Threading Machine


Before starting on your sensor you should first take time to get to know the circular knitting machine and be sure that you are able to get it to knit nicely. Expect the first few attempts to be messy. Machines come with instruction but the following steps will cover the general instructions that apply to most models.
To start, thread the yarn through the tension rig and through the hole into the center of the knitting machine. During the entire knitting process, if you machine makes strange noises, check that the thread is able to run through the tension rig with no extra friction on it, even having to unwind itself from the ball of yarn can sometimes be too much weight for the machine and it will help if you unwind the yarn ball so that the yarn can feed into the machine with absolute ease.
Step 3: Knitting the Beginning


Turn the handle and as you go thread the thread back and forth between the needles until you have completed the first round. with the knitting spools it can be important to turn in a particular direction. The singer spool knitter wants to be turned clockwise so that the needles can grab the yarn. For the spool knitter you also want to make sure that you start off with all needle latches open. You want to catch a first needle, then skip one, catch the second, skip the forth and then catch the first again and make sure that the first thread is pulled down bellow the latch so that when the latch loses it pulls the second thread through the first. After catching the first needle twice, continue to turn constantly, catching all needles and attach the weight to the yarn coming out from the center of the machine. Knit for as long as you want the non sensitive part to be.
Step 4: Knitting Sensitive Part


Take the conductive yarn and simply tie it to the yarn that is already running into the machine. See pictures for reference. Continue to turn and the knot should be pulled into the machine and not disturb the knitting. Now knit for as long as you want the sensitive part of the sensor to be. Depending on the diameter of your knitting machine you might have to adjust this so that your sensor gets the right sensitive range you are looking for. For the example sensors (both wide and narrow) the conductive part is about 7cm long. When finished knitting the conductive part simply cut the conductive thread (only the conductive thread) and continue knitting until the remaining tail is used up.
Step 5: Knitting the End Piece

Once the conductive section is finished continue to knit until you want to finish. Alternatively you could also insert another stretch sensor part by simply repeating step 3 after knitting an isolating stretch.
Step 6: Finishing Off


To end your sensor cut the yarn feeding into the machine, but leave about 30-50 cm extra. Pull the end of the yarn through the rig and hole until it does not catch on the needles anymore as you turn.
here are two ways to finish off so that your knitting won't unravel:
* You can either turn the handle several times until all the loops are free from the hooks any the tube come off the machine. This way you have to be careful not to stress the knitting in any way that would unravel it. Hold it gently in your hands, thread the end of the yarn through a needle and pick up the loose loops. then pull the thread tight, closing the tube. You can also finish the knitting any crocheting the loops, this will maintain the stretchiness.
* Instead of releasing the whole tube from the machine in one go you can also turn it around slowly, picking up each loose loop as it slips off the needle.
Step 7: Seeing That What You Made Works!


Take the battery, LED and crocodile clips and create the following circuit:
power+ ---(connected to)--- LED+
power- ---(connected to)--- one end of sensor
other end of sensor ---(connected to)--- LED-
Make sure that you make contact between the resistive yarn and the crocodile clips on each end of he sensor. See video and pictures for reference.
Now stretch the sensor in all directions, squish it up into a ball or press it tightly, all of these things should lead to a change in resistance big enough to fully light the LED when pressured/stretched and fully dim the LED when relaxed.
Step 8: What You Can Do With a Knit Stretch Sensor?


You can use it as in inflation sensor. Inflate a regular party balloon inside the knit tube and use and LED to visualize the change in resistance. See video and pictures for reference.
Video of inflation sensor:
>> http://www.flickr.com/photos/plusea/4117125399/in/set-72157623133756078/
ENJOY!


