

Introduction: Clean an Epilog Legend 36EXT I-Beam Belt


Our awesome Epilog Legend 36EXT laser cutter started to malfunction. The image was cutting correctly, but the optical cut head started drifting to the left side of the bed until it crashed and stopped working. I called Epilog tech support and they informed me that the reason the optical cut head was drifting was that the I-Beam belt was in need of cleaning. This required a partial disassembly of the machine. They were able to provide me with instruction on removing the drive motor holding the belt in place, but not full instructions for cleaning the belt. I decided to make this tutorial to make it belt specific, instead of motor specific.
After the completion of this process the laser cutter was working better than it had in months and I was very glad that I did it. This is not something that anyone would need to do every day, but is definitely something to keep in mind as your machine clocks hundreds of hours.
All you need to do this is some distilled water, mild dish detergents, q-tips, rags, sponges and a phillips screw driver.
Step 1: Unplug the Laser Cutter

Before you do anything, unplug the laser cutter. This will greatly diminish the risk of massive electrical shock.
Step 2: Remove the Side Panels


Remove the side panels from the laser cutter be loosening the screws holding it in place. I put the screw in appropriately labeled paper cups so that I didn't end up loosing them.
Step 3: Clean the Y-axis Belts


Once you remove the panels, you should see the y-axis belt.
Pour some distilled water in a cup and put in a drop of mild dish detergent. Environment-friendly brands tend to work well.
The y-axis belts should be relatively clean and you should be able to get away with wiping them off with a rag dampened in the soapy water.
Step 4: Remove the I-beam Cover


Remove the cover from the I-beam by loosening the screws holding it in place. Lift it away to expose the x-axis encoder and compressed air feed.
Step 5: Unplug the Motor


Disconnect the I-beam belt motor by unplugging the three lowest connectors
Step 6: Loosen the Belt


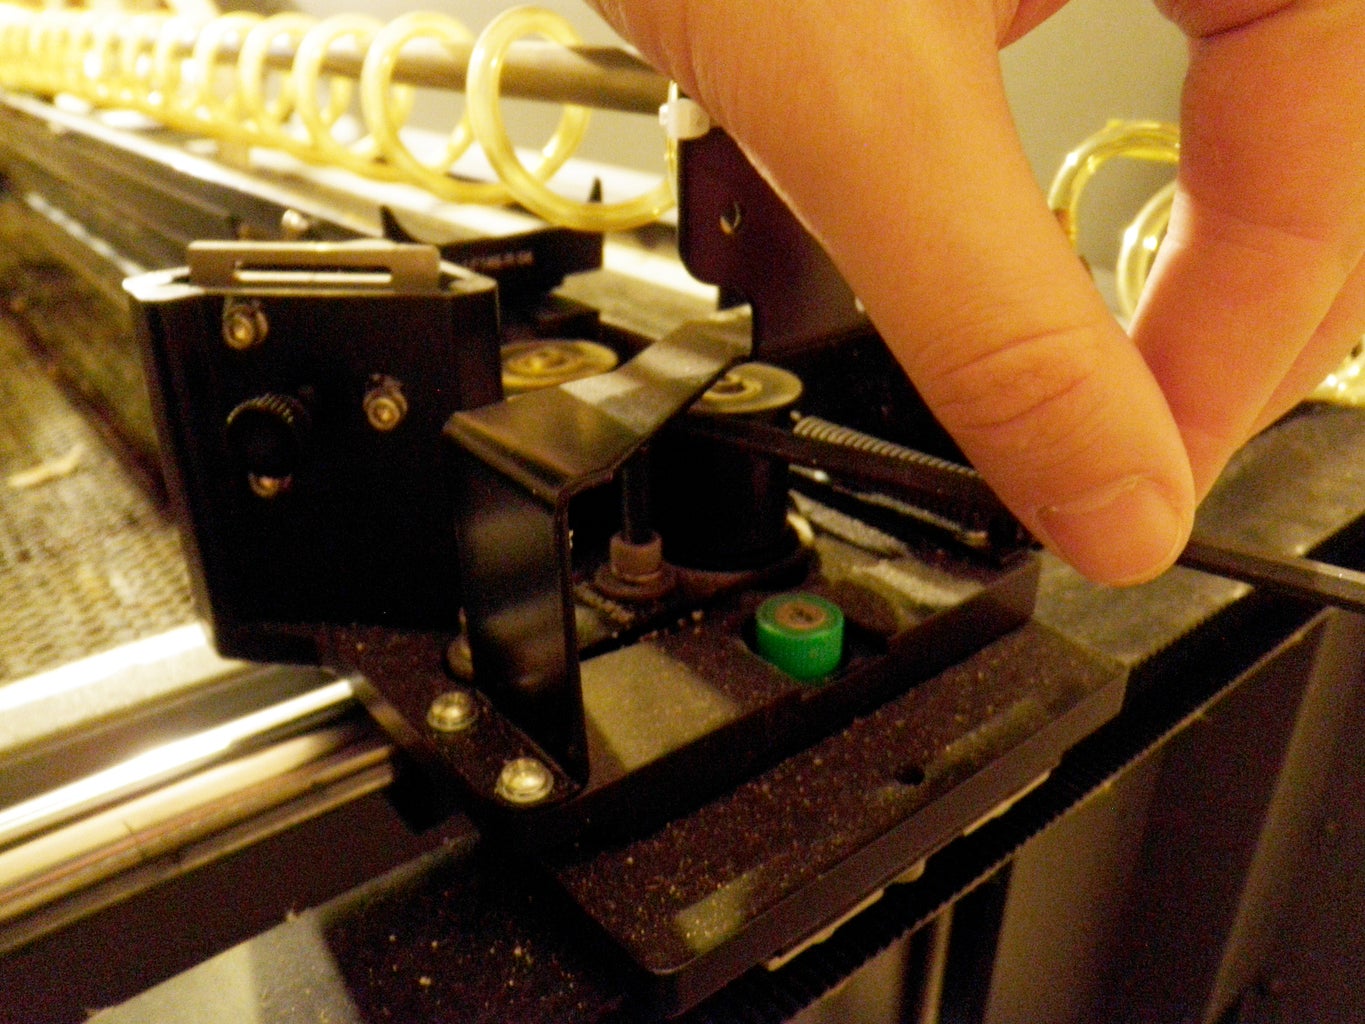
Loosen two bolts located on the right side of the I-beam near the pulleys (see image notes).
Once these bolts are loosened, push in the pulley and then while continuing to hold it in place, tighten the bolts.
This will lock the pulley in place, such that the belt remains loose.
Step 7: Remove the Motor


Loosen and remove the fan bracket surround the I-beam belt motor.
Loosen the four screws holding the motor in place. Once these are free, gently remove the motor. The belt should now be free for cleaning.
(Don't forget to put your hardware somewhere safe for easy reassembly.)
Step 8: Clean the Motor Gear


Clean the motor gear using Q-tips dampened in your soap solution and, if necessary, toothpicks to pick between its teeth.
Remove all of the accumulated gunk, to help prevent the belt from slipping.
Step 9: Clean the Belt


Clean the belt using a sponge dampened with your soap solution. Remove all of the laser dust and gunk accumulated over the years. Make sure that you clean the entirety of the belt. This may mean repositioning the laser head.
While, you're at it, you may want to clean off any dirty surfaces that you normally don't have access to, such as the inside of the I-beam assembly, the motor mount and the far pulleys.
If you decide to clean the X-axis encoder (the thing plastic strip that runs along the top of the I-beam, you should use dampened Q-tips and a lot of care (be gentle with this). When you are done cleaning, you may also want to clear out the optical sensor that runs along the encoder strip by shooting into it with a small bit of compressed air.
Step 10: Put the Motor Back In


Put the motor back on the motor mount and make sure the pulley is situated correctly on the drive spindle. Attach it firmly using the mounting hardware. Plug the motor back into the appropriate sockets and then reinstall the exhaust fan that wraps around the motor (make sure to clean it first).
Next loosen the two screws on the other side of the motor. The X-axis belt should now snap taught as the pulley returns to its original position. Tighten these screws once more to lock everything in place.
Step 11: Put a Lid on It


Put the sides back on and then the I-beam cover. Make sure they are all securely fastened in place when you are done.
Step 12: Test Cuts

Perform raster and vector test cuts in all quadrants of the machine. Make certain that it is now working properly. If there still seems to be a problem, contact the helpful folks over at Epilog tech support.
Participated in the
Epilog Challenge


