

Introduction: Coffee Cup Packaging


I have been reading a lot lately about efforts to reduce the number of paper cups the coffee industry uses. I tote around my plastic refillable mug, and get 10 cents off (Dutch people like to be cheap) so I hadn’t thought about it much.Until… I got yet another box in the mail. I hate getting all those new boxes in the mail, I wish they would re-use other boxes (Ilike the stuff inside, don’t get me wrong)!So I figured I’d mash up 2 problems… and maybe get a solution…. Coffee Cup packaging is born (This could change the world you know!! )
Step 1: Materials
Ok… so first step, I needed a coffee cup; headed down to the local coffee shop, to see if I could snag a few.Had a grown-up hot chocolate..aka “Mocha”, (in my plastic cup) and went dumpster diving.
Yes, I’m admitting it… sorry guys, I am using other people’s trash in this project. I figure with the plastic things on top it’s not like their mouth gets to the cup anyways.Lucky for you, if that seems squeamish, you can always just enjoy a coffee yourself, and use that :-)
Mind you acquiring a paper cup was harder than it first seemed.. apparently this paper trash doesn’t seem to get left in the shop, but follows all these coffee drinking souls to work. Dope!So I waited.
Paper cups acquired… I also needed:
The cup sleeve
A knife, or other sharp object.
Scissors
Something to poke holes (my Swiss army knife served well)
Scrap cardboard
A piece of ribbon (not pictured)
A bit of String
Glue
Tape
Painting supplies
Step 2: Clean Out the Cup


- I rinsed the cup right away, to get the syrup out.
- Then cleaned it more thoroughly at home.
Step 3: Constructing a Top


Find a circular object that fits inside the circle you’ve draw, with a little room to spare. About 1/8 of an inch on all sides should do it. You want the top you’re making to be smaller than the top of your cup so that it fits insides.
Trace around your new circular object.
Cut out the smaller of the 2 circles.
Using a knife or X-acto cut a small slit in the center of your cardboard circle. Make it just big enough to accommodate your ribbon, or string.
Fold your ribbon in half, and push it through the cut you just made.
Cut your ribbon, with enough extra that you have something to glue down.
Glue your ribbon down with white glue.
Allow time to dry.
Step 4: Painting the Top


Get out the paints. Mostly you need some browns, and maybe a cream color.
Paint a base coat in brown. I painted both the top and the underside. Allow to dry.
On one top:
I used a lighter brown paint to paint a circular blob type shape. Then, using the cream color, painted another smaller blob shape over top the light brown. And a small cream blob got painted on the other side. I was trying to create some “reflections”.
On the other top:
I tried to create that effect some coffee houses do, where they make shapes in the coffee froth. ( I love that! ). So to make the froth, I used a sponge to stipple a lighter color brown on, and then I stippled the cream color over that (each time leaving a bit of the color below show through). I then used the lighter brown, to paint the coffee design in, and finally went back and stippled over that with the cream color (really lightly).
I also painted part of the coffee sleeve.
Step 5: Assembly


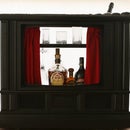
Make a note, or small present, put it inside, and put the lid on. I added some coffee beans for fun, and to fill it out for stability.
Easy version
If you’re just going to hand it to someone, this is probably, all you need to do. The cardboard will stay in place if you push down on all sides snuggly (not to much… just snug). Your recipient can pull on the tab, and ta daa!!
Secure version
I was trying to make a slightly more secure version, but I didn’t want to use glue so that it could be re-used. So I poked holes around the top (just above when the lid fits in securely). An odd number of holes work best. I then sewed around the top of the lid (going around 2 times, to make it look solid on the outside). The string on the inside helps to keep the lid in place. You only need about 7 to 9 holes… to many more makes the cup weak. You could do fewer holes, but your string will cross over closer to the center.
Step 6: Mailing the Coffee Cup... Don't :-(

I had the GREAT idea, of mailing the coffee cup. I was even really excited because you could simply take off the coffee sleeve, and put a new sleeve on for the next recipient. I wish you could do that with regular boxes (...hmmm next instructable idea).
Unfortunately, this doesn't work so well... the cups get a little smooshed in the mail, they aren't quite strong enough. I guess mail is heavy. Although the post office was quite kind, and taped all my bits together so at least my trial came back to me.
To bad... 'cause this was sooo going to make me rich!
Step 7: Ta Daa


I hope you enjoyed your cup of Joe! Now maybe someone else will get a chance to enjoy it as well.
p.s. You don't have to keep them coffee theme... you can paint what ever you want on them!
Runner Up in the
Coffee Cup Challenge


