

Introduction: Color Mixer With Arduino


A color mixer is a great project for anyone working and growing with Arduino. By the end of this instructable you will be able to mix and match almost every color imaginable by turning 3 knobs. The skill level is low enough that even a complete rookie can complete it successfully, but also interesting enough to be enjoyable for a seasoned vet. The cost of this project is next to nothing and most Arduino kits come with the materials needed. At the core of this code are some fundemental arduino functions that anyone using arduino will want to understand. We will go into depth about the analogRead() and analogWrite() functions as we as another usual function called map(). These links bring you to the arduino reference pages for these functions.
Step 1: Parts and Componets


Arduino Uno
Potentiometer (x3)
RGB LED
220 ohm resistor (x3)
Jumper wires (x12)
Bread board
Step 2: Plan Your Progress

It can be very helpful to plan how you will complete your project. Coding is all about the logical progression from one step to the next. I made a flow chart that outlines how I want my sketch to run. The overall goal is to have 3 knobs (potentiometers) control each of the three colors of an RGB LED. In order to accomplish this we will need to create a sketch matching the flow chart. We will want to....
1) Read 3 different potentiometers and save their values in variables.
2) We will convert those values to match the range of the RGB LED.
3) Then finally we will write those converted values to each of the colors of the RGB.
Step 3: How to Use Potentiometers


One of the most basic components in a electronics kits, the potentiometer can be used in many different projects. potentiometers function by allowing the user to physically change the resistance of the circuit. The most farmilar example of a potentiometer is a light dimmer. sliding or turning a knob changes the length of the circuit. a longer path results in more resistance. The increased resistance inversely lowers the current and the light dims. These can come in all different shaped and sized but most has the same basic set up. A student asked for help fixing his guitar and we found out the knobs on it were exactly the same as potentiometers. In general you was the outside legs connected to 5 volts and ground and the middle leg goes to an analog pin like A0
Step 4: Wiring Schematic for (3x) Potentiometer


The left most leg will be connected to 5v and the right most leg will be connected to GND. You can actually reverse these two steps and it will not hurt the project very much. All that would change is turning the knob all the way to the left will be full brightness instead of all the way off. The middle leg will be connected to one of the analog pins on the Arduino. Since we will have three knobs, we will want to triple up on the work we just did. Each knob needs 5v and GND so those can be shared using a bread board. The red strip on the bread board is connected to 5 Volts and the blue strip is connected to ground. Each knobs needs its own analog pin so they are connected to A0, A1, A2.
Step 5: Using AnalogRead() and Variables
With you potentiometer set up correctly we are ready to read those values. When every we want to do this we use the analogRead() function. The correct syntax is analogRead(pin#); so to read our middle potentiometer we would analogRead(A1); In order to work with the numbers being sent from the knob to the Arduino, we will want to also save those numbers in a variable. The line of code will accomplish this task as we read the potentiometer and save its current number in the integer variable "val"
int val = analogRead(A0);
Step 6: Using the Serial Monitor With 1 Knob
Currently we are able to get values from the knobs and store them in a variable, but it would be helpful if we could see these values. To do this we need to make use of the built in serial monitor. The code below is the first sketch we will actually run in the Arduino IDE which can be downloaded at their site. In the void setup() we will activate the analog pins connected to each middle leg as an INPUT and activate the Serial monitor using Serial.begin(9600); next we read only one of the knobs and store it in a variable like before. The change now is we added a line that prints what number is stored in the variable. If you compile and run the sketch you can then open your Serial monitor and see numbers scrolling on the screen. Each time the code loops we are reading and printing another number. If you turn the knob connected to A0 you should see values ranging from 0-1023. later on the goal will be to read all 3 potntiometers which would require 2 more analogReads and 2 different variables to save and print.
void setup(){
	pinMode(A0,INPUT);
	pinMode(A1,INPUT);
	pinMode(A2,INPUT);

	Serial.begin(9600);
}

void loop(){
	int val = analogRead(A0);
	Serial.println(val);
}
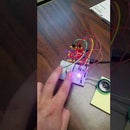
Step 7: Using the RGB LED


The 4 Legged RGB LED i one of my favorite components for Arduino. I find The way it is able to create endless colors from mixtures of 3 of basic colors fascinating. The set up is similar to any regular LED but here we basically have a red, blue and green LEDs combined together. The short legs will each be controlled by one of the PWM pins on the arduino. The longest leg will be connected to 5 volts or ground, depending if yours in a common anode or common cathode LED. You will need to try out both ways to problem solve this. We will already have 5v and GND connected to the breadboard to it should be easy to change. The diagram above shows using 3 resistors as well. I actually skip this step often as I haven't had and LED blow out on me.
To make colors we will use the analogWrite() function to control how much red, blue,or green to add. To use this function you need to say which pin# we will talk to and a number between 0-255. 0 is completely off and 255 is the highest amount of one color. Lets connect the red leg to pin 9, green to pin 10 and blue to pin 11. This might take some trial and error to figure out which leg is which color. If i wanted to make a purple hue I could do a lot of red, no green, and maybe half strength of blue. I encourage you to tinker with these numbers, its really exciting. Some common examples are in the pictures above
void setup(){
	pinMode(9,OUTPUT);
	pinMode(10,OUTPUT);
	pinMode(11,OUTPUT);
}

void loop(){
	analogWrite(9,255);
	analogWrite(10,0);
	analogWrite(11,125)
}
Step 8: Using Potentiometers to Control RGB LED (with One Bug)


It is time to start fusing our two codes together. You should have just enough room on a standard breadboard to fit all 3 knobs and the RGB LED. The idea is instead of typing in the values for red blue and green, we will be using the values saved from each poteniometer to constantly change the colors. we will need 3 variables in this case. the redval, greenval, blueval are all different variables. Keep in mind you can name these variables anything you want. if you turn the "green" knob and the red amount changes, you can switch the names to match correctly. you can now turn each knob and control the colors!!
void setup(){
pinMode(A0,INPUT);
pinMode(A1,INPUT);
pinMode(A2,INPUT);

pinMode(9,OUTPUT);
pinMode(10,OUTPUT);
pinMode(11,OUTPUT);
}

void setup(){
int redVal = analogRead(A0);
int greenVal = analogRead(A1);
int blueVal = analogRead(A2);

analogWrite(9,redVal);
analogWrite(10,greenVal);
analogWrite(11,blueVal);
}
Step 9: BONUS: Map() Function and Cleaner Code
You may notice that as you start turning the knob for one color up it will grow and then suddenly drop down to off. This pattern of growing and then quickly shutting off repeats 4 times as you turn the knob all the way up. If you recall we said the potentiometers can read values between 0 and 1023. The analogWrite() function only accepts values between 0 and 255. once the potentiometer goes over 255 it basically starts over at 0. There is a nice function to help with the bug called map(). you can convert one range of numbers into another range of numbers in one step. we will convert numbers from 0-1023 to numbers from 0-255. For example if the knob was set to half way it should read about 512. that number would be changed to 126 which is half strength for the LED. In this final sketch i named the pins with variable names for my convenience. You now have a completed color mixer to experiment with!!!
// variable names for potentiometer pins
int redPot = A0;
int greenPot = A1;
int bluePot = A2
// variable names for RGB pins
int redLED = 9;
int greenLED = 10;
int blueLED = 11;

void setup(){
pinMode(redPot,INPUT);
pinMode(greenPOT,INPUT);
pinMode(bluePot,INPUT);

pinMode(redLED,OUTPUT);
pinMode(greenLED,OUTPUT);
pinMode(blueLED,OUTPUT);

Serial,begin(9600);
}

void loop(){
// read and save values from potentiometers
int redVal = analogRead(redPot);
int greenVal = analogRead(greenPot);
int blueVal - analogRead(bluePot);

//convert the values from 0-1023 to 0-255 for the RGB LED
redVal = map(redVal,0,1023,0,255);
greenVal = map(greenVal,0,1023,0,255);
blueVal = map(blueVal,0,1023,0,255);

// write these converted values to each color of the RGB LED
analogWrite(redLED,redVal);
anaogWrite(greenLED,greenVal);
analogWrite(blueLED,blueVal);

//show the values on the Serial monitor
Serial.print("red:");
Serial.print(redVal);
Serial.print("green:");
Serial.print(greenVal);
Serial.print("blue:");
Serial.println(blueVal);
}

Participated in the
Arduino Contest 2017

Participated in the
LED Contest 2017

Participated in the
Epilog Challenge 9


