

Introduction: Connecting Arduino to MySQl Database W/ USB Using MysqlIO


I always thought about controlling arduino from another device over Wi-Fi or internet, but I didn’t want sacrifice any pin for communication. I already made a project to control my PC with arduino using IR remote (You can find the link here).
I upgraded the project to next level to communicate to MySQL database. Arduino sends data via Serial port to mysqlio in specific format i.e. “query=SELECT * FROM arduino”. Mysqlio detects these specific keywords and extracts the mysql command from the received string. Then it sends the same extracted mysql command to perform query.
I already found an instructable to communicate to mysql database for Linux and Mac systems in python. Windows doesn’t allow control serial ports from that application, moreover the mysql library that I designed is completely similar to real MySQL syntax, it seems like you doing MySQL in arduino itself.
I submitted this project for contest, so please vote if you like it.
Step 1: Materials Required
- Any Arduino
- USB cable A to B
Step 2: Development Tools Required
- Arduino IDE (Link to download IDE)
- Wamp Server or another MySQL service (Note: You can also use any free MySQL server from internet, it will give your project wireless capabilities)
- And of course, MysqlIO
Step 3: Setting Up the Database for Arduino
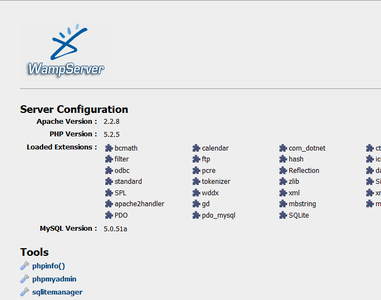
Run Wamp Server and open your internet browser, type ‘localhost’ in the address bar. You’ll see something as this image.
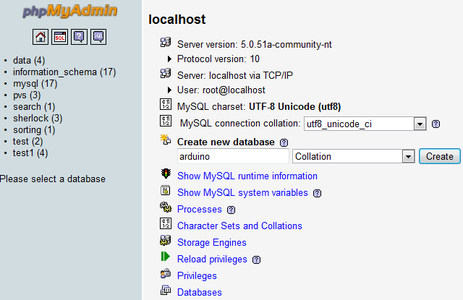
Click on phpmyadmin and create a new database ‘arduino’.
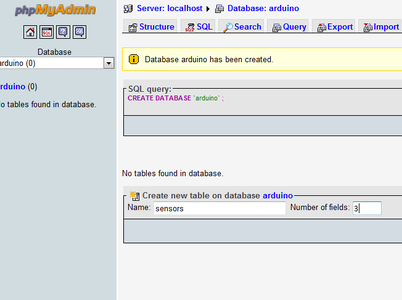
Now, create a table, name it as ‘sensors’ with 3 fields.
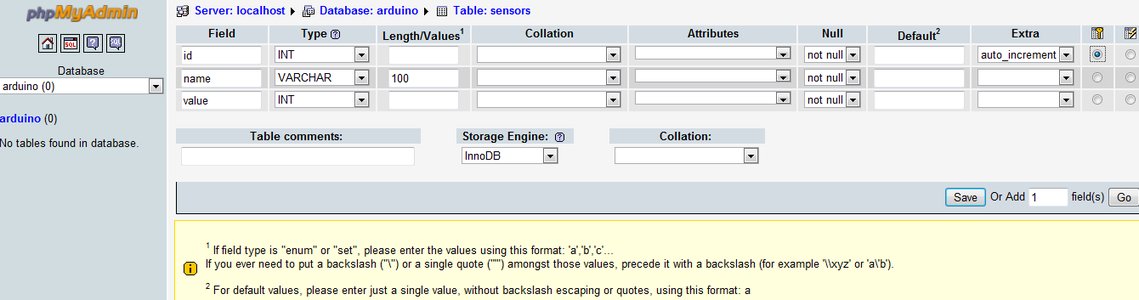
Use this as reference:
‘id’ as INT with auto increment.
‘name’ as VARCHAR of size 100.
‘value’ as INT.
Save the table, and now we are ready to code arduino.
Step 4: Coding the Arduino

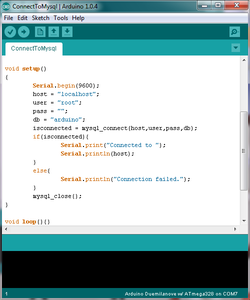
Extract the downloaded mysql.zip files in arduino’s libraries folder.
Restart the arduino to load the mysql library. Then go to: File>Example>mysql>ConnectToMysql
Change the user and password according to your mysql server configuration.
Upload the code to arduino.

Step 5: Talking to MySQL Database With Arduino
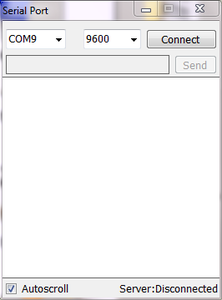

Download and install the MysqlIO app. Make sure Wamp Server is running else it will give an error.
Select the com port to which arduino is connected and the baud rate.
Mysqlio will receive data from the arduino and decode the received data into useable mysql commands.
As you can see, Connected to localhost and Disconnected which indicates that arduino has successfully connected to mysql database arduino.
Try other examples like, InsertRecord, DeleteRecord or any other code of your own.
You can also alter the parameters with variables to store sensor’s data over mysql database.
Attachments
Step 6: Conclusion

Creating a website or another app to read these values in mysql database and performs events according to the values will give unimaginable powers to your project.
If you use an online mysql server instead of ‘localhost’(i.e., host=”mysql.yourdomain.com”) your project gains the power of internet via USB cable using no Wi-Fi or Ethernet shields, all you need is to connect your computer to internet.
I’m not aware of any other app or library which can communicate to MySQL database in much simpler syntax. I already created a website with complete documentation and examples of Mysqlio application (here), it is completely open-source. You can download the Mysqlio source code and improve the app, it is written in VB .NET, you are welcome to any suggestions.
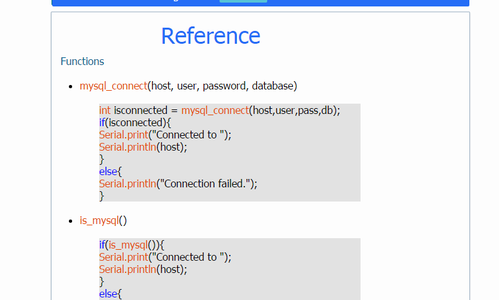
You can also download the Source code of MysqlIO, MysqlIO app or Arduino's library from my website too, there you will find references of other functions.
I already created another project to control the arduino from a php website on Wamp Server. Using MysqlIO app, I will post that instructable soon.
Attachments

Participated in the
Epilog Contest VII

Participated in the
Remix 2.0 Contest


