

Introduction: Control Arduino Using Android App


In this instructables I'm going to explain how to control the arduino IO pins using an android app, which we'll write here.
The communication will be over ethernet and we'll use the GET request to activate the IO's.
Let's get started!
Step 1: Parts

For this instructables you'll need several parts.
- An arduino
- An android smartphone or tablet (I'm using android 5.0.1)
- An ethernet shield
- 3 Led's
- 3 220 ohm resistors
- Some jumper wires
- a breadboard
- A computer with android studio installed
Step 2: The Ethernet Shield

I got this Ethernet shield from gearbest.com.
It worked instantly on my arduino mega (also from gearbest.com)
On the shield you have 2 SPI devices. The SD card reader and the W5100 IC for Ethernet.
In this instructables we'll only be using the Ethernet part.
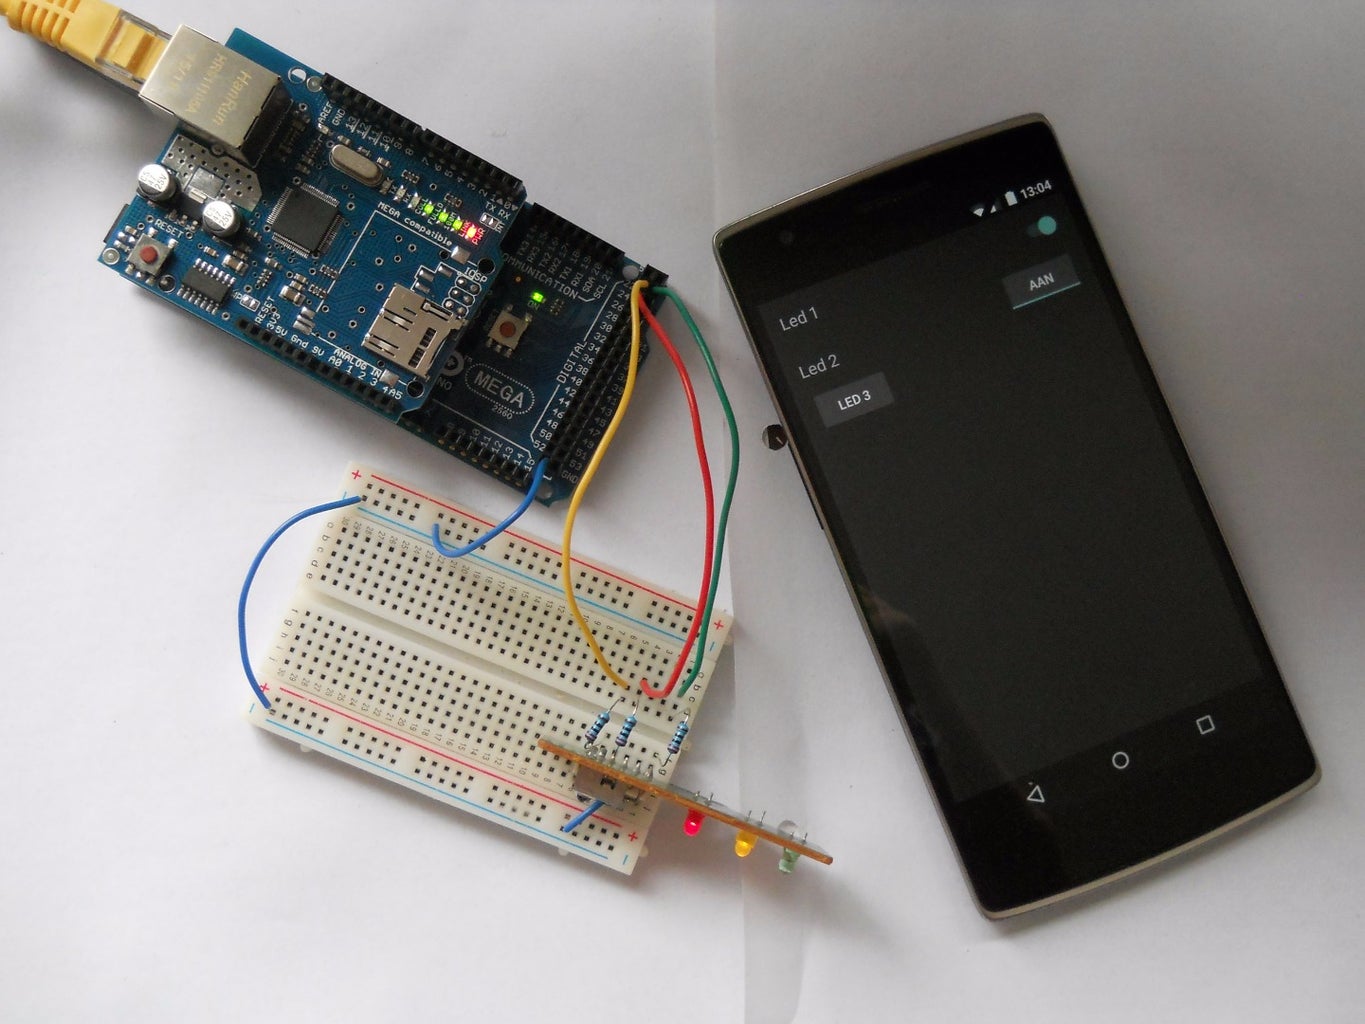
Step 3: Schema

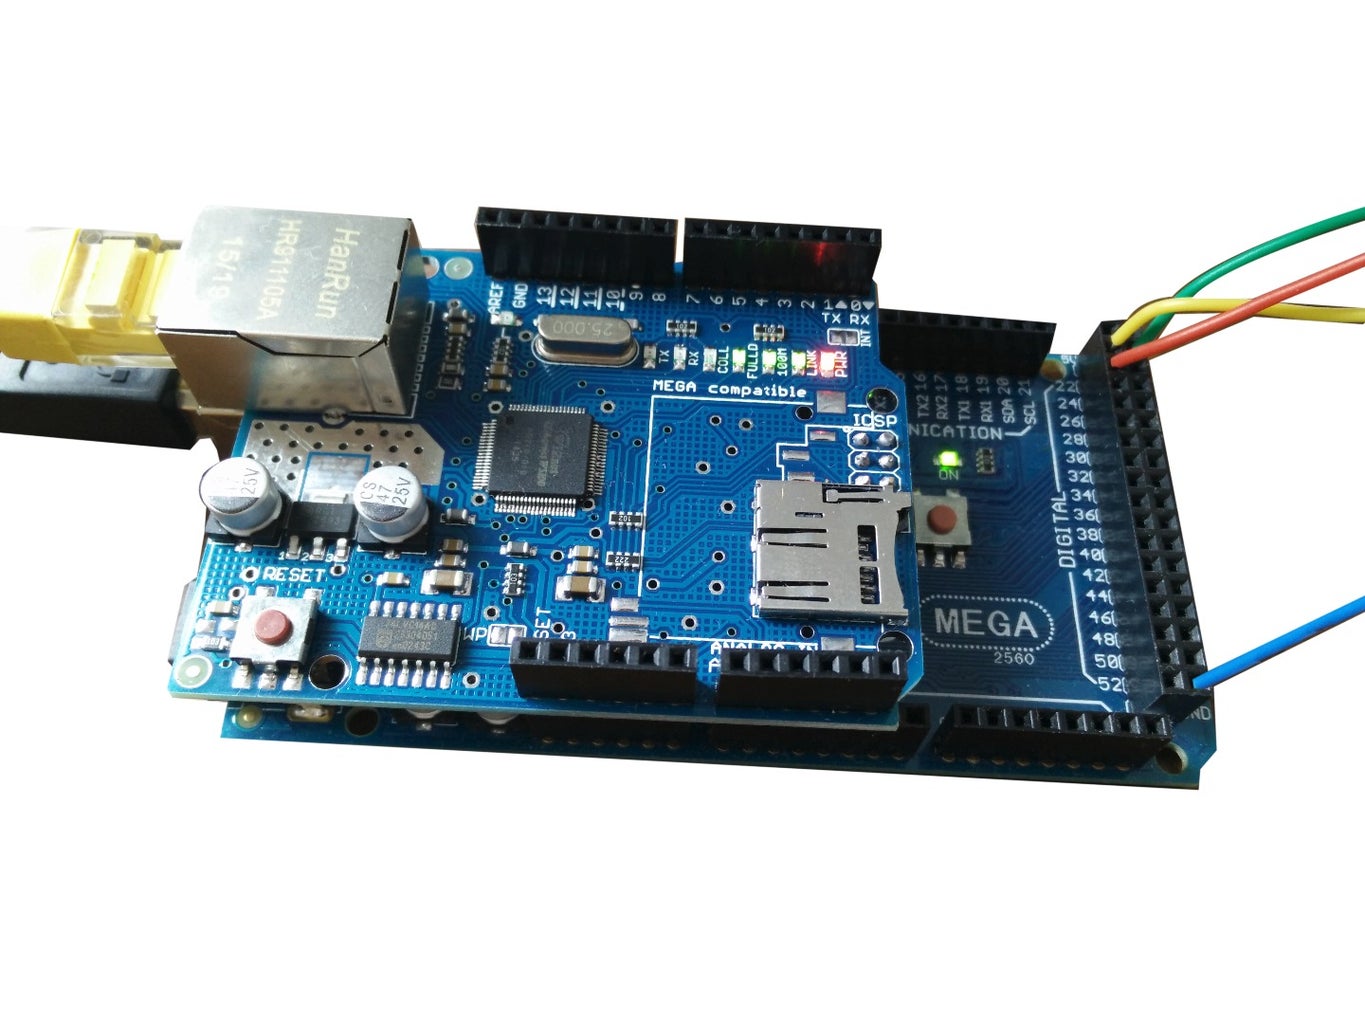

We need to connect the 3 led's to the arduino. You can use every pin except pin 0, 1, 10 to 13 and 50 to 53.
I'm using pin 22, pin 23 and pin 24.
You also need to connect your arduino to your local network. Internet isn't needed.
Step 4: Arduino Sketch

For the arduino sketch I started from the example webserver sketch.
I tried documenting every thing, but if you have a question feel free to ask!
#include <SPI.h>
#include <Ethernet.h>

// Set the MAC address
byte mac[] = {0xDE, 0xAD, 0xBE, 0xEF, 0xFE, 0xED};

// Set the IP address
IPAddress ip(192, 168, 1, 177);

// Start a server at port 80 (http)
EthernetServer server(80);

void setup() {
  // Open serial communications
  Serial.begin(9600);

  // start the Ethernet connection and the server
  Ethernet.begin(mac, ip);
  server.begin();

  // Pin 22 - 24 output (leds)
  pinMode(22, OUTPUT);
  pinMode(23, OUTPUT);
  pinMode(24, OUTPUT);
}


void loop() {
  // Check if client connected
  EthernetClient client = server.available();

  if (client) { // If there is a client...
    boolean currentLineIsBlank = true;
    String buffer = ""; // A buffer for the GET request

    while (client.connected()) {

      if (client.available()) {
        char c = client.read();// Read the data of the client
        buffer += c; // Store the data in a buffer

        if (c == '\n' && currentLineIsBlank) {// if 2x new line ==> Request ended
          // send a standard http response header
          client.println("HTTP/1.1 200 OK");
          client.println("Content-Type: text/html");
          client.println("Connection: close");
          client.println(); // Blank line ==> end response
          break;
        }
        if (c == '\n') { // if New line
          currentLineIsBlank = true;
          buffer = "";  // Clear buffer
        } else if (c == '\r') { // If cariage return...
          //Read in the buffer if there was send "GET /?..."
          if(buffer.indexOf("GET /?led1=1")>=0) { // If led1 = 1
            digitalWrite(24, HIGH); // led 1 > on
          }
          if(buffer.indexOf("GET /?led1=0")>=0) { // If led1 = 0
            digitalWrite(24, LOW); // led 1 > off
          }
          if(buffer.indexOf("GET /?led2=1")>=0) { // If led2 = 1
            digitalWrite(22, HIGH); // led 2 > on
          }
          if(buffer.indexOf("GET /?led2=0")>=0) { // If led2 = 0
            digitalWrite(22, LOW); // led 2 > off
          }
          if(buffer.indexOf("GET /?led3=1")>=0) { // If led3 = 1
            digitalWrite(23, HIGH); // led 3 > on
          }
          if(buffer.indexOf("GET /?led3=0")>=0) { // If led3 = 0
            digitalWrite(23, LOW); // led 3 > off
          }
        } else {
          currentLineIsBlank = false;
        }
      }
    }
    delay(1);
    client.stop();
  }
}
That was the code for on the arduino.
Pretty easy, right? Let's go to the app!
Step 5: App Layout
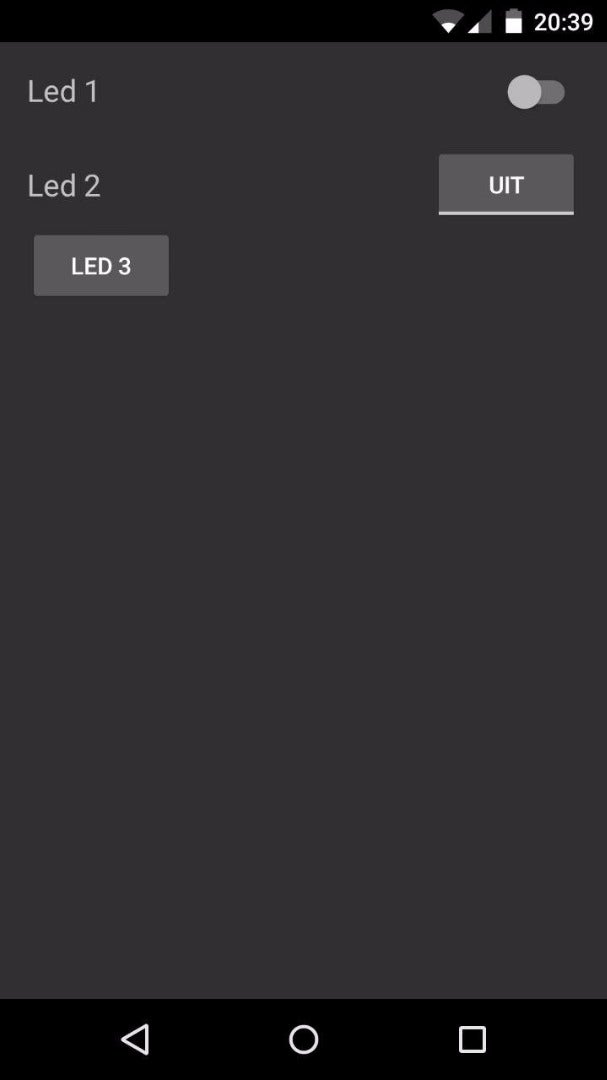
For creating an android studio project I'll redirect you here. The start is the same, choose a name and create the main activity, but after you deleted the "hello world" textview you need to add 3 buttons of any kind. I'm using a switch, a toggle button and a normal button, but you can choose what you like most.
Note:
When you get a render error, on the top of the window, change Apptheme to Appcompat.NoActionBar
! Attention !
A normal button will only lit it's led when pressed. The led will go out when the button is released.
In res/values/styles.xml you need to change parent to: "Theme.Appcompat.NoActionBar"
Ok, now we can start coding the app!
Attachments

Step 6: App Coding
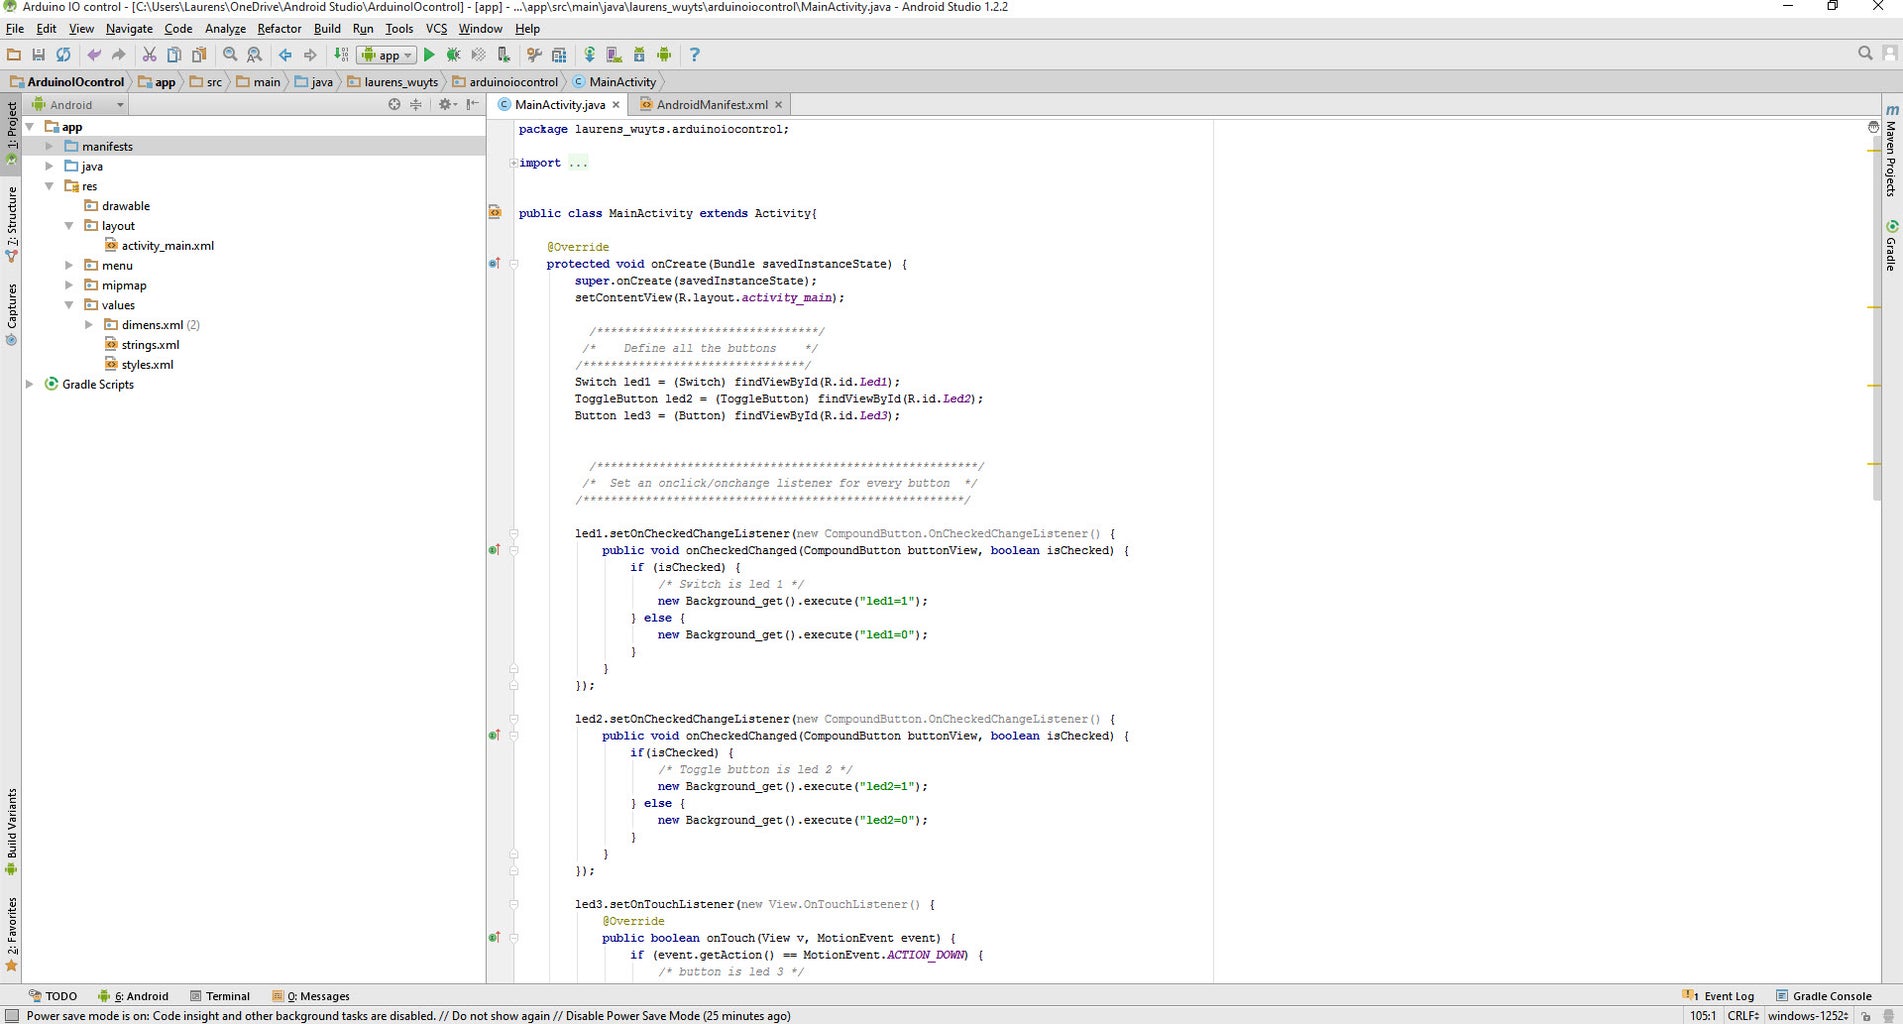
For coding the app, I made it easier for you. You need to copy this code to MainActivity.java and change package laurens_wuyts.arduinoiocontrol to company.appname.
package laurens_wuyts.arduinoiocontrol;

import android.app.Activity;
import android.os.AsyncTask;
import android.support.v7.app.ActionBarActivity;
import android.os.Bundle;
import android.view.Menu;
import android.view.MenuItem;
import android.view.MotionEvent;
import android.view.View;
import android.widget.Button;
import android.widget.CompoundButton;
import android.widget.Switch;
import android.widget.ToggleButton;

import java.io.BufferedReader;
import java.io.IOException;
import java.io.InputStreamReader;
import java.net.HttpURLConnection;
import java.net.URL;


public class MainActivity extends Activity{

    @Override
    protected void onCreate(Bundle savedInstanceState) {
        super.onCreate(savedInstanceState);
        setContentView(R.layout.activity_main);

    }

    @Override
    public boolean onCreateOptionsMenu(Menu menu) {
        // Inflate the menu; this adds items to the action bar if it is present.
        getMenuInflater().inflate(R.menu.menu_main, menu);
        return true;
    }

    @Override
    public boolean onOptionsItemSelected(MenuItem item) {
        // Handle action bar item clicks here. The action bar will
        // automatically handle clicks on the Home/Up button, so long
        // as you specify a parent activity in AndroidManifest.xml.
        int id = item.getItemId();

        //noinspection SimplifiableIfStatement
        if (id == R.id.action_settings) {
            return true;
        }

        return super.onOptionsItemSelected(item);
    }

        /*****************************************************/
       /*  This is a background process for connecting      */
      /*   to the arduino server and sending               */
     /*    the GET request withe the added data           */
    /*****************************************************/

    private class Background_get extends AsyncTask<String, Void, String> {
        @Override
        protected String doInBackground(String... params) {
            try {
                  /*********************************************************/
                 /* Change the IP to the IP you set in the arduino sketch */
                /*********************************************************/
                URL url = new URL("http://192.168.1.177/?" + params[0]);
                HttpURLConnection connection = (HttpURLConnection) url.openConnection();

                BufferedReader in = new BufferedReader(new InputStreamReader(connection.getInputStream()));
                StringBuilder result = new StringBuilder();
                String inputLine;
                while ((inputLine = in.readLine()) != null)
                    result.append(inputLine).append("\n");

                in.close();
                connection.disconnect();
                return result.toString();

            } catch (IOException e) {
                e.printStackTrace();
            }
            return null;
        }
    }
}
In this code you only need to change the IP to the IP of your arduino.
For checking the buttons you'll need to do 2 things:
- Define the button
- Add an onclick/onchange listener for every button.
Define buttons:
/* For a switch */
Switch led1 = (Switch) findViewById(R.id.Led1);

/* For a toggle button */
ToggleButton led2 = (ToggleButton) findViewById(R.id.Led2);

/* For a normal button */
Button led3 = (Button) findViewById(R.id.Led3);
Add onclick/onchange:
Place the onclick/onchange listeners in the onCreate function.
/* For a switch you'll need an "OnCheckedChangeListener" like this */
led1.setOnCheckedChangeListener(new CompoundButton.OnCheckedChangeListener() {
    public void onCheckedChanged(CompoundButton buttonView, boolean isChecked) {
        if (isChecked) {
            /* Switch is led 1 */
            new Background_get().execute("led1=1");
        } else {
            new Background_get().execute("led1=0");
        }
    }
});

/* For a toggle button you also need a "OnCheckedChangeListener" */
led2.setOnCheckedChangeListener(new CompoundButton.OnCheckedChangeListener() {
    public void onCheckedChanged(CompoundButton buttonView, boolean isChecked) {
        if(isChecked) {
            /* Toggle button is led 2 */
            new Background_get().execute("led2=1");
        } else {
            new Background_get().execute("led2=0");
        }
    }
});

/* For a button you'll need a "OnTouchListener" */
led3.setOnTouchListener(new View.OnTouchListener() {
    @Override
    public boolean onTouch(View v, MotionEvent event) {
        if (event.getAction() == MotionEvent.ACTION_DOWN) {
            /* button is led 3 */
            new Background_get().execute("led3=1");
        } else if (event.getAction() == MotionEvent.ACTION_UP) {
            new Background_get().execute("led3=0");
        }
        return true;
    }
});
That's all the coding that needed to be done! Now we need to add permissions to your app.
Attachments
Step 7: Adding Permissions to Your App

For your app to work you'll need to give it permissions. We only need 1 permission: Internet access. To give this permission you need to open the manifest file and add:
<uses-permission android:name="android.permission.INTERNET" />Just before
Step 8: Resume

In this instructables I showed you how to control arduino IO pins over the network from an android phone.
I also included the full app directory for those who would like to use it.
I hope you liked it please leave comments and feel free to ask questions (There are no stupid questions ;) )
Laurens


