

Introduction: Controll Leds With an Arduino From a C# Program


Have you ever wanted to control some LEDs with your Arduino from a program you have written? Well I'm here to help you with just that. This is my First 'able so please help me out if i mess up along the way. And feel free to add on and change any of the code to fit your needs.
Step 1: Open a New Project

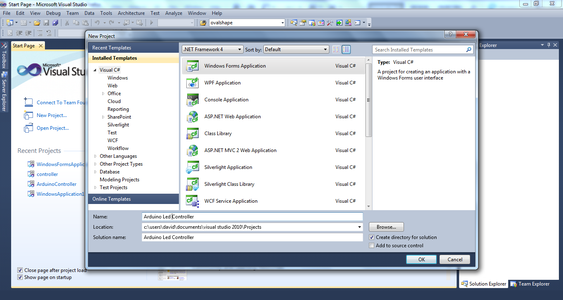

Open up Microsoft Visual Studio 2010 or Microsoft Visual C# 2010 and make a open a new C# Project and name it what ever you want. I will call mine "Arduino Led Controller". After you name it, click okay.
Step 2: Add Your Controlls


For this example, i will do 2 simple buttons to turn an led connected to pin 13 on and off. First Open the toolbox and click and drag the button onto the screen. Do this twice. Then add two pannels and resize the form, view the pics to see this.
Also add a serial port from the toolbox
Step 3: Rename Your Buttons

You can now rename your buttons or keep them the same. i will keep them the same, but i will change the text. do this by clicking on the button and going to the properties on the right side of the screen and changing the text section. shown below. Make sure you have the correct button selected when you are trying to change its text.
Step 4: Add the Code


Double click on the On button, and you should get a screen that looks like the first picture. Then in the block of the code add this code:
serialPort1.Open();
if (serialPort1.IsOpen)
{
serialPort1.WriteLine("A");
}
serialPort1.Close();
panel1.BackColor = Color.Lime;
panel2.BackColor = Color.Transparent;
then go up to the code:
public Form1()
{
}
and add this:
InitializeComponent();
serialPort1.PortName = " ";
serialPort1.BaudRate = 9600;
in between the brackets.
we will add the PortName value in a later step.
Now go back to the design page and double click on the off button and add this code:
serialPort1.Open();
if (serialPort1.IsOpen)
{
serialPort1.WriteLine("a");
}
serialPort1.Close();
panel2.BackColor = Color.Red;
panel1.BackColor = Color.Transparent;
Step 5: Arduino Code
okay for the arduino code you have to receive messages from a serial port. so this is the only way i know how to do this. Please forgive me if there is a different way for i have just started programming with the arduino.
int message = 0; // This will hold one byte of the serial message
int LEDPin = 13; // This is the pin that the led is conected to
int LED = 0; // The value or brightness of the LED, can be 0-255
void setup() {
Serial.begin(9600); //set serial to 9600 baud rate
}
void loop(){
if (Serial.available() > 0) { // Check to see if there is a new message
message = Serial.read(); // Put the serial input into the message
if (message == 'A'){ // If a capitol A is received
LED = 255; // Set LED to 255 (on)
Serial.println("LED on"); // Send back LED on
}
if (message == 'a'){ // If a lowercase a is received
LED = 0; // Set LED to 0 (off)
Serial.println("LED off"); // Send back LED off
}
}
}
Attachments

Step 6: The Setup


First you need to take an led and connect it to your arduino like the photo below. make sure the anode(+) is in digital pin 13 and the cathode(-) is in ground.
Then you need to open up the arduino ide and add the code attached below. Then go to the menu bar of the program and go to tools/board and choose the correct board that you are using. i am using the Dueminelove. then go to tools/serial port and note the name of yours. in my case it is COM4.
sorry for the poor photo quality, i had to use my phone. My camera broke this morning.
Attachments
Step 7: Adding the Serial Port Number to the C# Program


Go back to The C# project and find this code:
serialPort1.PortName = " ";
in the blank quotes change it to whatever your serial port is.
then you're going to have to go to the design screen and click the serial port at the bottom left of the screen. Go to the properties section and change the PortName to the same thing you did as the code. in my case it is COM4.
Step 8: Test Your Program


Upload your sketch to the arduino, and test it with the serial monitor. Type a capitol A for on and a lowercase a for off. then go to the C# program and click the start debugging button. its the play button on the top tool bar. (or click the button f5) and click the on button, the led should go on. click the off button and the led should go off. Voila! you just made a program that talks to an arduino!
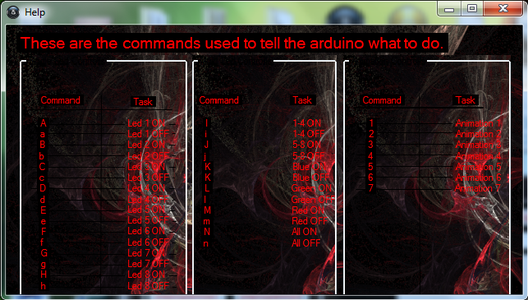
Now you can add more leds and more functions! have fun!! below i have attached pics of my controller! have fun playing with this! i will attach the code and what not below for the whole project.
Participated in the
LED Contest


