

Introduction: Cool Cool String Art

First, you need to have everything you need. Choose the color of spray paint you need. You need a board that is long enough for the word you want and make sure it's not too long. You need a hammer and a decent amount of nails, depending on how long the word is. You also need a lot of strong string in whatever color you choose.
Step 1: Paint

When you are done with painting and it is done drying. You're ready to start the third step!
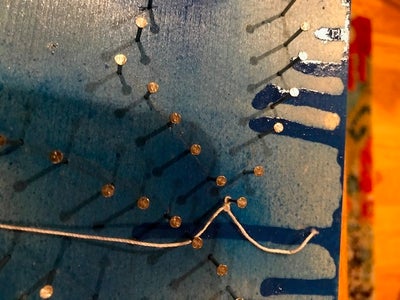
Step 2: Nails!

The nails should have enough space for the string. Leave at least 3/4 of an inch for the string.
Step 3: Done With Nails

When you are done with the nails and they have enough room for weaving, you need to get your string.
Step 4: First Step for Weaving
You need to tie the string at the edge where you want to start. Starting at corners are a little easier.
Step 5: Starting Weaving

Before you start going at it with the weaving, you need to have an outline for the string so it keeps its shape.
Step 6: Technique
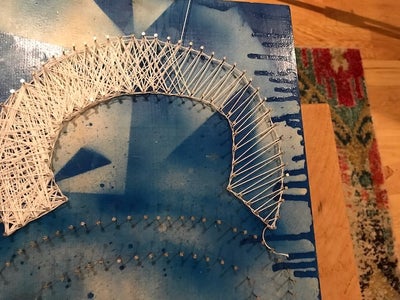
You don't really need to be neat with the weaving. When it looks more like it's overlapping it look Cool Cool.
Step 7: First One Done
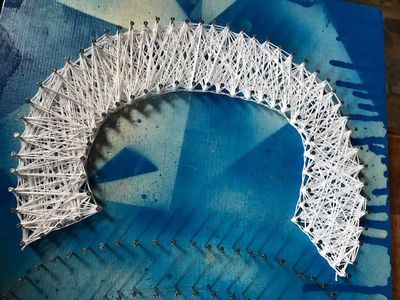
Your letters should look like they are full, but you can still see a little bit of blue through the string.
Step 8: Done With First Color

When you are done with the first color you are ready to start with the outline of the letters.
Step 9: Outline

The outline is just like how you started the weaving. It should look like it is bolding the letters and it stand out.
Step 10: Finished!!!

Congratulations!!! You are done with your string art.


