

Introduction: Corner Lamp


A light where it's most needed, in the dark corners of your room. It seems like no matter how many lights I turn on the corners always seem so dark.
After a little homework the only corner lighting solution I found was this $900 lamp by Peter Bristol that was made for Established & Sons, a designer furniture company. While his light is stunning, the price tag was not. A little more digging revealed a DIY attempt, but it's incomplete and doesn't have instructions. Taking matters into my own hands, I decided to make my own using off the shelf components.

This lamp is made up of 3 basic components: a plywood triangular frame, an inexpensive lamp socket and cord, and a piece of clear acrylic. This lamp wasn't hard to make, but did take a little figuring out. Though it's entirely possible to make with handheld power tools, this project is much easier with a table saw.
Ready? Let's make!
Step 1: Sketch Out Triangle


To start an equilateral triangle was drawn on a ½" piece of plywood. To get the angle right I used a digital angle finder, but any protractor would also work. The triangle size needs to be large enough to create a cavity when installed that will fit a light socket and bulb, I found that with each triangle side measuring 24" gave me a good fit.
Once the equilateral triangle was drawn I created a concentric triangle with parallel sides inside the first triangle, offset ¾".
Step 2: Cut Out on Table Saw


Using the outer triangle lines as a guide, the triangle was cut out of the plywood. You can use a table saw for this, or you can use any other tool that is capable of making straight cuts. If you're new to woodworking and want to learn all about how to make straight cuts without a table saw, I have a class that can teach you all about woodworking without fancy power tools.

Ounce the triangle shape was cut out the table saw blade was angled to make a 45° bevel cut. Using a sled I lined up the edges of the triangle with the cut line in the table saw sled, clamped down the wood, and cut a bevel into each side of the triangle.
Step 3: Drill Starter Holes


Once the outside shape has been cut we can start to remove the inside section of the triangle.
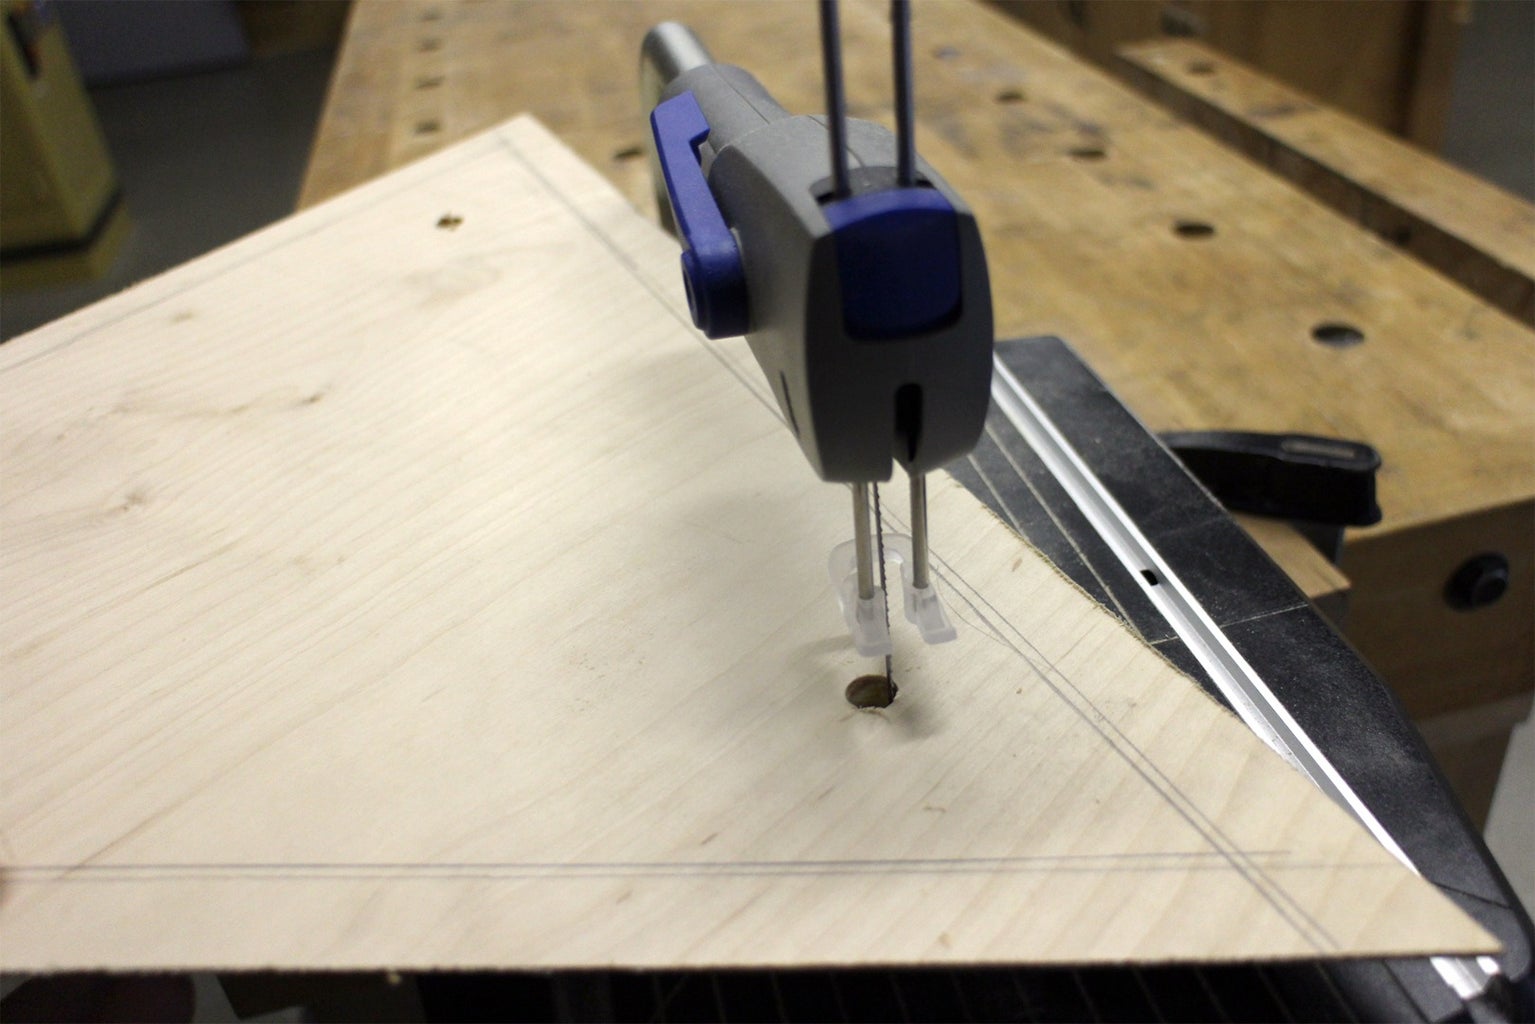
Using a large diameter drill bit I drilled a few openings at near each corner of the triangle interior, these openings will allow the blade of the cutting tool room to maneuver between straight sections of cuts. Any cutting tool can complete the task of removing the interior of the wood triangle, I used a scroll saw but a handheld jigsaw would work just as well.

Use one of the drilled openings to start your cutting. Follow as close to the pencil line as you can get, and pulling away at the corners to meet up with the next drilled opening.
Step 4: Clean Up Interior Corners


With a little cutting the bulk of the interior wood can be removed in one large piece. This will allow you to maneuver the blade into the corners and nibble away any last pieces inside the pencil marks.
Step 5: By Hand

Of course, power tools can't solve everything. For any really precise areas you can use a thin Japanese saw and remove the wood corners by hand, making sure to clamp your frame down securely.
Step 6: Drill Mounting Holes

To mount the triangle frame on the wall we'll need to make some mounting holes. Since the triangle frame is very light it won't require much in the way of fasteners to hold it to the wall.
I found some long wood screws and selected a drill bit to match the diameter of the screws. The frame was laid flat on the table with the beveled side facing down, the frame was tilted up onto one of the sides until the bevel was flat against the table. The frame was gently clamped in this position which allowed clear access to the inside edge, which is where the mounting holes are to be drilled.

A hole was drilled about midway along the triangle side, perpendicular from the inside frame edge, though the bevel on the underside. After, the frame was unclamped, rotated, and the same process repeated on the remaining two sides. A countersink drill bit was used to allow the screw heads to sit flush with the frame when installed.
Step 7: Clear Acrylic


To cover the light and part of the frame a piece of clear acrylic was used. The acrylic was cut to sit on top the face of the frame, so needed to be about ½" larger on all sides than the interior triangle opening.

Most clear acrylic will have a protective film to prevent the acrylic surface from getting scratched, for our next step we'll need to remove all protective film.
Step 8: Sand Acrylic


To diffuse the light we'll need to make the clear acrylic frosted. Using a orbital sander with a 120 grit sanding pad I evenly sanded both sides of the clear acrylic, creating a soft diffuse surface.

To clean things up a bit I went over both surfaces again with a 180 grit sanding pad, which evened out the frosting and gave a clean look without any large sanding scratches.
Step 9: Drill Magnet Divots


To hold the frosted acrylic to the frame I used small but mighty 3/16" x 1/16" neodymium magnets. I first placed the frosted acrylic on the triangle frame face and centered the acrylic, making a small mark at the corners and along the side of the acrylic.
Using a drill bit that was slightly larger than the diameter of the magnet I carefully drilled partway through the acrylic at the marked corners. By not drilling completely through the acrylic there's a smooth undamaged surface on the other side.

The neodymium magnets were glued in each divot with a small dab of strong 2-part epoxy.
Step 10: Metal Attchment Points


To give the magnets something to grab onto I placed metal machine screws with flat tops into the wood frame.
To do this I centered the acrylic sheet with the glued magnets back on top the flat face of the frame and marked where the magnets fell on the frame. Since I wanted just the machine screws flush with the face of the frame I drilled a smaller opening for the threaded portion of the screw and a reamed a shallow opening for the head of the screw.

The frame is delicate, so I hand tightened the screws in each opening until the heads were flush with the face of the triangle frame.
Step 11:


Before the frame can be mounted on the wall we need to make a cavity in the back of the frame to allow for the power cord. I used a cloth covered lamp cord for this project, these can also be found inexpensively at your local Swedish furniture store.
I sketched where I wanted the cord to exit my lamp frame with a pencil, then carefully cut a cavity with a rotary tool with a cutting bit.

I checked often to make I was removing enough material to allow the entirety of the cord diameter to fit inside the cavity, this was somewhat tricky because the cavity needed to be angled at the same angle as the bevel cut earlier. Luckily it wasn't too hard, and the rotary tool made quick work of it. After, I sanded the cavity smooth so the cloth wrapped cord wouldn't get snagged.
Step 12: Position Frame and Lamp


With the bevels cut on each side, the frame will only fit in one position. Place the light cord and socket against the wall and then place the triangle frame over, feeding the cord through the cavity cut into the frame. Position the frame so all sides are snugly against the wall.
Step 13: Mount Frame + Lamp Socket

With the frame positioned screws can be sunk through the drilled openings from inside the frame and into the wall. This frame is very light, so does't require much to keep it fastened to the wall, and certainly won't need drywall anchors.
The lamp socket can also be attached to the wall, taking the weight of the cord from off the triangle frame and allowing the wall to hold the lamp separately. Since the socket is hidden behind a frosted acrylic cover, the mounting doesn't need to be anything special. The socket I used had a threaded mounting ring with a few openings which I used to feed a long screw through and attach to the wall.
The critical part here is that the lamp is positioned high enough as to not break the plane of the triangle frame face, which would interfere with the acrylic cover and prevent the magnets from grabbing onto the frame, but to also make sure the lamp is far enough away from the wall to allow air circulation.
Since the lamp bulb is so close to the wall, an LED bulb is used as they don't produce heat the same way incandescent bulbs do.
Step 14: Add Frosted Acrylic and Enjoy!


With the frame and socket installed the frosted acrylic faceplate can be placed on top, firmly held in place by magnets. Plug it in and your darkest corners will be beautifully illuminated!
I made two of these corner lamps for my apartment, one with a red cord and another with a white. I thought the white cord would hide better on the walls, but I actually prefer the way the red cord stands out.
Have you made your own corner lamp? I want to see it!
Happy making :)

Participated in the
Lamps and Lighting Contest 2016

Participated in the
Wood Contest 2016


