

Introduction: Counter for Local Chocolate Store


Hello everyone!
This time I bring a sample of what we did with my brother (user @ESTEMARITO of instructables)
We made a bar for the local chocolate shop my mom.show you in simple steps as did the structure and details to make it a fine product.
mission:
To build a long-lasting bar, make it look nice and let mom happy! and of course, win some chocolate!
So, enjoy this tutorial we prepare today!
Step 1: The Project

1. the project
We measure the local to see the location of the bar.
Store measured 3.60 meters wide and 7 meters long
check the correct measures and calculate the space for you and the person serving customers.
We conclude that the bar would have 4.10 meters long and 1.60 meters wide. being 0.75 cm to scroll inside of the bar and 0.60 bar.
Step 2: Let's Begin With the Structure!


we've continued with the structure
well! already have specific ideas. then we begin to measure, cut and assemble aluminum uprights.
cut with shears and drilled aluminum plates with self-drilling screws.
assemble the parts according to the structure of our plane did.
measures were perfect. so we continue with our project!
Step 3: We've Continued With the Structure


we've continued with the structure
finished setting the skeleton structure and finish.
reviewed to sign all is well and adjust some parts that were a little loose.
Finally we turned the structure to ensure low so it does not move.
this being very firm!
Step 4: Now the Tricky Part!


Now the tricky part!
Buy wood veneered MDF, with measures of the plane and went perfectly.
drilled first and then put the screws to secure each wood stud.
when we finished with the first placed a wooden aluminum H for the board is not seen between the two woods and is also nice.
finish this side of the bar.
at the bottom you will get a guard wood painted black.
Step 5: The Other Side!


The other side!
repeat the procedure on the first side with the woods we bought but we had to do it in 2 parts.
because they do not exceed 2.75 cuts. too bad.
on the edge of the wood was going to be ugly bare.
so we put an edge that comes on a roll and we apply heat. am very beautiful!
sorry I have no photos
Step 6: Almost Ready!


Almost ready!
placed above our table structure. the look with screws and did get a little more into the wood.
we put putty to fill the holes we expect it to dry and gave it 2 coats of oil to seal.
then prepare a mixture of varnish with walnut ink color.
and had 2 hands with soft brush for a finer finish.
Step 7: That's All!


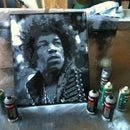
That's all friends, I hope you have as much as we enjoyed and I hope this serves to give ideas for all Instructables!
these pictures were at the opening and really is working very well!
After 15 years working in our home mom can have your chocolate shop and alfajores! and we are happy to have helped in the Bar, painting and graphic design, web design and other stuff!
Thanks for the ideas and plans. @Estemarito
Sorry for English!


