

Introduction: Craptastic Anti-theft Radio


Imagine you're a thief, prowling a parking lot looking for an aftermarket radio to smash and grab. You pass by my little Civic and see only a crappy stock radio (without even a tape player) and keep walking. Not realizing it was only a fake cover over my sweet JVC receiver.
This instructable shows how it's done.
Step 1: The Stock Look


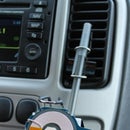
Here you can see how the radio cover looks when placed over the new flat screen JVC radio. (It's actually a few years old now - that's why its scratched a bit).
Step 2: Remove Stock Radio and Decapitate Face

Remove factory radio from car, remove face from main body.
Step 3: Remove Electronics

You won't need anything behind the buttons so remove the display/keypad and recycle appropriately.
Step 4: Remove Light Pipe

There was a bit of clear plastic to spread and illuminate the various buttons. Remove and discard. Save all
Step 5: Epoxy Buttons, Knobs

Use epoxy around the edges of all buttons and carefully glue them back in place. The volume knob needed a washer to hold it in place.
Step 6: Paint an "off" Display

I mixed metalic acrylic paint to a gray/greenish hue to simulate what the display would look when turned off. Paint the "display" from the
Step 7: Nibble Edges

Using nibbler, pliers, and other tools of mass destruction remove the side and bottom edges (but not the top edge). With a Dremel or bench sander carefully sand the back plastic as flat as possible.
I accidentally sanded too deep and scratched the display a bit. Just one more 'defect' to make the radio less desirable ;)
Step 8: Paint and Finish

I placed a bit of foam around the edge so there won't be a visible gap when placed over the new radio and to prevent the screen from getting scratched.

Runner Up in the
Glovebox Gadget Challenge


