

Introduction: Creme Brulee + Laser Cutter = ???


It seemed like such a simple idea - laser etch a cool design on creme brulee for Valentine's day dessert. First, we needed to bake the custard at home then off to techshop to use the lasers.
You'll need:
6 large egg yolks (I only had medium eggs and the internet told me 6 yolks is 105 grams, so I used 7 medium egg yolks)
1 quart of cream
1 cup of sugar
a vanilla bean
a pinch of salt
a torch
and a laser cutter
Let's get started
Step 1: Make the Custard


Gather the ingredients. Preheat your oven to 325*F. Split the vanilla bean lengthwise, put it along with the cream, half a cup of sugar, and a pinch of salt in a sauce pan and bring it up to a simmer. Let it steep for 15 minutes then temper the egg yolks in (whisk the yolks adding a little of the hot liquid at a time so you slowly bring the yolks up to temperature without ending up with scrambled eggs).
Pour the custard into ramekins, then place the ramekins in a baking dish and add enough water to the baking dish until it's the same depth as your custard. Bake for about 25 minutes, until the custard is just set. Use a metal spatula to retrieve the ramekins and put them on a wire rack to cool. Wrap them in plastic wrap and stick them in the fridge overnight.
Step 2: Go Play With Lasers


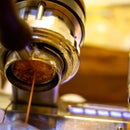
Having absolutely no idea what would work or wouldn't work I talked the techshop staff into helping me. We tried etching at a variety of laser settings both with raw sugar sprinkled on top and torching the sugar topping before putting it in the laser cutter. The closest we managed to get to success was by etching the raw sugar and being left with a faint pattern in the top (the robot in the 5th picture). With the 90 watt trotec laser set to 90% power we were able to melt the sugar but it ran all over the place and did't have any visible detail. With the 60 watt epilog laser set to 20% power we were still able to burn through the cooked sugar leaving a faint image behind.
Presumably it would be possible to torch each creme brulee before rastering a small design but the lasered part wouldn't end up crispy which sort of defeats the purpose of making creme brulee in the first place.
Fortunately all the failures tasted delicious, off to try plan B...
Step 3: Try a Stencil


Since writing directly on the sugar with the laser was a bust the next plan was to cut out a stencil with the laser and torch the sugar through the stencil.
With an even simpler design this might have worked. As it turns out, the flame is perfectly happy to sneak past the indent at the top of the heart so I was left with a fancy valentines day triangle... not exactly what I had in mind. Plan C?
Step 4: Stencil in Reverse?


First lightly crisp the sugar, then stick the heart shape on top, then torch the whole mess, trying (unsuccessfully) not to turn your stencil into a miniature campfire.
Use a small offset spatula or a knife to pry up the stencil while you keep the torch on the edges to prevent it from being glued in place.
Decide that the caramelized pattern isn't clear enough so grab original stencil and some powdered sugar to cover your tracks. Slice up a strawberry and call it a success. Aside from the slightly second-hand looking stencils...
Anyone have any bright ideas on how I might make this work? My other brilliant idea was to cut out a heart using a waterjet, weld the heart to a scrap of metal as a handle, heat the heart with a torch and use it to brand the creme brulee... Maybe next year.

Participated in the
Valentine's Day Contest


