

Introduction: Braid Your Hair Without Looking


Let's work out those arms! Once you've mastered the basics of braids with a mirror, it's time to start braiding at the back of your head. This Instructable will strengthen your coordination and spatial relationship skills needed to create ornate braided updos. Try to do this without the help of a mirror, but if you need to cheat, I won't tell!


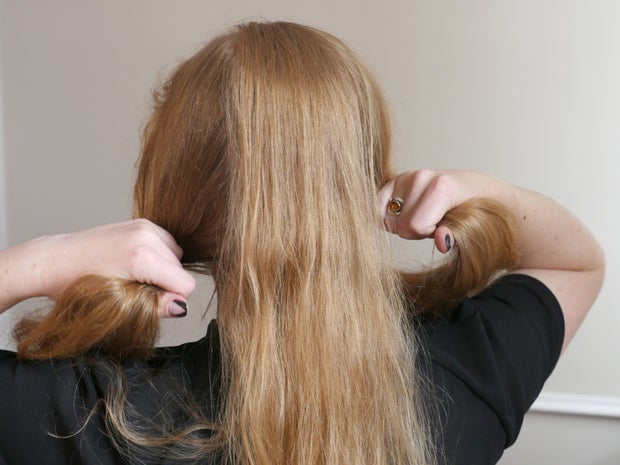
Smooth the top half of your hair back and up into a ponytail and secure it with a small elastic, leaving the rest of your hair down. It will be easier to focus on what your hands are doing if you're not battling to keep your hair in one place! If your hair is short and your resulting ponytail is too short to braid, try two pigtails instead, or forego the elastic altogether.
This Instructable is part of my beginner braids series. If you like this lesson, try the rest!
- Hair Braiding for Absolute Beginners
- Easy Hairstyle with Two Small Braids
- Braid Your Hair Without Looking (this lesson)
- French Braid Basics
- Dutch Pigtail Braids
- Crown Braid
- Waterfall Braid
- Fishtail Braids
- Stacked Braids
- Rope Twist Hairstyle
To keep up with what I'm working on, follow me on YouTube, Instagram, Twitter, Pinterest, and subscribe to my newsletter.
Supplies
To get started learning to braid, you really just need some hair, a mirror, and dexterity in both hands. Everything else here just enhances your results!
- Brush
- Comb
- Hair elastics
- Bobby pins
- Duck bill clips
- Dry shampoo (or make your own)
- Hairspray
- Styling paste
- Conditioning oil
As an Amazon Associate I earn from qualifying purchases you make using my affiliate links.
Step 1: Braid Three Sections


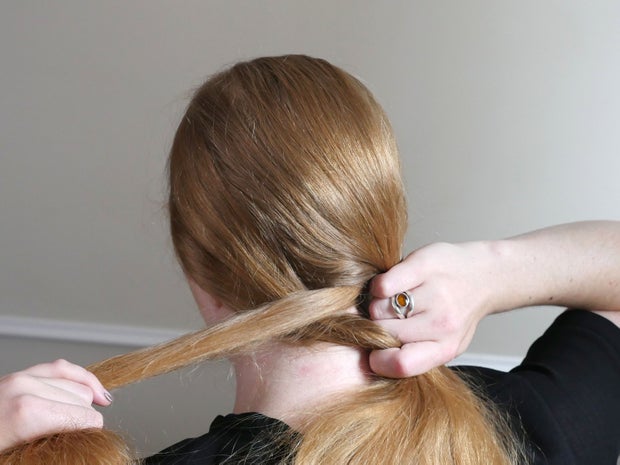
Divide your ponytail into three sections. Smooth your fingers through each one then cross the rightmost section over the center one, then cross the left section over the center one, and so on as you have already learned.


Be careful not to catch any of the hair outside your ponytail as you braid. You can put it in a temporary ponytail or sweep it over your shoulder if it's getting in your way.

Step 2: Repeat Until Complete, & Practice


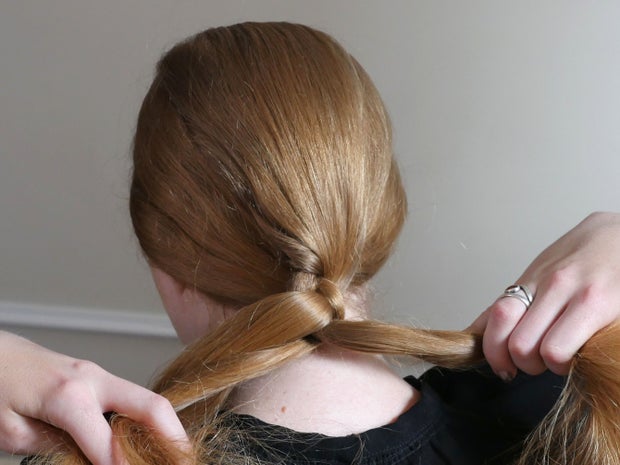
If you're not used to braiding your hair, your arms may become very tired very quickly. It's ok to take a break! You can let go of one section, so long as you're holding the other two. This way you can rest one arm at a time. The more you braid, the stronger your arms will become!
Continue braiding until you reach the end of your ponytail. Pull it away from your head to double check you didn't pick up any hairs you didn't mean to (you can gently pull them free now if you discover some).

Secure the end of the braid with a small elastic.
 Practice braiding your hair this way, without a mirror, until it becomes second nature! The stronger you make your basic braiding skills, the easier it will be to absorb and recreate more complex techniques.

Step 3: Crossing Over Vs. Crossing Under

All braids involve interleaving sections of hair, and up until now you have learned to cross your sections over one another to the middle position (as shown on the left in the photo above). This lesson introduces the technique for crossing strands under one another to create an "inside out" braid (as shown on the right above). This technique is used to create Dutch braids like my other tutorials for pigtails and crown braids.
Additionally, the lines of these two styles are slightly different, and if your hair is highlighted or otherwise multicolored, the results could be quite unique. Personally, I like the reduction of frizz at the base of the neck when using an inside out braid.
Step 4: Begin a Standard Braid With All Your Hair

Up until now, you've only braided a portion of your hair, or had the "training wheels" of an elastic helping you out. This time try a standard braid with all of your hair (or most if it's short). Gently brush out any tangles and gather it to the back, then divide into three sections with your fingers or a comb.


Cross the right section over the center section, then cross the left section over the center.
Step 5: Continue Braiding


Cross the right over the center again, then the left over the center.

Repeat for the length of your hair.
Step 6: Finished Standard Braid

If your hair is long, it may be more comfortable to switch the braid to the front of your shoulder after braiding a while. It's easier to see the braid this way and gives your shoulders a rest. However when finishing a braid this way, the orientation switches such that your hands will now be crossing sections what seems to be under the center, rather than over it.

When you compare the two photos in this step, do you see how the zigzag sections seem to be pointing up in one and down in the other? This is the difference in appearance between the front and back of the braid. Tie off your braid with a small elastic, or shake it out to try the next one.
Step 7: Begin a Crossed Under Braid


Gently brush out your hair and divide it into three sections once more.

This time take the right section and cross it under the center section, then likewise cross the left section under the center section.
Step 8: Continue Braiding


Again cross the right section under the center, then the left section under the center.


Repeat these steps along the length of the braid.
Step 9: A Note About Unwanted Twisting

As with before, it may be more comfortable to finish this braid over the front of your shoulder. In the previous braid in this lesson, you learned that this will change the orientation of your crosses, as your hands now come at the braid from the opposite side. If you instead twist the braid so as to keep braiding "under" (rather than flipping the braid over), your results may be a twist midway down the braid, as shown. While you may like this effect and use it on purpose in certain styles, you're equally likely to want to avoid any twists like this! To prevent mid-braid twists in this context, make sure the braid remains straight and flat throughout, flipping it over if necessary.

Tie off your "inside out" braid with a small elastic.
This Instructable is part of my beginner braids series. If you liked this lesson, try the rest!


