

Introduction: Curved Laser Bent Wood


This instructable will cover my own experiments with laser kerf bent wood, also known as lattice hinges, and how I tried to create it parametrically to bend along a curved surface.
There's a lot of good information about lattice hinges here http://www.deferredprocrastination.co.uk/blog/cate... which explains the concept and actual physics behind it.
I'm no engineer, so all of what I've found is through trial and error.
Step 1: Patterns


I tried a lot of different patterns to try to achieve different results, most of which were failed attempts at making a doubly curved surface. Some turned out to be more flexible than I expected. Some were much less than expected.
I'll explain each pattern in the following steps.
I've attached the files for the pattern samples in the photo above. If your browser tries to open the file and you get a blank page, try right clicking the link and choose "save link as". It seems people are having issues downloading the files.

Step 2: Straight Lattice


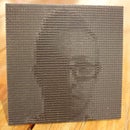
This is the most common lattice hinge and the most reliable. Lattice hinges rely on torsion of the material to bend and it's easy to see in this photo. The radius of the bend depends on the length of the cuts, the distance between them and the thickness of the material.
Step 3: Wave Lattice

This is one that turned out to be more flexible than expected. It was an attempt to bend in two directions, which it does not. It does however bend in one direction pretty well for such short spring members.
Step 4: Cross Lattice


This is what I've found to be the most flexible pattern so far. In thinner materials, it's even able to bend on a diagonal. The last two photos are of a variation I tried that was not as successful, but showed potential in bending two directions.
Step 5: Fillet Lattice


The idea behind this pattern was do distribute the stress of the torsion more evenly. Sharp corners tend to be breaking points when a material is under stress. Rounding the corners distributes that stress a little more evenly along the spring.
In the last image, I was experimenting with varying the density of the pattern to bend in a gradual curve.
Step 6: Beehive Lattice


This is one that I was sure would be my answer to a doubly curved surface, but it turned out to be the least flexible of all. The answer is pretty clear, the spring members are very short.
Step 7: Bastian Lattice

This pattern was inspired by Andreas Bastian's work on Mesostructured Materials http://www.andreasbastian.com/blog/3d-printed-meso... which is exactly what I've been trying to do with laser cutters.
It is not yet very flexible, but shows potential. The pattern in the photo is accidentally flipped and creates a rigid pattern that cracks in very satisfying directions. The pattern in the sample files is correct and less cracky.
Step 8: Bending Along a Curve


I have come up with two ways to create curved bends. The first is manually warping a pattern with illustrator and photoshop. The second is parametrically generating the pattern on a surface.
First I'll cover the photoshop technique, then I'll get into the more complex parametric design with grasshopper.
Step 9: Warping With Photoshop


Begin with the 2D outline of the surface you are wanting to bend. You get this by flattening or unrolling a developable surface (this can be done in most design software like Inventor etc.). For more information about developable surfaces you can read this http://en.wikipedia.org/wiki/Developable_surface . It is important to understand the concept when designing for fabrication with sheet materials.
With the outline in illustrator, copy and paste it into a new photoshop document. Choose to paste as a path. Next brush a stoke over the path so it's visible by clicking the solid ring at the bottom of the path menu.
Next copy and paste your cuts in the same way. Ideally you would measure the length of the surface and the radius of the bend to determine the number of springs in the pattern before you warp them. If you're like me, you take an educated guess and try it.
While you cut paths are selected, transform them by pressing ctrl+t. Then right click and select warp. You will have a grid with four points and their control points.
Warping will take some practice. It helps to have a good understand of how to work with bezier curves when using illustrator and photoshop. If you have a four pointed surface, match the warp points to the corners of the surface, then align the control points so that they are tangent to the edge they are following. I didn't do a very good job of this in the photos.
Once you are satisfied with your warp, hit enter to finish it. Now you can export your paths back into illustrator for laser cutting.
Step 10: Parametric Kerf Bending


I have been using paneling tools for grasshopper to generate patterns on curved surfaces. The paneling tools "morph 2D" tool allows you to morph a 2D curve onto a 3D surface. It does this by dividing a surface by its UV domain to create a grid. Then it stretches a pattern into the frames created by the grid. In this case I am morphing it onto a flattened 2D surface, but it seems that the pattern doesn't change when it is flattened . I assume the surface domain is equal on the flattened surface (please correct me if I'm wrong). The pattern in the pictures is created by a grid with 1 division in the U direction and X number of divisions in the V direction. This process generally works well for simple ribbon-like surfaces, but is not an accurate way to generate the correct bend for every surface.
The photos above are proof of concepts used for my instructable the Bloom Lamp and another lamp that is still a work in progress.
The next step will be to algorithmically calculate the density of the pattern based on the curvature of the surface and direction of the bend. One idea would be to find the points with the most curvature on the surface and use those points as grid attractors.
If you have ideas, please pick up where I've left off and remember to share it with the rest of us.
Enjoy your curvy wood!


