

Introduction: Custom Gamecube Controller

In this instructable, you'll see how to disassemble and paint a Gamecube controller to your personal taste.
Step 1: Dissasembly


Dissasembling your controller
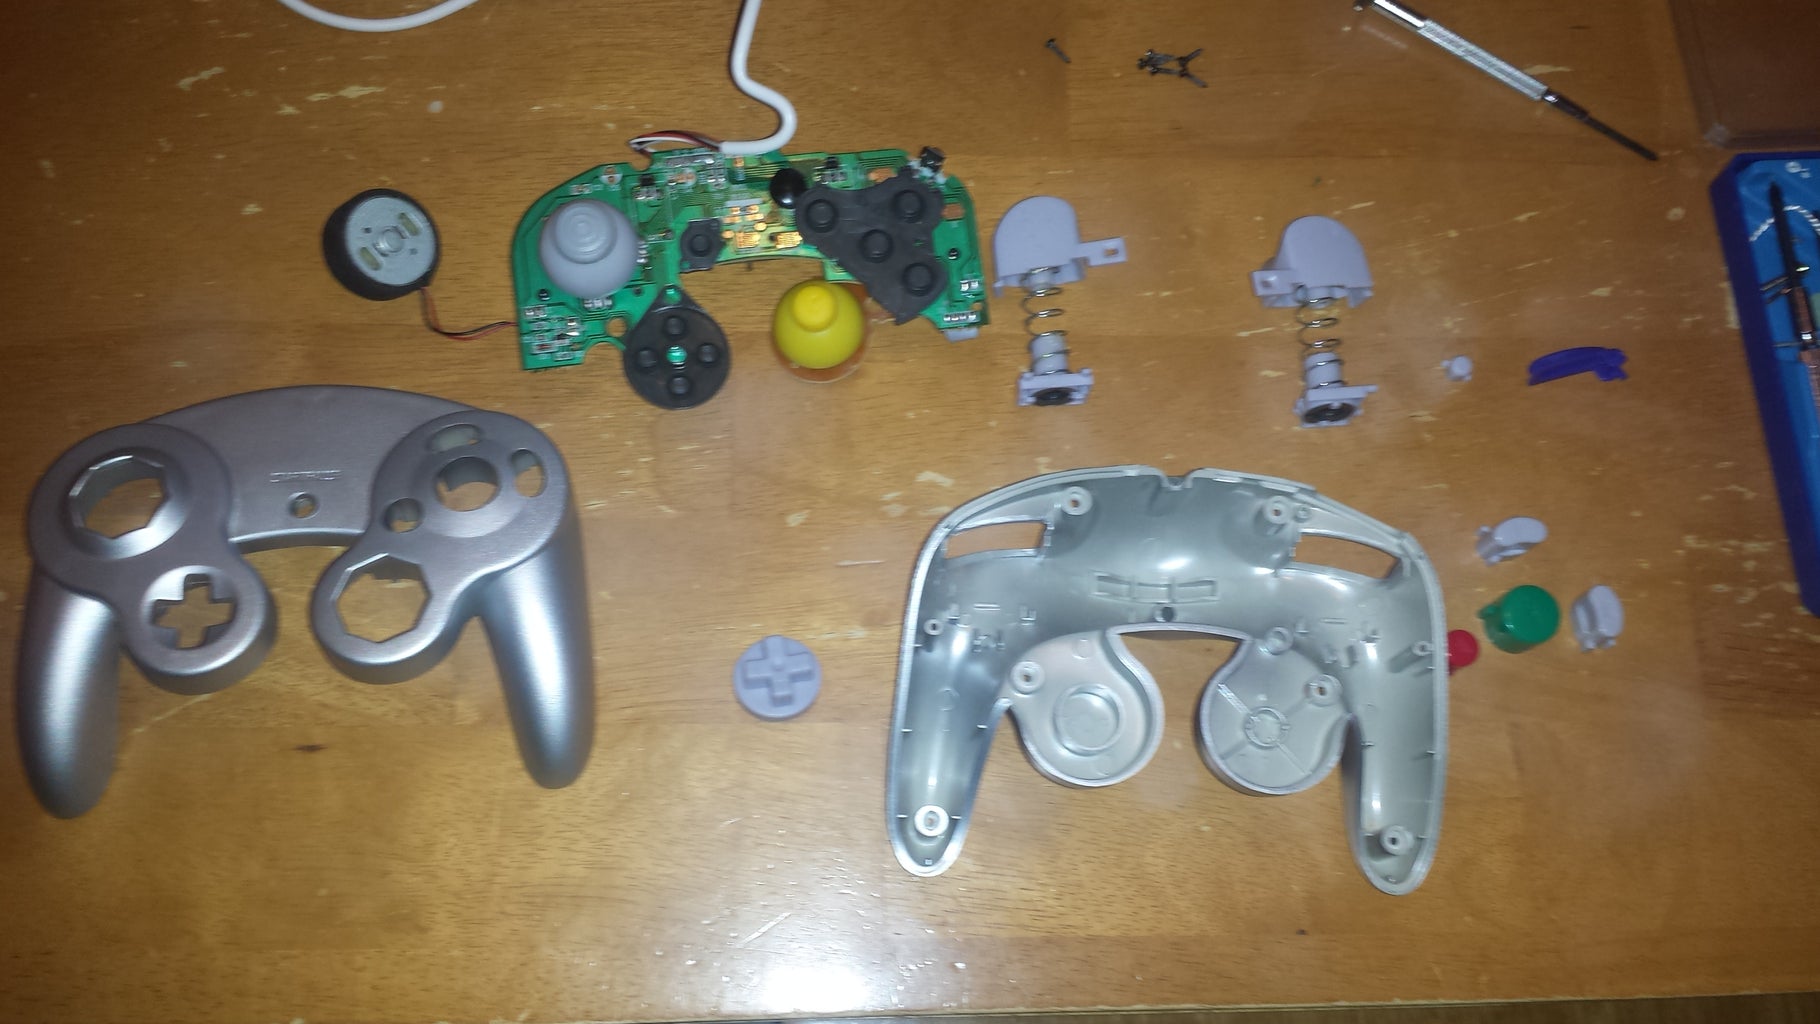
-Take out screws. (number of screws may vary depending on brand of controller. mine has six)
-Once all screws are taken out, seperate the controller into two pieces. Take out all internal parts and put them in a safe place until you're done. I used a ziploc bag because of the convenience.
Step 2: Prep

Of course, you're going to need paint to do this. I personally recommend Krylon. It sticks great to the controller without the need of sanding or a primer. you'll also need a clean place to work. I used a large cloth on the ground.
Step 3: Customizing Your Controller


In my case, I used white paint and flicked on red acrylic paint with a toothbrush. To start, spray a light coat from left to right, spraying from each side once, letting it dry in between coats. It took me about 3 coats before it was a good solid white. After the white paint was dry, I flicked red paint on with a toothbrush. after about 20 minutes, I sprayed a clear coat over the white, spraying in the same fashion. Once done, I left it to dry for 30 minutes.
If that's all you want to do, just let it dry for about an hour, then leave it in a cool dry place for a couple days to dry completely. i wanted to add a bit more texture, so i decided to add some fingerprints. I just held it in my hands, moving it around to lightly add them.
Step 4: Finishing


Once you're done, just replace the parts, screw it back together and enjoy your game!


