

Introduction: Cut Throat Razor


A couple of years back a neighbour of mine told me he had bought a cut-throat razor. At the time I was busy making knives so it sparked my interest. He explained that he had set himself up with a razor because he wanted to save money by doing things the old way. I asked to look at the razor and if he could tell me all he knew about it. He had out laid a bit for his set up - about $400 AUD - and the razor was quite nice. I marveled at its simplicity and beauty. I thought to myself I have to make one!
I joined a razor forum and asked a few questions but was met with basically "It's not an easy road and involves a fair bit of research". I didn't think it would be very hard to make one, so I came across a little arrogant in my response even though it was not my intent. "I don't think it would be that hard to grind one!". They knew a bit about razors, I did not...
I researched under the advice of forum members and then found a local guy close to me that makes the most beautiful hand crafted razors. Stu is his name from Boxer razors. You can see his work here. I asked if he would help me and graciously he said he would
Stu is a patient, kind man and took the time to explain many things to me to make my road an easy one. I dedicate this instructable to him because without him I would have had a second grade razor.
The video is a visual documentation of the process I went through to make the razor. I hope you enjoy.
Step 1: Designing a Razor


The design process of your razors' geometry is most important. Since the razor is such an age-old design there are many, many websites that hold the key to information regarding the subject.
Here are some:
Shave my face. A good read for those who have time
For this reason, I will briefly go over the most important things that helped me design a functional razor. If you have made a razor and have a suggestion, leave a comment. I am always fond of improving my instructables where there is a need.
The first picture shows the key components on a razor's body and will help to identify names when needed. (Images of razor profiles, razor components and razor points courtesy of theshaveden.com)
Profiles of razors: The second picture shows the shapes of various grinds applied to different razors. While they all look different, they do have something in common - the relationship of the spine-to-blade width. A basic rule of thumb is that the blade-to-spine ratio is 4:1. It can, however, be a bit less - say 3.7:1 . This will help in many ways, the first is that it prevents the blade from getting in the way when shaving, allowing all the pressure to be applied in the right place. Another common reason is that this helps in removing the hair and shaving cream away from the face. The third is that this will prevent you from grinding an edge that is too thin and having the edge crumbling away in your hands is not something you want. There are many others, but these are the basics.
Heel of blade to the pivot: Here you will need enough room to hold the razor, allowing your thumb to have movement.
Scale width at pivot: You want your razor design to be the same width at the pivot point as your scales. This will aid in many ways, but most importantly in holding the razor while stropping.
Tail: The tail of the razor needs to be designed in such a way that you have just enough room for a finger . My razor has what's called by some a "monkey tail" (longer tail). I liked the look of it but normally it's done when the razor is a heavy razor and is used to balance the razor. The monkey tail is not a necessary feature to the function of a razor.
Visually balanced: When I first started designing my razor, Stu suggested it's best that I hand draw the razor before digitising it. This helps to create a visually balanced razor that is appealing to the eye. The last picture shows my initial design.
The point: For a beginner, a round point is more user-friendly because it protects the user from nicks in the face while shaving. It's a better design in terms of safety. But the choice is yours in terms of how you want it to look. The picture above I took from a website and shows some of the different types of points razors can have.
Plunge cut at heel: This is something that was changed on my razor. Stu explained that because my plunge cut on my blade was all the way to the edge, it would impede on the way the razor was honed. We decided to scollop the finger hole far away enough to expose the edge so it did not rub on the hone. If this is confusing, I understand, have a look at my razor at the heel point and it will make more sense.
Step 2: Cutting a Perspex Prototype


Once your design is established, it's time to get out the old coping saw and cut a blank out of perspex. Having something to hold will let you know where to make changes and also give you a guide to follow. You can use a CNC machine or even a scroll saw for this step if you have one. It will make things a lot easier. To drill the pivot and scale pins, I used a cordless drill to drill some wires in place so I could open and close my razor.
Step 3: Choosing a Steel

The number 1 steel used by hobbyists for razor making is O1 tool steel. This is because it's very stable when heat treating, it holds a good edge and is fairly inexpensive. Most tool shops will have some but you can search the web for knife-making steels to make your job easier. Here are some links of places that would sell it. Be sure to work out your spine width to blade width before purchasing.
Jantz supply (Image courtesy of Jantzsupply)
I used a knife-making steel called CPM-S35VN. It is a stainless and a powder metallurgy steel and it is my favorite steel for knife making. I liked the fact it was a stainless and a steel not commonly used in razor making.
Step 4: Cutting Your Blank


For this step I used a marker to roughly draw out the shape on my piece of steel. Another idea is to lay your perspex shape on the steel and spray paint over it - this will leave your exact pattern.
For the purpose of visuals I am just using a piece of alloy here to explain.
I then used an angle grinder with a pferd brand cutting disc to rough cut it out. I cleaned it up using a sander and Dremel with Dremel sanding drums.
After sanding it to the right shape I used some dividers to work out my center line to grind to. Mark from both sides of steel. Make sure you mark this line deep as you will reference it a lot and you do not want to lose it. Stu uses an automatic punch to knock some dents along the line so I followed suit and I have to say it's a great idea.
You are best to leave a little bit more steel around the top of the spine and the end of the razor for grinding. I changed my design to a square tip instead of a round because I liked the look better.
Step 5: Grinding the Blade


First step is to flat-grind your razor from spine to close to the edge. Flat-grinding is how it sounds, flat from point-to -point. (Picture 3). Do not grind your edge to nothing here, leave yourself some room for hollowing out the blade and heat treating.
Hollow grinding is the process of grinding a concave surface of the blade. Note (picture 5) as it shows the flat grind being hollowed. Because I do not have a super hollow grinding tool, I used a machine that my father gave me for a birthday present. Its a washing machine motor connected to a stone wheel and it works great! Thanks dad for making me this. I first cleaned the wheel with a diamond wheel dresser (picture 7) and then sat the blade midway on the wheel and slowly ground into the cut. The wheel is quite large so there wasn't a worry about grinding through both sides. You can use soap (picture 8) to fill the pores of the stone wheel so metal doesn't clog it as fast. this also helps with the lubrication of the grinding. I concentrated on taking my time in grinding a neat scollop between the spine and edge. leave about half a millimetre (0.019 of an inch) on the edge for the heat treating otherwise the edge will melt or warp in the oven.
Step 6: Getting Your Razor Heat Treated

While you make your scales, your razor can be posted to a heat treating plant. If you're in America, I would suggest Paul bros.
Here in Australia I used Hills heat treat in Melbourne. They don't have a website that I know of but you can contact them here:
Address: 7 McLellan Street, Bayswater VIC 3153
Phone:(03) 9762 6233
Let's be honest. If you're like me, you want things done as best they can first go. A good friend once said "The heat treatment is the heart and soul of the blade". No point investing all the time to make a razor that does not hold its edge.
I am not familiar with how to heat treat powder metallurgy steels and don't have the setup to do so. If you have a heat treat oven and know your steels feel free to make a comment on the process you use.
(Image courtesy of wiki.)
Step 7: Cutting Your Scales


Scale material and what to choose:
These days, there are many different materials that you can use. For example; carbon fibre, micarta, timber, perspex, plastic, metal etc. I would suggest a material that is slightly flexible because the scales will have a small amount of pressure placed on them. Modern makers are quite good at working with the new materials but for a first razor I chose to use timber.
When choosing a timber it's important to use something with a medium to tight grain cut from a slow growing tree. This is because the razor will be exposed to water and then dried. The tightest timber grains come from the desert. i.e. desert ironwood would be suitable. I used a timber called Conkerberry. It's a parasitic plant that feeds on the base of other plants and takes up to 200 years to grow a small branch about 2.5 inches around. My timber was collected sustainably from old flood plains where the tree had been uprooted with its host.
For this project you will need your coping saw again. Simply stick your pattern on the material you choose to use and transfer it. You can draw around the perspex or print and glue your pattern on. If you have some thin material you can cut two of these and glue them together with PVA glue for sanding. Lewis Razors has a good video which explains this process very well. Make sure you drill your pivot hole before sanding everything off, so you have a flat surface to drill on.
Hot tip: when sanding your final sand use wet and dry paper (600-1200 grit) combined with wd-40 to get a smooth waterproof finish.
Step 8: The Wedge


Once the scales are sanded and completed you can then begin making your wedge. Again I used a piece of desert wood here. This time Pink Gidgee, also sustainably cut from old dead trees.
In the video you will see how I cut my razor wedge to shape. It's important that this is cut or sanded symmetrically to provide equal pressure on each of your scales. The wedge is tapered so the top is slightly smaller than the width at the pivot. This helps open the scales so your razor rests on the top of the scales when closed. You can see me sanding-trying-resanding till the wedge holds the blade at the appropriate height. Stu pointed out that you do not want the blade to close to the underside of the scales because someone may cut themselves while handling it or your blade may be damaged by being knocked on something.
Step 9: Peening the Wedge


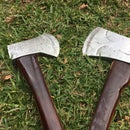
Peening is the process of working a metal's surface to improve its properties. For the razor in Laymans terms, I am just referring to knocking the head of the brass pins to mushroom them. You can see in the video I am using the wrong hammer for this job. As I was excited to give it a go I polished the end of a small claw hammer and started the tapping. The correct hammer is a peening hammer, it has a rounded face (Shown in the first picture)
Things you will need:
Peening hammer (light weight)
Brass rod
Small washers (optional)
Anvil (I used a small section of train track)
The process: I first sanded the end of a pin square so I had a flat surface to work with. I then wound it in a rise and began to tap the pin very very softly. I moved the hammer face around so that the metal is slowly pushed around. A peening hammer would make this job easy because the round face saves rotating the hammer. You would simply tap around the edge of the pin with a peening hammer.
Once you feel you have a nice even burr around the edge of the brass pin, the top looks nice and round you can slide the washers on (if you have them), then put the pin in one side of the razor. I used some small washers here donated by Stewart. They spread the load and look nice.
With the brass pins through, you want to make a mark on the opposite side that is a little less than the width of the pin. I scratched a mark with the tines of my vernier calipers. If you have washers, put them on before making this mark. Cut this off here and lay it with the pin you have just peened on your anvil. Begin to peen the side facing up. Once you have mushroomed this a bit, alternate between sides to make both sides an even, flattened circle. You can feel the scales pull up tight on the wedge - this is also an indicator or when to stop. Gluing the wedge isn't necessary but I did.
This process is the same for the pivot only with a few differences. Stewart's advice is to peen the pivot till the blade is tight, then stop and wriggle the blade back and fourth till it moves freely. This is called setting. Once the blade has been set, continue peening till the blade can hold its weight up by itself. I also used brass washers either side of the blade here to allow water to dry out of the pivot area and prevent wear on the timber. Also Stewart's advice. (See last picture)
Step 10: Honing Process


Sharpening a razor involves a lot of expensive stones. Stu was nice enough to show me how it was done on his hones. Here is a list in order of the hones used.
1st: Diamond impregnated plate. 325 grit extra course
2nd:1000 grit
3rd:4000 grit
4th:8000 grit
5th:13000 grit
6th: Chromimium oxide 60000 Grit =.5 micron semi paste.Here he did 5-10 laps on piece of balsa used as a strop
7th: To finish the process, do 50 laps each side of the razor on a leather strop. When you strop a razor, not much pressure is being applied. Keep in mind, if your strop is not wide enough, make sure you strop the full edge by moving the razor diagonally down the strop in and opposite upwards.
You will notice Stewart places electrical tape on the spine of the razor before starting to hone . This is a modern technique of preventing the spine of the razor being worn away on the hone and changing the angle.
Stu says " There is sharp or razor sharp and they are two different things" You want your razor to pop those hairs off and not be scratchy or uncomfortable.
Step 11: Time to Shave


To be honest, this made me quite nervous because I have never had or completed a full cutthroat razor shave before the above video was made. Knowing the edge is so sharp and one wrong move will sink that blade deep is a little disconcerting. Sure Stu had shown me the correct process, but it's a whole other science.
Enjoy learning how to shave with your new razor and be careful!
Special thanks:
Stu from Boxer razors for all his advice, time and care.
My girl for filming me.

Second Prize in the
Metal Contest


