

Introduction: DHT 11 Using Using Arduino


Hai,
In this instructable we will be making a DHT 11 using arduino and serial monitor. The DHT11 is a basic, ultra low-cost digital temperature and humidity sensor. It uses a capacitive humidity sensor and a thermistor to measure the surrounding air, and spits out a digital signal on the data pin (no analog input pins needed). Its fairly simple to use, but requires careful timing to grab data. These sensors are very popular for electronics hobbyists because there are very cheap but still providing great performance.
Step 1: Things Required


Arduino . (in this case I am using arduino uno r3)
DHT 11 sensor.
Couple of wires.
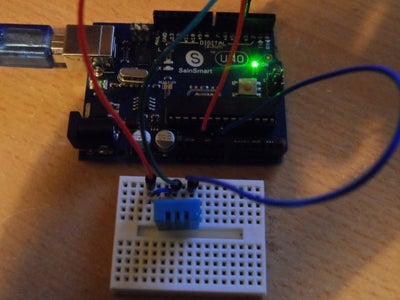
Step 2: Wiring Up !


Connect the DHT 11 to arduino by using this schematics. Make sure your are connecting to the right pins on DHT 11.
Step 3: Code.

#include
dht DHT;
// if you require to change the pin number, Edit the pin with your arduino pin.
#define DHT11_PIN 2
void setup() {
Serial.begin(9600);
Serial.println("Started Analysis"); }
void loop() { // READ DATA
int chk = DHT.read11(DHT11_PIN);
Serial.println(" Humidity " );
Serial.println(DHT.humidity, 1);
Serial.println(" Temparature ");
Serial.println(DHT.temperature, 1);
delay(2000); }
Step 4: Install Dht Library.
without installing dht library it wont work so download the zip file and;
* Go to arduino IDE
*Sketch
*Include library
*Add zip file
*select the zip file
Step 5: Conclusion.

If you had connected your Dht11 and arduino correctly, you will have readings shown in the image above.
I hope you all loved my instructable.


