

Introduction: DIY Camera Rig


I am an aspiring film-maker and photographer and have over the years experimented with many ways to shoot video. My experience is that anything professional photo/video is VERY expensive! That got me on the thought of making this rig myself. I found most of the parts easily and very cheap.
This is not so much a step by step guide to how i made the rig but rather an account of the parts i used and where you will be able to find them as well as the approximate pricing.
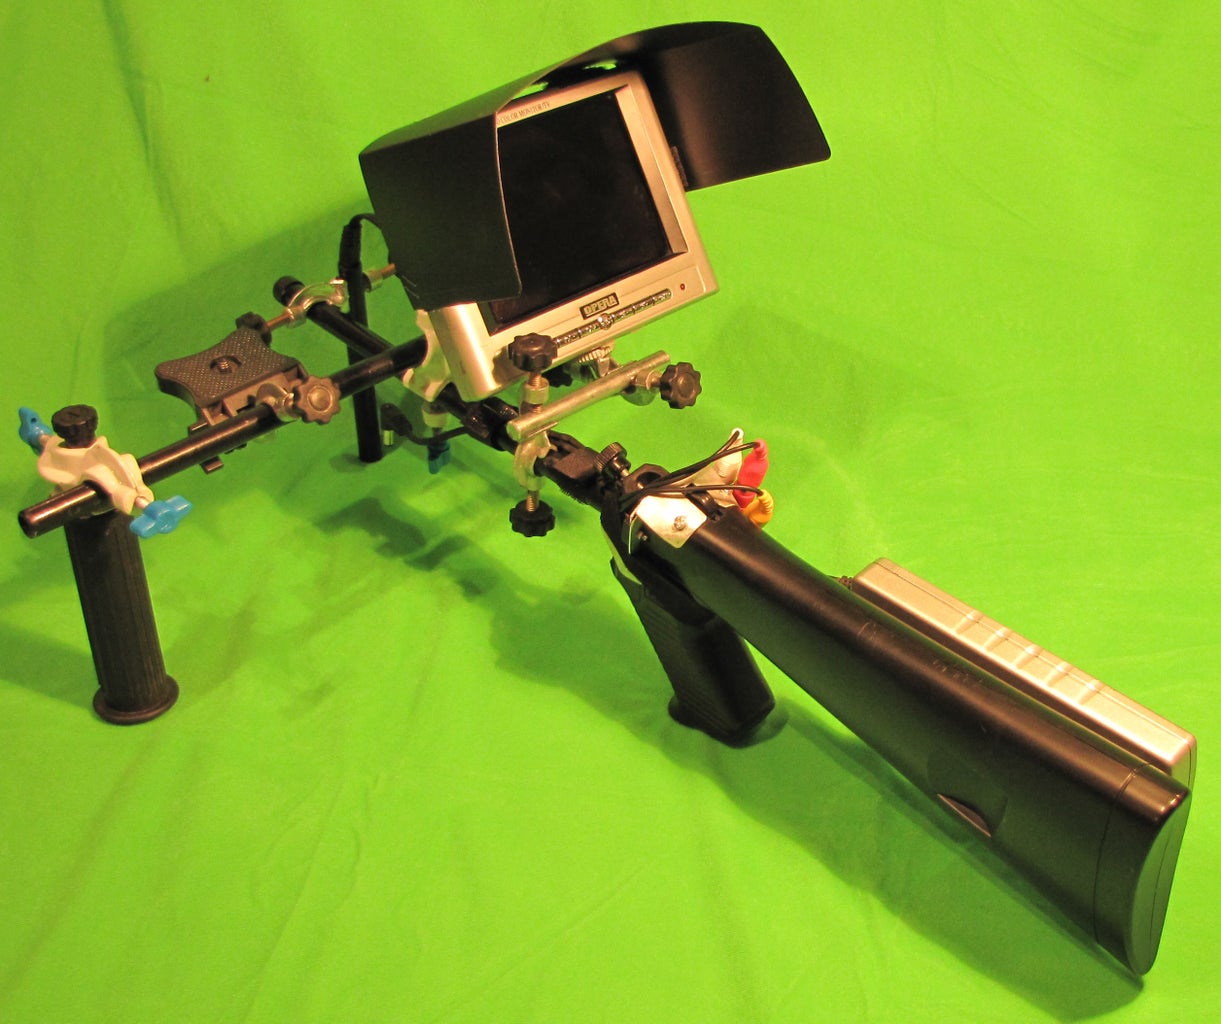
Here is the Rig i built-
Including video samples filmed with and without to compare stability.
Step 1: The Design


First of all it is very important to choose the correct design that fits your needs.
Designs vary from simple hand held, to advanced shoulder mount or dolly mounted camera rigs so be sure to pinpoint your need and field of use. Photo 1 below demonstrates some different camera rigs from Redrock-a professional camera rig manufacturer. Now these are all DSLR rigs, but may very well work with point and shoot or video cameras as well.
When i designed my rig i researched a lot of different designs and chose the one that fit my needs and the materials i had at hand the best.
Step 2: The Materials
Now that you have decided on your design you have to consider the materials.
In the video i have included a link to below, i have included a list of all the materials i used in my rig.
My DIY Camera Rig- http://www.youtube.com/watch?v=i_R0HC-uULw
Materials:
15mm(diameter) Rods-i used 12mm but the standard is 15. These can be simple aluminium rods from a hardware store or you can saw pieces off some compact clothes drying racks or old strollers.
Hand Grip(s)- I used one from an old bike, you can also get them off scooters.
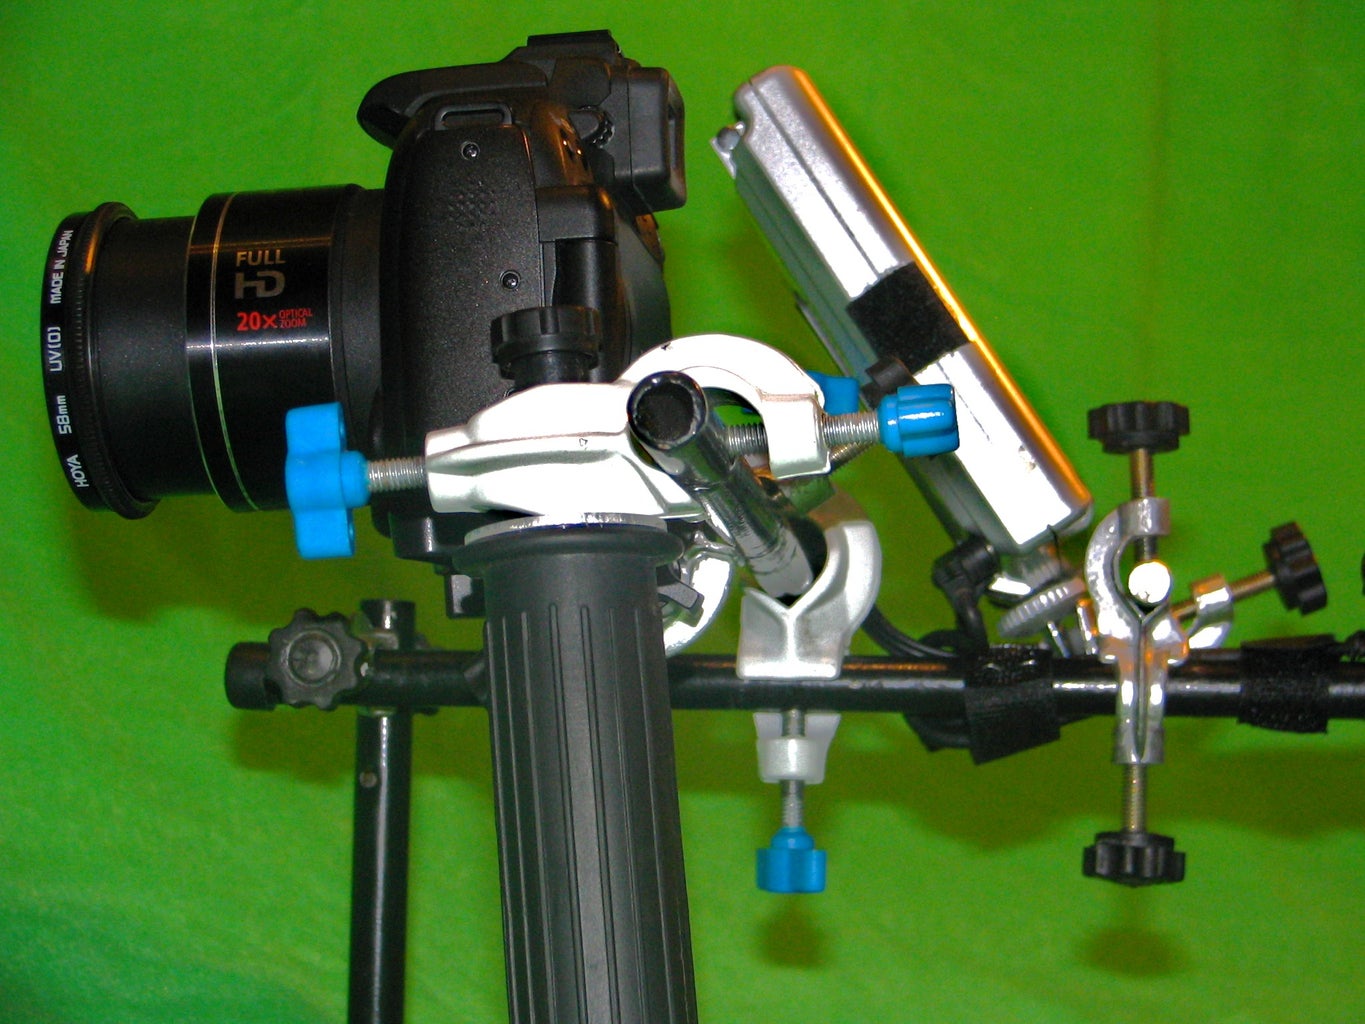
Camera Mounting plate- Mine was a Car TV mounting plate with a regular 8mm mounting nut. But you can buy them at a photo store or use an old tripod mounting plate.
Rod Clamps-These allow the rods to be clamped together. I got mine at a hardware store, have a look at the Video linked above to see what they look like.
These materials above are the basic materials needed to build a rig, I describe with more detail other additional materials i used that you might consider using yourself in the video i have linked.(My DIY Camera Rig)
Step 3: Assembling the Rig

This step is called 'Assembling' for a reason, when you have all the needed parts there is very little work to do. See embedded video for assembly.
You will have to cut your 15mm aluminium tubing to the right lengths and then clamp them together according to the rig design you have chosen.
To make the hand-grip module as i did you will need a short piece of PVC pipe cut to the length of the rubber/foam grip that fits comfortably inside. Glue the PVC pipe inside the grip
and then cut a piece of the aluminium rod to a few centimeters longer than the grip. Fit it inside the PVC/grip and fill the remaining space with Hot Glue and let it dry.
Depending on the type of camera mount plate you have you need to figure out a way to easily attach it to the rig mainframe. Mine had a small pivot bolt which connected it to the baseplate (of the Car TV stand) so i used a clamp to hold the bolt and the other end clamps on to the rig.
Step 4: Additional Add Ons

A camera rig can be very simple, allowing you to hold and control your camera better than just holding the camera in your hand. It helps to stabilize the camera as it has extra weight which slows your motion. The shoulder or back brace designs help with this too.
I decided to take the next step and add a small monitor (LCD) with an on-rig power supply so that i could hook it up to my camera which has a small LCD which is hard to see in bright daylight and when holding the camera out.
The LCD runs off 10 AA batteries in the silver case you can see in the photos below.
I also made a sun hood for the LCD so that it would be easier to use outdoors. It is attached to the LCD by Velcro strips so it can easily be removed or reattached.
Additionally the camera can be connected to a laptop via a long USB cable to utilize the external and rather much larger display of the laptop.
This, in a professional setting, would allow the director to view the video recording live as it takes place, without having to be right next to the camera rig operator.
Hope this instructable helped you. If you have any questions feel free to comment below or PM me.
Dan
Finalist in the
USB Contest


