

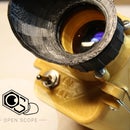
Introduction: DIY Cascade Night Vision Scope


What's the matter? Can't see in the dark? Flashlight won't work? NSA/FBI/ATF not noticing you? Pesky rodents and other pests invading your premises and getting the best of you? Never fear. I've found a great way to build affordable real night vision that works great. Actually, this thing is kickass, so if you're ready for a fun project that won't kill your bank account, then have a seat, get your snacks, and get ready to take some notes.
Basically, I've been interested in night vision for awhile. I also play airsoft (Like our page! https://www.facebook.com/Point3Airsoft), so having night vision is a highly coveted advantage at night games and is probably the dream of every Battlefield/Call of Duty playing airsofter to have working night vision. I've heard of the toys that use infrared light and cameras to see in the dark, I've seen the expensive Gen 1 units that require infrared illumination to see anything, and I've gawked and cursed at how expensive the Gen 2 and Gen 3 units are. However after doing some research about how night vision works, some sourcing for parts, making a bit of an investment, and waiting for items in the mail, I've managed to build probably the best performing DIY night vision device you can get for the money. In the end, I spent around $200 building this and probably could've saved even more money if I had cut a few corners here and there. You can only imagine how happy my inner child is every time I power mine up.
Inspiration for this project originated from the cascade night vision thread on the AR15 forum and the Australian night vision forum. Both threads are run by David Kitson (cj7hawk), so big thank you for him for answering some of my questions and providing open source information about the project. I'll provide links to the threads at the end of the instructable. :)
Before I start, pleasebe responsible. Depending on where in the world you live, possession of night vision may actually be illegal. This can also potentially be weapons mounted, so don't be an idiot.
People who play with fire get burned; people who play with guns get shot.
Let's get started! :)
Step 1: The Science and History Behind the Tube

In order for you to build night vision, you need to know how night vision works. I'll try to summarize it for you.
So basically night vision uses what is called an Image Intensifier Tube. This electro-optical vacuum tube essentially gathers incoming photons through the objective opening into a photocathode, and converts those photons into electrons. The electrons are amplified across a microchannel plate and then are reconverted back into photons when they hit a phosphor screen.
I'm not going to get into details about the different 'generations' of night vision, but Gen 1 is the most affordable commercially and usually the weakest and lowest performing on the market. The tube I used in this project is also Gen 1 and is called a cascade tube. Essentially, it contains three gen 1 tubes as three 'stages' for a single tube.
History time. Sometimes called 'starlight scopes', these cascade tubes were developed in the 50's and 60's and were used in the AN/PVS-2 rifle scopes during the Vietnam War. In fact, an AN-PVS-2 eyepiece will physically fit like a glove to the end of the same tube we'll be using. Cascade night vision was also the first true passive night vision system, not requiring any IR illumination.
Cascade tubes were very large however, and were outmoded by Gen 2 tubes and systems because they were smaller with less geometric distortion (fisheye). Gen 1, 2, and 3 night vision devices are still manufactured and used today, however cascade night vision is not. In fact, there are lots of new old stock cascade tubes unused and unissued in surplus (you can still buy these tubes today if you know where to look).
Let's get what we need. :)
Step 2: Gather ALL the Parts!

Image Intensifier Tube (P8079HP Cascade Tube): ~$130
Although any intensifier tube will work assuming it has its own power supply, I used with the P8079HP. There are two places to get this tube without bidding and overpaying for them on a silly auction site. Both suppliers are in the UK and cost a touch over a 130 bucks before shipping. I've heard that both of these sellers are reputable and Starlight even inspects the tube before they ship it. Also, if you're getting multiple tubes, I think Anchor will combine shipping.
Anchor Supplies: http://www.anchorsupplies.com/night_vision.htm
Starlight NV UK: http://www.starlightnv.co.uk/buy_scopes_online.html
C-mount CCTV Objective Lens Assembly:
I used this 50mm one:
http://www.amazon.com/gp/product/B007SGGMU6/ref=oh_details_o00_s00_i00?ie=UTF8&psc=1
Any C-mount lens will work, however you'll want one faster than F2 to let in as much light as possible. This one is F1.4, which is plenty fast for this. Also important to note that this lens contains an adjustable iris. I'll explain the importance of this later. :)
C-CS Adapter Ring:
I used this:
http://www.amazon.com/gp/product/B002XDHZNM/ref=oh_details_o03_s00_i00?ie=UTF8&psc=1
But you could also just try something like this:
http://www.amazon.com/C-mount-Adapter-Extension-Aliminum-Security/dp/B004ILYMS8/ref=sr_1_2?s=electronics&ie=UTF8&qid=1374538150&sr=1-2&keywords=cs+adapter
This is how you will secure your lens to your enclosure and allow you to use other c-mount lenses in the future. You could just epoxy the lens to your enclosure if you don't plan on using others, but I would rather screw up and ruin a cheap ring instead of a $35 lens.
Magnifying Loupe (25mm):
Used this one:
http://www.amazon.com/gp/product/B000CAHCQS/ref=oh_details_o03_s00_i01?ie=UTF8&psc=1
This is what will be used for your ocular lens, or your eyepiece. If you can, find one with an adjustable focus. Otherwise, you can simply use threaded PVC adapters to adjust that. There are many different options for what you can use for this, but I liked this one because it was 10x magnification (ocular magnification determines field of view of the tube output, not the incoming image) and was 25mm in diameter compared to my 50mm objective. 50/25 is 2, which is the magnification of the whole system. If you don't want magnification, you can just use a 25mm objective lens. If you want more magnification, you can get a 75mm objective (3x), however I wish you the best of luck finding one under 100 bucks!
3" PVC Pipe
3" PVC End caps/Test caps
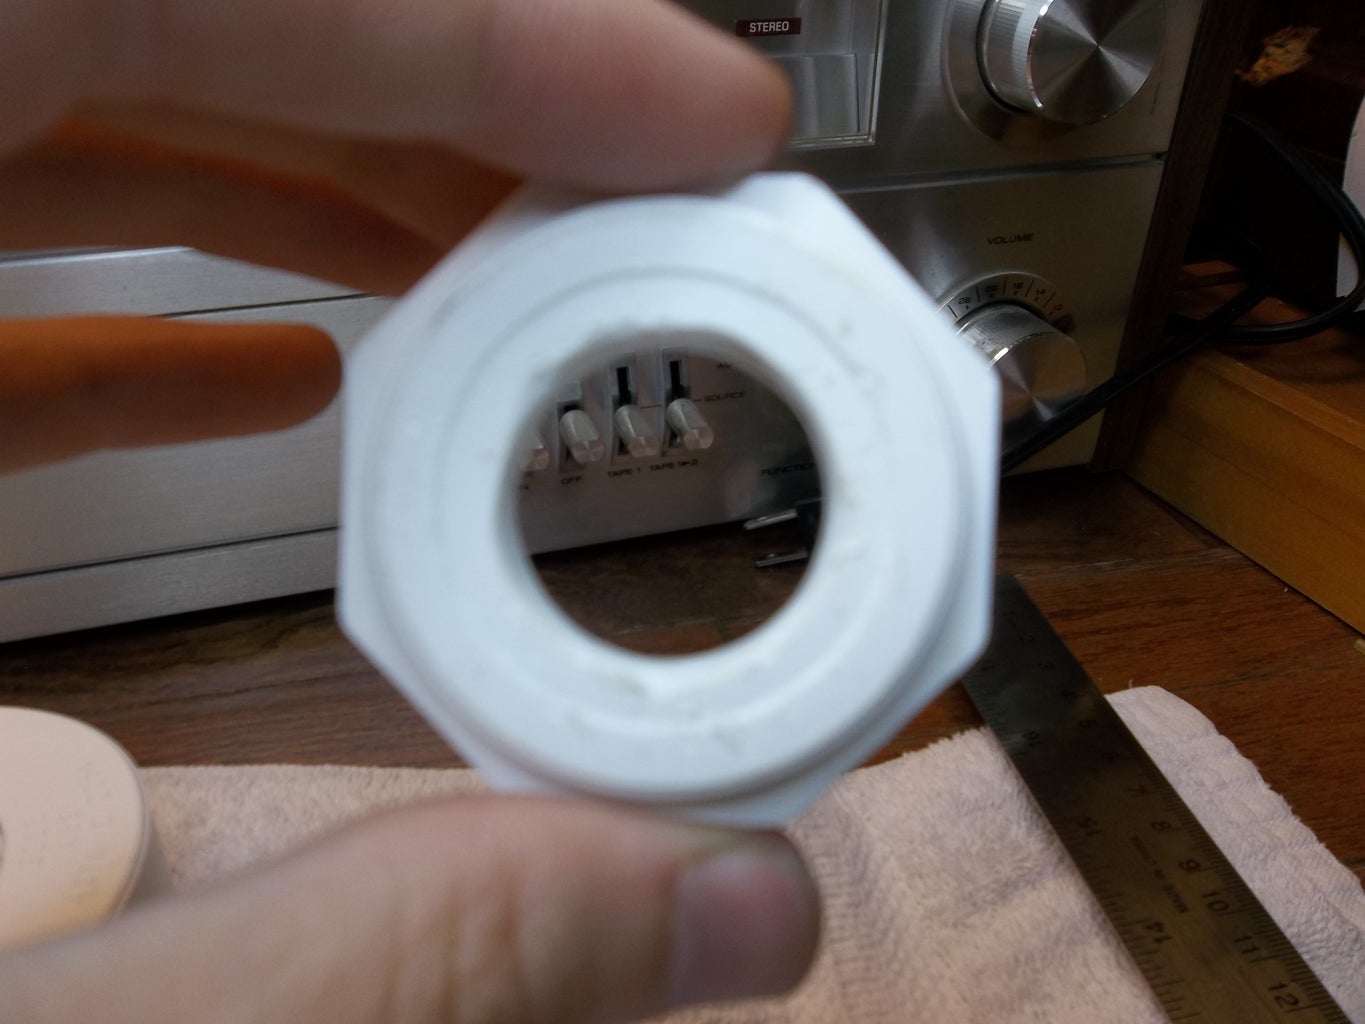
1 1/4" threaded plug
1 1/4" threaded adapter
ABS Project Box (RadioShack)
2-4 AA/AAA Battery Holder (RadioShack)
Toggle Switch
Black Duct Tape
Plastics spray primer
Spray paint (color of choice)
Want to make it a rifle scope?
-You'll need a laser sight with a pressure switch that can be rail mounted. Windage/elevation adjustment is a plus.
-Also, you'll need rail mounts. Harris bipod rail adapters work great for this. I used two of these:
http://www.amazon.com/gp/product/B004MCLGV4/ref=oh_details_o04_s00_i00?ie=UTF8&psc=1
Finally, if you want a rubber eyepiece for looks, I used and modified this:
http://www.amazon.com/gp/product/B00BULEB6C/ref=oh_details_o02_s00_i00?ie=UTF8&psc=1
Step 3: Test the Tube


Once you've gotten your tube in the mail and have finished celebrating its arrival from the United Kingdom (long live the queen), you're going to want to hook it up and get it to glow to make sure it works. Before you do anything, note that these tubes are very sensitive to any light, as you will see. The tube runs off of 3-6V DC, so feel free to wire it up. Also, take care not to put any more than 6V in, since you'll probably completely destroy it by overloading the circuitry. I hope you're taking notes.
-The positive terminal is the threaded brass hole near the front of the tube. Not exactly for sure on the size of the threads, but I know it's metric and it's tiny. I ended up finding a small screw that would fit the threads and putting a wire terminal on it.
Note: Do NOT solder the positive terminal. There is solder connecting the brass threads to the inside of the tube and heating up the brass could potentially disconnect the internal power connection. Use a screw instead.
-The ground terminal is the metal ring around the input window on the front of the tube. Take a look at the photo if you get stuck.
Temporarily hook it up to 3-6V in a dark area, and you should see the phosphor screen light up green after a second or two. But right now you can't see much with it. Once you're done and wondering what you've gotten yourself into, let's try to get a picture from it.
Step 4: Making the Eyepiece


To make the eyepiece, I got a threaded plug and threaded adapter that I could fit my eyepiece lens into, and I cut off all but the threads of the adapter. I got my 3" end cap and cut a hole into it using a hole saw bit. I think I used a 1 and 5/16". Really, the hole just needed to be big enough to thread the plug into the adapter through the end cap. I took another hole saw and cut a hole into the threaded plug so I could look through the lens. I sanded down the ridges on the threaded plug and taped my lens assembly together by wrapping electrical tape around it. The lens was able to hold itself in place after wrapping more electrical tape around it to shim it snugly into the end of the plug.
-A couple of notes, keep any paint off the threads of the eyepiece and use a strong super glue for the adapter! Paint got on mine and I ended up having to permanently set my lens before taping the eyepiece assembly to my housing. Quite irritating.
Step 5: Making the Objective


To make the objective assembly, basically you just need to glue your c-cs mount or whatever c-mount adapter you've chosen for this, drill a hole for the threads to go through the end cap, and glue the adapter to the end cap. Screw in your lens and you've completed the objective portion of the housing.
Step 6: Adding Power

This is possibly the easiest part of the whole project other than reading this silly instructable and hitting the 'favorite' button (by the way, feel free to do that if you really like how this is going so far!).
The only thing you're going to need to do before doing any wiring is drill a hole in your housing and in a project box or other enclosure so the wires can go from the tube to the batteries. :)
Since you've already wired up the tube to test it, screw in the positive connection, solder the negative wire to the ground ring on the tube, and pull the wires into the battery box. It's as complicated as wiring a 6V LED. Get a 6V AA or AAA battery holder and solder either the ground or positive battery connection to the corresponding wire lead from the intensifier tube. Don't mix them up! I'm not sure what happens if you accidentally swap the polarity on the power. Solder the other lead from the tube and the other corresponding lead from the battery pack to a switch and seal everything up inside a project box or enclosure.
Step 7: Painting

*Feel free to skip ahead if you're using a metal housing
Painting is a very important step for this system, because PVC plastic allows a small amount of light to pass through it. This creates a problem when you don't want any stray light entering the objective of your scope and clouding up the picture. To fix this, take all of your pieces, unscrew and remove your tube and any optical glass or lenses, lightly sand them with sand paper, and go to a well-ventilated area to paint. You might want to consider taping any threads to avoid getting paint in them. First, you're going to want to hit all of your parts with a plastics primer. 1-2 coats should do fine. The important part, is you're going to want to paint the inside of your objective end cap. This is to ensure no light leaks into the device should the paint on the outside scratch or come off. Once the primer has dried, feel free to paint your scope the color of your choice.
Step 8: Shimming and Focusing the System


This next part requires some patience. Measurement doesn't hurt either. First of all, to get your tube to fit nicely inside the PVC pipe and not slide around, you're going to want to shim it with tape or something. I wrapped duct tape around the intensifier tube housing until the tube took effort to move around in the pipe.
The trick to getting your tube to focus inside the housing is to start from the objective. Mount your objective lens, slide in your tube, and turn it on in a dark place. Point it at something you can focus on such as a wall or a tree in the distance, and push/pull the tube through the PVC housing until you can see the image clearly. You want this to be difficult to move so your tube doesn't shift over time and lose focus. Also remember not to push or put any pressure directly on the phosphor screen or the photocathode. Push on the outer edges of the ends of the tube instead. If you have trouble adjusting the tube position, try fiddling with the objective focus to make focusing easier.
For the eyepiece, hold up your magnifier to the phosphor screen and measure the distance needed to focus it. Attach the eyepiece cap and screw the lens until you can clearly see the image in the tube. If you can't seem to focus, try adjusting your distance by trimming your housing tube. I had to trim mine twice! Once you're close enough, you should be able to just screw the eyepiece in and out to focus it on the screen.
Step 9: Riflescope Conversion


Since I play a lot of airsoft, I figured I'll get the most use out of the tube if I can use it to aim with, which required some additional modifications. Obviously, this unit is a little too large and has too much distortion to try to helmet mount for land navigation, so I went with a rifle scope instead. I'm sure that this could be used for hunting if it could withstand the recoil, but I haven't tried it on any real firearms yet. If you're going to rifle-mount this optic, make sure you have a bipod for the rifle and an optics rail that is large enough fortwo rail mounts for stability. This optic is very large, heavy, and will add a lot of weight to a rifle and make a bipod very useful for supporting the weight of the gun.
Rail Mounting-
Unless you plan on just using this as a spotter for surveillance and recon, you're going to need a way to attach this optic to the rifle platform of your choice.
I purchased two 'Harris-style bipod adapters' off amazon for 20 bucks and unscrewed the center 'post' in both. After drilling two small holes down the middle of both adapters. When drilling through any kind of metal, ALWAYS center punch the hole first, and drill slowly. Add oil to piece if necessary. Once that was done, I also took my pipe housing and used a piece of angled steel to create a parallel line on my pipe to ensure that my pipe is sitting on the adapters straight. I actually got a section of weaver/picattiny rail and mounted my rail mounts on it. I used some hot glue and tape to temporarily hold the pipe to the mounts while I removed them from the rail and drilled through the PVC using the holes I previously drilled as pilot holes.
From there, I could remove my rail mounts from the PVC, drill the holes in the rail mounts slightly larger, and tap threads in the PVC pipe. The point of this is that the holes in the rail mounts are through holes to the threaded holes in the PVC. Screw on your mounts and you're in business.
Aiming-
To aim it, I purchased a laser sight with a pressure sensor and windage and elevation adjustment set screws. I was able to position it right underneath my objective lens on my optics rail and I wired the sensor to where I usually place my left thumb when supporting my airsoft gun during use.
To note, the laser is very bright on the tube at close range. I only just tap it on briefly and it creates a bright spot on the tube. I basically just use the fading spot on the tube to aim with, but the laser is perfect when used to aim longer distances.
Step 10: Conclusion


So overall, when it comes to serious DIY night vision, cascade is the way to go. Even compared to the cheapest gen 1 monocular with no other features and the need for IR illumination, this unit is dirt cheap and kicks ass. There are few things in this world that will make you feel as proud of yourself as a maker, and equally diabolical as building a night vision scope like this and helping your airsoft team win a night game or putting an end for your nocturnal pest issues once and for all. The laser is incredible. I can look up at the sky and still see the beam! Even hundreds of yards away I can see where the dot is. This makes a fantastic airsoft or hunting project since night vision is so expensive to buy new even for first generation units.
A couple of issues I had with this project were getting my tube to stay still inside my housing and fogging from humidity in hot weather. I fixed the first issue by drilling a few holes and threading some screws through to help grab the tube and keep it from sliding. I made sure to wrap duct tape around where the screws were going to touch so my tube wouldn't be damaged from them. The fogging issue, I haven't really figured out yet. One night I took my scope out to look around with it and I could tell the image was in focus, but it looked cloudy. I thought it was a power issue at first, but I later figured out that is was just condensation from the air. I suppose letting the unit sit out in the humidity for 20 minutes or so could help, but I'm not sure.
You might want to consider getting a few things once you've built your scope:
-Lens caps are a good idea to manually control when you want light in and out and adds a sense of security with the unit. You could even try to build a spring-activated shutter that only opens when you hold a button for maximum protection against sudden overexposure.
-A bipod or monopod would make a wonderful addition to this unit when you want to just look around. You could also consider adding a handle on the outside of the housing if you think you'll be carrying it around a lot.
-A throw lever around the focus/aperture wheels on the objective lens for easier use and quicker adjustment. I made one on my aperture wheel on my objective lens from a zip tie, some heat shrink tubing, and some electrical tape.
-A rubber eyecup for comfort and preventing light from leaking into the surroundings from the phosphor screen. Plus, it just makes the finished optic look very cool.
I highly recommend checking out david's (cj7hawk) threads for more info about the cascade night vision systems:
AR15 thread-
http://www.ar15.com/mobile/topic.html?b=6&f=18&t=359614
Australian night vision forums-
http://anvf.blackice.com.au/cgi-bin/nightvision/forum?index=projects&story=cascade&chapter=0002
And also, if you have access to a 3D printer, you can try to print out some parts that David designed and provided for free download as open source on shapeways.com. You can find those here:
http://www.shapeways.com/shops/dropbeartech
Thank you for reading! I hope you enjoyed reading and learning about night vision and I wish you the best of luck should you build one! Please vote for me if I enter this thing in any contests on here! :)
AIRSOFT UPDATE 8/6/2013:
So I went to an airsoft night game over the weekend and had the chance to really push this thing to the limits. The field this was located at is away from a lot of light pollution and it has very few lights nearby. I ended up attaching an infrared flashlight to my power box with zip ties and it made a huge difference in some areas. The IR light really helped light up far away areas when I was looking for people. I also was using illuminated glow in the dark 'tracer' BB's to help see where my shots were actually going.
I started using the scope and rifle about 2/3 of the way through the first game and I forgot my flashlight. We were walking through tall grass and brush to get to the other side of a small lake, and I was having trouble navigating around. The game ended before they could get me where I was needed and I ended up nearly getting lost on the way back to the reload area!
Later on, the other team was waiting at the bottom of the field on the other side of some train tracks with a VIP our team had to capture and defend. A train ended up stopping on the tracks and cutting the other team off, causing us to have to delay and restart the game! Once we got going again, we were prone in some bushes on top of a hill maybe 20 feet away from the tracks. As soon as the train moved, I was able to see the other team in a tight group. Once our guys started shooting, I was able to easily take out anyone still remaining on the other team. The scope was very effective and the flashlights and strobes that the other team had didn't hurt the tube at all.
In another scenario, we had to defend a VIP on a small two-story watch tower. I was positioned up top, and using the IR flashlight illuminator, I was able to laze targets for my teammates that were 300 yards away! The ability to mark targets was invaluable for the situation and earned us a victory that match. The scope did end up making my wrists and shoulders pretty sore the next day, but it was worth it. I earned much respect from my peers and endless compliments on how cool it was and how flawlessly it functioned.
Overall, I had the most fun I've ever had playing airsoft after dark because I built this scope. :)

Participated in the
Great Outdoors Contest

Participated in the
Weekend Projects Contest


