

Introduction: DIY Cookie Cutters


It's time to get creative and make your own cookie cutters!
This is a fantastic way to create your own shape without having to cut templates over and over again. Personally - I've never cut a template, but I can imagine that it would be tedious. I'd rather make a cutter if I ever plan on using that shape ever again.
I was working on one of these last night and I kinda cut my fingertip off. I urge you to use safety. (Basically, don't try to reshape your cutters with a serrated knife at full force, without gloves on.)
Step 1: Tools for the Job.

You will need:
Crop-a-dile. It's a crafting thing for scrap booking. Use a 40 or 50% off coupon!
Scrap booking grommits, any color. I used 1/8".
Sheet metal, aluminum, from Home Depot. Make sure it's not too thick to shape!
Tin Snips. I got a set of 3 at Home Depot for $10. Super great/cheap.
GLOVES. Yeah. You will get snips of metal stuck in your skin when cutting, if not carefully watching for splinters sticking out.
Step 2: Metal Strips


First thing you need to do - is gear up and cut some strips. Try to keep them straight. If you're more professional than me = you may mark some lines and cut them.
Try to keep them less than an inch in width, you don't need them to be so thick.
Step 3: Bend Your Shape!


Think about the cookie that you need, take into consideration - the size. Freehand it, or if you are more technical - you can think of a professional way to shape them. I've seen boards with nails in them, outline your shape with nails and bend the metal around them. Seems awesome, but a lot of work.
When you bend the metal, watch out for splinters and wiggle them off. Also, since you are wearing gloves, you will be protected from any cut edges.
I am making this rectangle on purpose, because I need it LOL. :) You will see it in another instructable! :)
Step 4: Fasten and Finish


Now, the Cropadile isn't Hercules, so you have to go easy on it.
My technique is to overlap the 1/2' flaps to secure, select my 1/8" PUNCH setting, try to punch through both pieces at the same time. (But they are too thick.) This will dent the two sections where you will need to do each individual punch. Move up to your second grommet placing and FAKE PUNCH that also.
Then push them apart, punch each of the 4 holes by themselves.
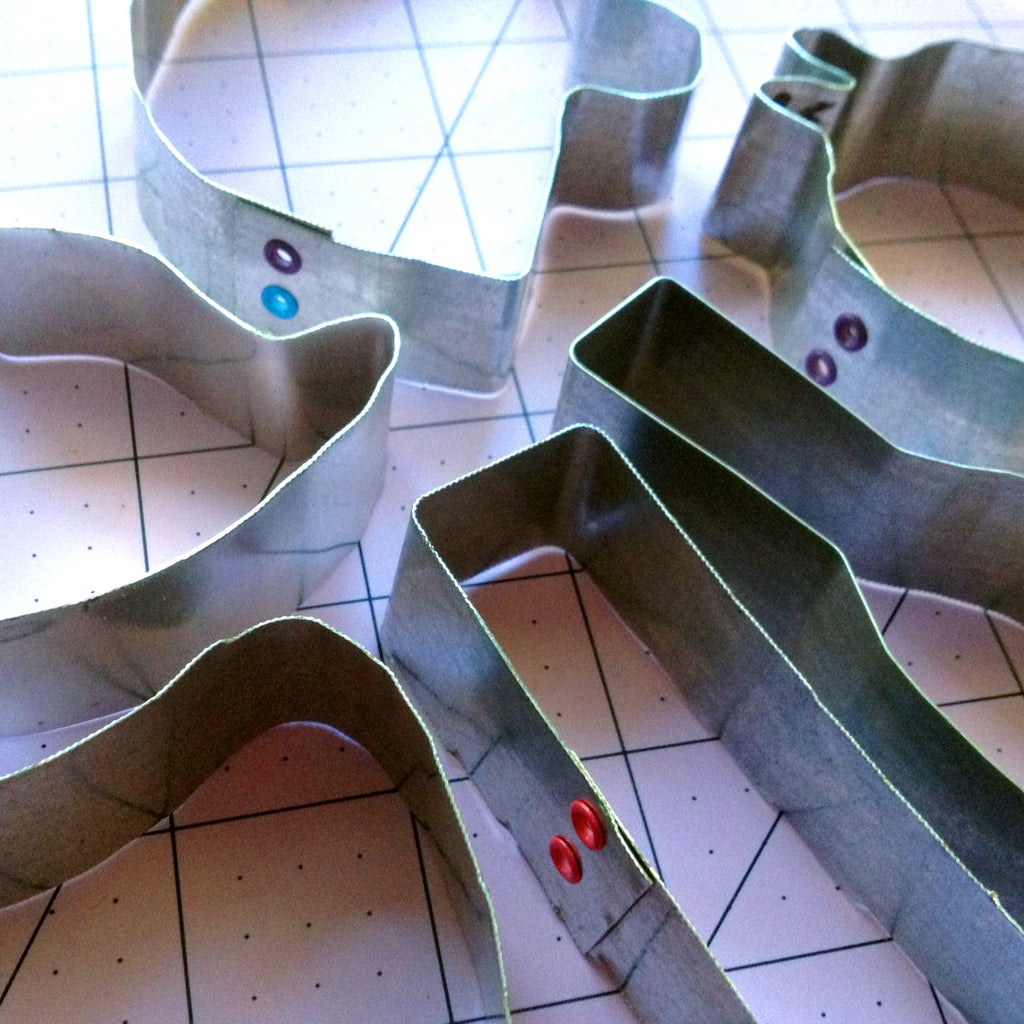
Line your first grommet into the hole, set your Cropadile to ... flatten the grommet-mode.
PUNCH/FLATTEN your grommet in place, which will fray the inside flat-like and secure your cutter shut.
NOW...................Take your cutter and press it onto a surface and make sure you have a pretty flat-cutting edge for cutting the dough. THEN, pinch it to hold where it lays flat....CHECK your second punch.....is it a perfect hole? If not, RE-PUNCH it. It will be fine! :)
Then set your second grommet and flatten it in place. The two grommets will be totally secure and you will be proud of your new cutter!
Trouble-Shooting---------------------------------------------------------------------------------------------
If you have an overlap on your grommet edge, just clip it off to make it straight - using your snips.
If you have splinters or sharp edges, remove them safely! - They wiggle off with some effort.
If you use your cutter and it does't fully cut because it wasn't flat enough --- Make sure to flour your surface, roll your dough, then do a wiggle once you've cut and pressed your cutter. That will separate the shape from the dough. Since your surface has enough flour, it will not stick. And if your sugar cookie dough is cold enough, the shape will hold. :)

Participated in the
Holiday Gifts Contest

Participated in the
Instructables Design Competition

Participated in the
Redneck Contest


