

Introduction: DIY Fiber Optic Jellyfish Chandelier


It's taken me five months to finish my niece's birthday present of a jellyfish chandelier. The first attempt ended up looking like a Rastafarian octopus in shades of purple and green when what I was aiming for was an airy, lightweight, whimsical jellyfish light fixture.
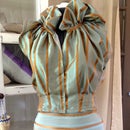
The above is my second attempt using mostly silk and fiber optic cable. I think it captures the spirit of a jellyfish chandelier pretty well despite some (fixable) flaws.
The components for this chandelier were thrift store finds, one Dollar Store salad bowl, and a piece of fiber optic cable, brinding the total cost to about $15.
Step 1: Supplies and Tools

This DIY chandelier was made using:
* A hanging light fixture without a shade
* One green silk scarf
* One white silk scarf
* One 2-foot length of side light fiber optic cable
* White merino wool roving (< 1oz)
* 1 Clear acrylic salad bowl (Dollar Store find)
* Super glue
* Hot glue
* Epoxy
* Six small super magnets
* Ribbon
* Flood light shell
* 60 Watt chandelier bulb
You will also need:
* Scissors
* Drill
* 1" hole drill bit
* Hot glue gun
* Bubble wrap
* Polyurethane
* Paint brush
* Candle
* Toothpick
* Packing tape
* Coconut oil
* Plastic food wrap
* Soapy water
If over 50, I recommend:
* Reading glasses
* Head lamp
Step 2: Fiber Optic Spray


The belly of the jellyfish chandelier looks like a shower head of fiber optic cables. To make this spray of light, I cut the fiber optic cable casing open and removed several strands of optic fibers. I used different lengths of fibers, gluing them to the glass shell of a flood light. To make the fibers easier to glue, I melted the tips and flattened them against the tile counter top so they would have a head like a nail. The head was glued to the glass flood light shell with super glue just to keep it in place. Once all the optic fibers were secured to the glass shell, I used mixable epoxy to glue them permanently to the glass surface, applying the epoxy with a toothpick.
Step 3: Curl Optic Fibers (optional)

The side glow optic fiber I bought wasn't as side-glowy as I was hoping, but I discovered that if you melt the fibers into curly configurations, there is a light burst at every bend. As an option, you can pass a candle under the fiber optic shower head and bend or curl the fibers for added light and whimsy. I did, naturally.
Step 4: Chandelier Shade


There are probably a million ways to make the main shade for a jellyfish chandelier. I don't know why I picked this way, but that's what I've got to show.
I found a smooth semi-circle glass lamp shade to use as a mold for my lightweight silk shade. It was a bit too small, so I wrapped it with bubble wrap, then wrapped the bubble wrap with plastic food wrap for added smoothness. Next, I anointed the surface with coconut oil. Why? Because I intended to place a polyurethane-soaked piece of silk over the form and didn't want it to glue to the plastic. Hence the barrier creme. Coconut oil is ideal because it hardens at room temperature and won't soak into your silk.
Next I cut a circle of green silk, painted it with polyurethane, and placed it over the bubble frame. I let the poly dry and put a second and third coats on it. I allowed it all to dry overnight.
Step 5: Chandelier Shade Pt.2


Retrieve the Dollar Store plastic salad bowl for use in the DIY chandelier. This will be the skeleton of the jellyfish and will hold up the silk shade. Mark where to drill a hole in the plastic bowl where the light fixture will fit. Drill the hole (I used a 1" hole borer). Place the plastic bowl inside the silk shade and mark where the hole is, then cut a circle in the silk to thread the light fixture through.
Step 6: Secure the Fiber Optic to the Shade


Now the fiber optic shower head has to be secured to the chandelier head in such a way that it can be easily removed when the light bulb requires changing. I did this with ribbon and tiny super magnets. I cut three strips of ribbon about 5" long and glued one end of each to the bottom of the salad bowl with super glue, spaced apart equally like a three-legged stool. Next I glued three small super magnets to the outside of the flood light shell using super glue. Lastly, I looped the other end of the three pieces of ribbon around a small magnet and glued them with superglue and hot glue.
To attach the fiber optic spray to the chandelier shade, all you have to do is hold it close to the light bulb and the ribbon magnets jump into place around the flood light case. I repeated that several times for the fun of it.
Step 7: Felting Silk Legs


To get the fluttery look of jellyfish legs (is that what they are?), I cut several crescent-shaped pieces of green silk and felted one side with white merino wool, leaving a long tail on one end.
Using the same wet felting method used in my fused fiber neck warmer, I lay the pieces of silk on a piece of bubble wrap, spread wispy bits of merino wool along the inner side of the crescent and more wool down one end of the crescent. This was flipped over and a bit more wool added to the other side so the fibers would fuse through the silk and into each other. The fusing happens when you wet the wool with hot soapy water, cover it with another layer of bubble wrap and agitate. One time I used a car buffer to agitate the wool fibers, but I wanted more control over my project this time, so I used the rolling method pictured here.
Step 8: Making the Outer Silk Shade


For the outer silk shell of the chandelier, I used a circular piece of silk felted around the outside edge in a similar way to the legs of the jellyfish.
Cut a circle a little bigger than the first silk circle in step 4. Place it on a piece of bubble wrap so half of it fits on the bubble wrap. Put wisps of wool fibers around the half of the circle that is sitting on the bubble wrap. Add some extensions here and there as shown. Wet with soapy water. Place another piece of bubble wrap on top of the half circle that has been prepared and fold the unprepared half over it. Repeat with the wool fibers and hot soapy water. Cover it with a third piece of bubble wrap.
Before rolling into a log, beat the silk and wool fibers with the palms of your hands for a couple minutes.
Roll into a log and agitate back and forth for five minutes or so.
Open up the felted silk and roll the extended fibers with your hands to form tentacles. Once you are satisfied that the wool fibers have fused into the silk, take the whole thing over to a clean sink and begin throwing it down. Open it up every once in a while to untangle the tentacles, then keep on throwing until the wool has shrunk to your satisfaction.
Step 9: Put It All Together


Once the outer silk piece is dry, cut a hole in the top for the light fixture.
Glue the legs of the jellyfish directly to the inside of the plastic bowl with hot glue as shown.
Connect the light fixture to the jellyfish body.
Screw a 60 watt light bulb into the light fixture.
Snap the fiber optic spray into the chandelier.
You're done. Hang from a ceiling hook and enjoy!

Finalist in the
Instructables Design Competition

Participated in the
Make It Glow

Participated in the
Holiday Gifts Contest


