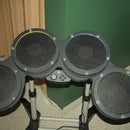
Introduction: DIY Fiberglass Window Screen Mesh Drum Heads
To me the window screen mesh heads feel great and are much quieter than the Roland mesh head on the Roland PD85
Step 1: Removed the Head From the Rim
Since I had no use for them, I used the rims from heads that came with the toms I purchased. I removed the heads from the rims with a utility knife.
Step 2: Fiberglass Window Screen
I picked up a 48" x 80" roll of fiberglass window screen from Menards. Cut out squares about an 2" wider than the rim.
Step 3: Trimmed of the Excess Screen
Trimmed of the excess so it would be easier to work with.
Step 4: Pushed Drum Head Rim Into the Drum Hoop
Laid the two layers of fiberglass window screen over the drum hoop and pushed drum head rim into the drum hoop.
Step 5: Wrapped and Tied String Around the Drum Hoop and Rim
Wrapped and tied string around the drum hoop and rim to temporarily hold it all together. It made the sewing easier
Step 6: Thread for Sewing Leather Material
I used heavy thread for sewing leather material. The tan color showed up better in the tutorial images. Comes in black also.
Step 7: Sewed the Screen Onto the Rim
Not sure what type of stitch I'm using. I just went back and forth every 1/4" and sewed the screen onto the rim. Took about 10 min.
Step 8: Trim Off More of the Excess
I trimmed off more of the excess screen getting pretty close to the stitches.
Step 9: Top View
This is top view. I colored the tan stitches black with a marker. Black thread would look nicer.
Step 10: Laid on Two More Layers of Window Screen
I put the mesh head on the drum and laid on two more layers of window screen. Tighten down the lugs.
Step 11: Trim Off the Excess Window Screen
Trim off the excess window screen. I'm sure the screen will wear at some point. When the top two layers start to wear out. I can easily replace them and won't have to re-stitch new screen to the rim.


