

Introduction: DIY Microscope


This Project Is A Part Of The Afrimakers Event
http://www.afrimakers.org/
Introduction
We used a simple cheap webcam to make a microscope. In short, a small hack to the optics of a standard webcam with an adjustable focus-lens, allows to create video data, with a magnification of around 100 to 400x (depending on the model) at a working distance of a few mm. The highest magnifications can be achieved by inverting (putting upside down) the lens. We used white LEDs at first but the picture wasn't clear enough ,so we used A Flash Light for brighter and more clear view.
It's Based On The DIY Microscope Here : http://hackteria.org/wiki/index.php/DIY_microscopy
Step 1: Objective

To use a simple usb webcam as a microscope, only a few modifications are needed. Also, A Software That Control The Focus Of Specimen Using Small Servo Motor.
Duration
4 Day
Targeted age group
all
Step 2: Get a Webcam

You can experiment with different products. High resolution cams will make you see more clear details of what you want to see with your own microscope.
Step 3: Disassemble the Webcam : Step 1
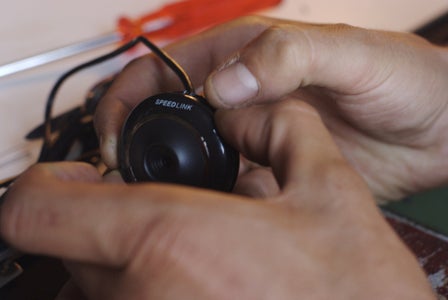
Gently remove the cover from the webcam. Usually it's screwed with one or two screws but most of the time you will find it's not so you can just try to remove it .you will know you are doing it right when you hear it clicking but make sure you are not breaking the webcam circuit inside and watch out the lens.
Step 4: Step 2

After you open it , make sure not to unplug or cut any wires . Make sure that you remove any screws attached to the webcam's circuit.
Step 5: Step 3
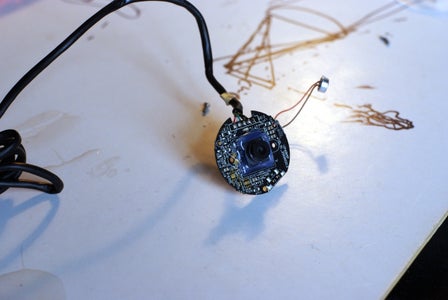
Now You have got yourself your own microscope camera but still not yet ready to view Micro-stuff. Make sure that you don't cut any wires while moving the circuit so the microscope works fine with no problems.
Step 6: Remove Webcam's Lens

Remove the Webcam's Lens. It's obviously located at the center and this should be easy to do.
Step 7: Invert the Lens

Invert The Lens (Put it up side down) and fix it back on the webcam's circuit center (CMOS Sensor).
Step 8: Webcam Test

Connect your webcam (a microscope now) to your pc or laptop and check to see if it still works or not, You won't see anything but a blurry image which is totally normal at this point. Now we have to make a design for our DIY microscope. To view the webcam , you can use any webcam software like VideoLan (VLC), AMCap , macam, guvcview, ...etc
Step 9: DIY Microscope Design : 3D Modeling


At first, We laser cut the Hackteria DIY Microscope Kit And It's Avaliable Here : http://hackteria.org/wiki/index.php/Laser-cut_microscopy_stages After that we decided to make the Focus Adjustment made by Arduino so we can control it by software instead of manual control.
Step 10: Design Assembly

Step 11: Laser Cutting


While Laser Cutting The DIY Microscope Parts Download PDF Cut File Here : () You can Import the pdf in any vector program like Inkscape , CorelDraw,....etc
Also There's A Picture Of Top Part (Flash Light Holder)
Step 12: Arduino Focus Adjustment : Step 1

Step 13: Step 2

Get Arduino Uno And Program It To Control The Servo Motor. You can do that by downloading one of the arduino example codes avaliable here : (http://arduino.cc/en/reference/servo) and play with it a little until you understand the concept behind Servo Motor control. You can download the Arduino Software (Avrdude) from here : (http://arduino.cc/en/Main/Software).
Step 14: Step 3

After that, You can download the code we used to control the servo motor from github here : (https://github.com/mrvolta/DIYMicroscope) , but let's first add some RGB leds and make our design look fancy.
Step 15: Step 4

Fix The Arduino on the Microscope's back by Screws , Then Connect the Servo Motor And The RGB LEDs to the Arduino Uno As Shown
Step 16: Circuit (By Fritzing)

You can download the full resolution version of the circuit here : (http://s21.postimg.org/9wsiniybr/Page_1_Untitled_Sketch_bb.jpg)
Step 17: RGB LED Installation


As you can see in this figure, The RGB LED is in the RED phase and is installed under the Slides Part to give a fancy look (I call it "The Makerbot Look")
Step 18: The Final DIY Microscope
Step 19: Software Control

As you can see, This Is A Software Made For Kids , You can view the webcam and Also Make The Focus Adjustment Using The Up Right Corner Controls .
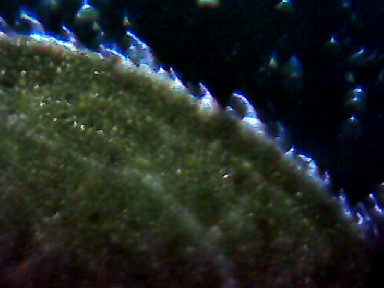
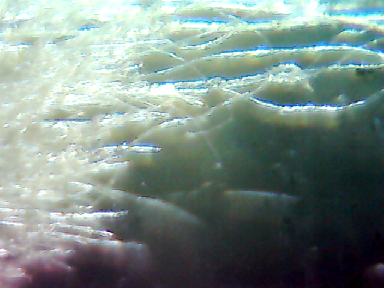
You can "Reset" To The Default Position Of The Servo (Which is in the middle) This is a picture of a part of a flower under the DIY Microscope (Approx. 100x)
You can download the software from here : (https://www.mediafire.com/?ozjkwckywowokdm). In Case you were wondering,
It's A C# Windows Application. (Make sure to install .Net Framework 1st)
Step 20: Slide Samples


Step 21: Improvements
In Design
1) Make DIY Microscope Kit where anyone can buy it or make the whole microscope so everyone can enjoy the beauty of magnification.
In Software
1) We are going to write a Python program which controls the servo motor (focus adjustment) through Serial Communication with the Arduino Uno Board , So the whole project can be done using Open Source Resources.
2) Light Intensity will be adjustable using Software (Slider)
3) A Proposal Is suggested to make the whole microscope Remotely Controlled Via Internet , You Can check the idea of remote labs or Web Labs here: (http://www.weblab.deusto.es/website/)

Participated in the
Makerlympics Contest


