

Introduction: Creating a DIY Pallet Wood Floor With Free Wood


It took some effort, it took some time, but in the end, we're super thrilled with it.
Step 1: Getting Started

Our pantry floor was a disaster. Or, the tiny scary purposeless room we turned into a pantry had this horrible cheap carpet in it. Hardly up to task. Stopping by a pallet recycler for another project, I discovered these cut block pieces. Slowly over time I amassed enough for the whole floor.
Step 2: Start of Installation
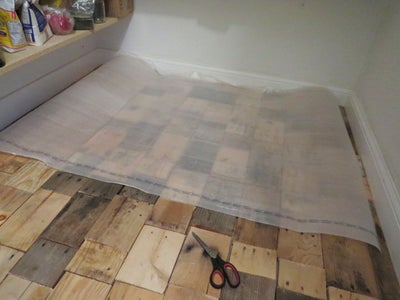
I picked up a roll of foam underlayment to add a layer of insulation as I'm 95% sure there is nothing but air under this floor. In hindsight, I could have rolled more than one layer, but, so it is.
Step 3: Re-placing Blocks

Next I moved the blocks back over the foam. Once all the blocks were back down, I borrowed a friend's compressor and nail gun, tacked all the blocks down.
Step 4: Figuring Out the Step

We have one small step leading into this room so I used some thinner smaller pieces I had collected to cover it.
Step 5: "Grouting"

Once everything was tacked down, it was time to "grout" the floor. I mixed up a creation of fine saw dust, gloss oil based polyurethane, and mineral spirits to thin. I won't lie, it was challenge getting it between the joints.
Step 6: Scraping, Unfortunately

The next day, the floor was a mess. I hadn't been as tidy with the grout as I had hoped and I ended up having to scrape the excess off the blocks. Sad face.
Step 7: Time to Polyurethane

The last step was two coats of the same oil based gloss polyurethane. I'll add a few more but at the time, it was all I had time for.
Step 8: Another View
The floor has held up very well. The temperature in this room doesn't fluctuate much so the wood hasn't gone all kitty-wampus. The majority of the wood was already well aged when I got it too, so it's been all good.
Step 9: Last Step: Enjoy

We're really enjoying this floor and it's perfect for our pantry. In the end, this project cost less than $100 for an approximately 100 sq. ft. room with all the wood being free.
If you're intrigued, come read all the details in my blog post here: http://humboldtartdept.blogspot.com/2014/08/the-pantry-floor-is-done-done-done.html

First Prize in the
Pallet Contest


