

Introduction: DIY Smart Home Doorbell for Less Than $40!


Smart doorbells are an amazing tool but still an expensive one (~$200)! Today in this Instructables, we propose to help you build your own smart home doorbell for less than $40.
We will guide you through the basic core steps to build the doorbell with simple components and no need for coding or manual skills. If you’re passionate about woodwork and/or 3D printing, you can of course go further and give your doorbell a beautiful case (if you do so please share with us!). For the sake of simplicity, we will keep our explanations to the “raw” version of the doorbell.
FEATURES
With this Instructables, you will be able to create a doorbell that can:
- Warn you when someone rings it (duh!) on your smartphone
- Use your house/office lights as a visual notification tool
- Send you a picture of your guest on your smartphone
- Allow you to open the door remotely
All this without any special tech knowledge and no expensive equipment!
FOR WHOM?
This Instructable can be great for you if you are:
- A tech enthusiast, eager to learn more about the IoT/smart home world
- An experienced home automation maker who wants to add new and fun features to their house and make it even more automated
- A disabled person or a relative: IoT devices are great for people with limited mobility. We receive every day feedbacks from our products’ users who are able to remotely trigger health care equipment, automate household tasks or start unreachable appliances and we’re immensely proud that our work can slightly improve their daily lives.
- Someone passionate about DIY projects who doesn’t know much about tech yet
- Or simply a lazy person!
We hope you’ll find this instructable as accessible and fun as we do!
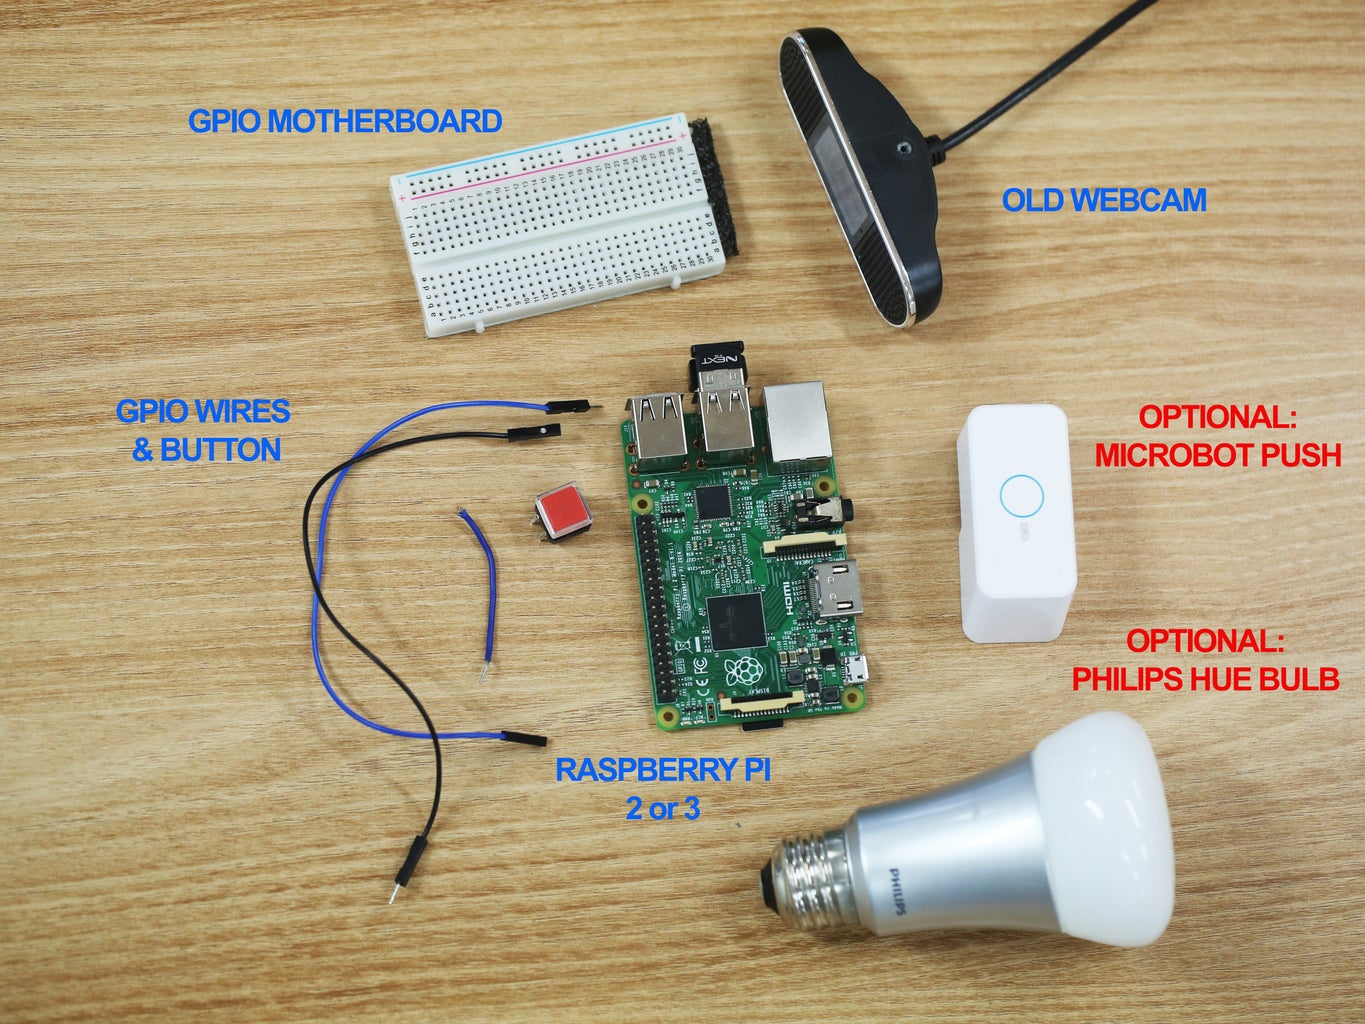
Step 1: REQUIRED MATERIAL
Step 2: SET UP YOUR PROTA PI
You first need to build the smart hub that will control the automation of your ring bell and connect all devices together. Prota OS for Raspberry Pi is our free smart hub OS which is very easy to install. In no time you will turn your Raspberry Pi into a smart home automation hub!

You can download Prota OS here. Then burn it on the SD card.
We made an easy guide you can follow to set up your Prota Pi.
Alternatively, you can check this Instructables.
Step 3: SET UP YOUR GPIO BREADBOARD AND BUTTON
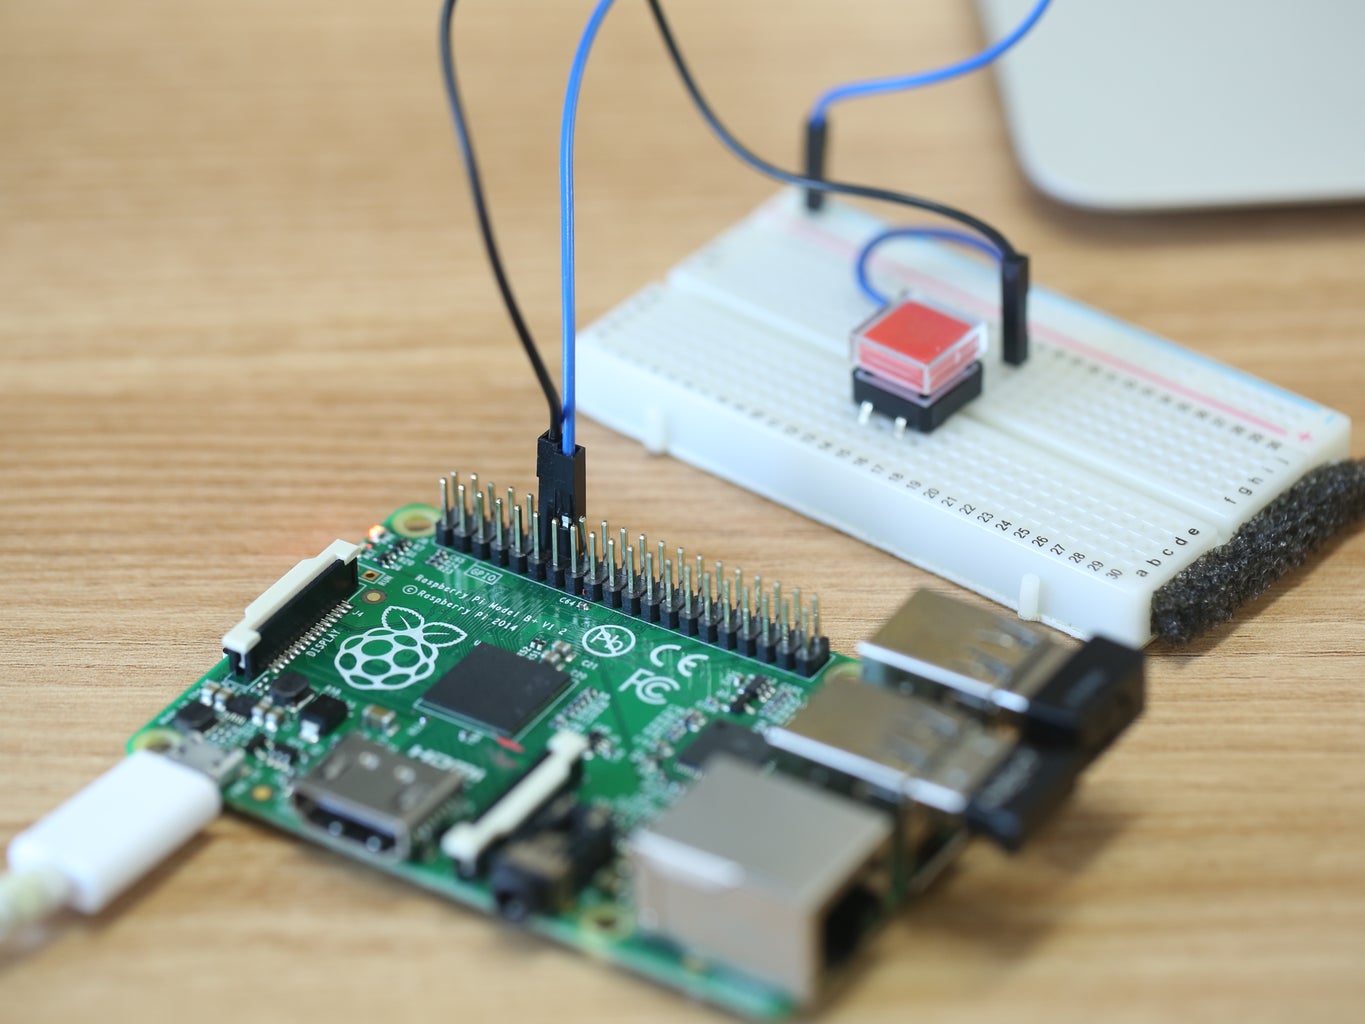
We will now set up the breadboard and its button that will officiate as the ringbell of our project!
To avoid getting lost with your breadboard, follow this visual to remember which dedicated role has each pin.

Position your wires and button as it is on the picture below:

Now connect the ground wire to a ground pin and the other one to (for instance) GPIO18.

- Now let’s open Prota Space.
- If you haven’t done it yet, download the GPIO app in App Libraries.
- In GPIO app, click on GPIO18.
- Select “Interrupt” and “Pull up”. Click on “set”.

The button is now set up.
Step 4: SET UP YOUR TELEGRAM BOT AND YOUR WEBCAM
A Telegram bot is a virtual assistant that you can create on Telegram messenger app.
If you want to learn more about Telegram bots, don’t hesitate to read this previous Instructables .

- Download Telegram app on your smartphone and create an account
- Download Telegram app on your Prota Pi (in App Libraries)
- Open the Telegram app on Prota and click on “Request Authorization”
- Set a name and username for your bot, then click on "Create"
Your bot is now created! Once the automation is setup (next step), the bot will send you a notification + a photo of the person that rang your smart doorbell. If you have a MicroBot Push, you will also be able to open the door by sending a message to your bot!
Now let’s quickly set up your old webcam to turn it into a smart cam!

- Plug-in the camera’s USB cable to your Raspberry Pi
- Download the Webcam app on your Prota Pi (in App Libraries)
- Open the app to check that the camera is now working (it should start to automatically take screenshots in case of any motion)
Now that the bot and the webcam are set up, we need to create the automation workflow
Step 5: WRITE THE AUTOMATION STORY

Stories app is what allows you to set up your automation workflows by writing them in natural language.
We need to automate two things:
- What happens after the guest press the ringbell (various notifications)
- The remote opening of your door (if you have a MicroBot Push)
Let’s set first the notification storyline:
- Open Stories app, click on + and then on “when”
- Click on “set sensor” and select GPIO. The event should be “detects a rising interrupt on pin GPIO18”. This means “when your ring bell is pressed”.
- Now we will set the actions that follow this trigger. Select Webcam, the action event should be “webcam take a snapshot”.
- Click on the “then” button on the top right corner. Select Telegram for the next action, select your bot, select “send ? to ?” and for the instructions add a notification text like “Someone is at the door!”
- Click on “then”. Select “send a photo to” and add the instructions for “to” field and select “snapshot file” to be sent.

Optionally, if you have a Philips Hue bulb, add this part “Then Philips Hue alarms rapidly” so that you also have a visual warning at your desk.

Now let’s configure the commands to open the door. If you have a door at home or at the office that can open with a button, MicroBot can automate it! First, install your MicroBot Push on the door lock button as we did in our office.

Then, pair it with your Prota’s MicroBot Push app. Once this is done, write the following storyline:
“When Telegram Bot receives a message” and add the condition “Text equal to ‘Open’” “Then Door Push press the button” Now, once notified of your guest arrival, a simple text “Open” sent to your Telegram Bot will open the door!
DONE! You can now test it before installing it all next to your door (see gif at the top of this step)
Step 6: INSTALL AND USE!
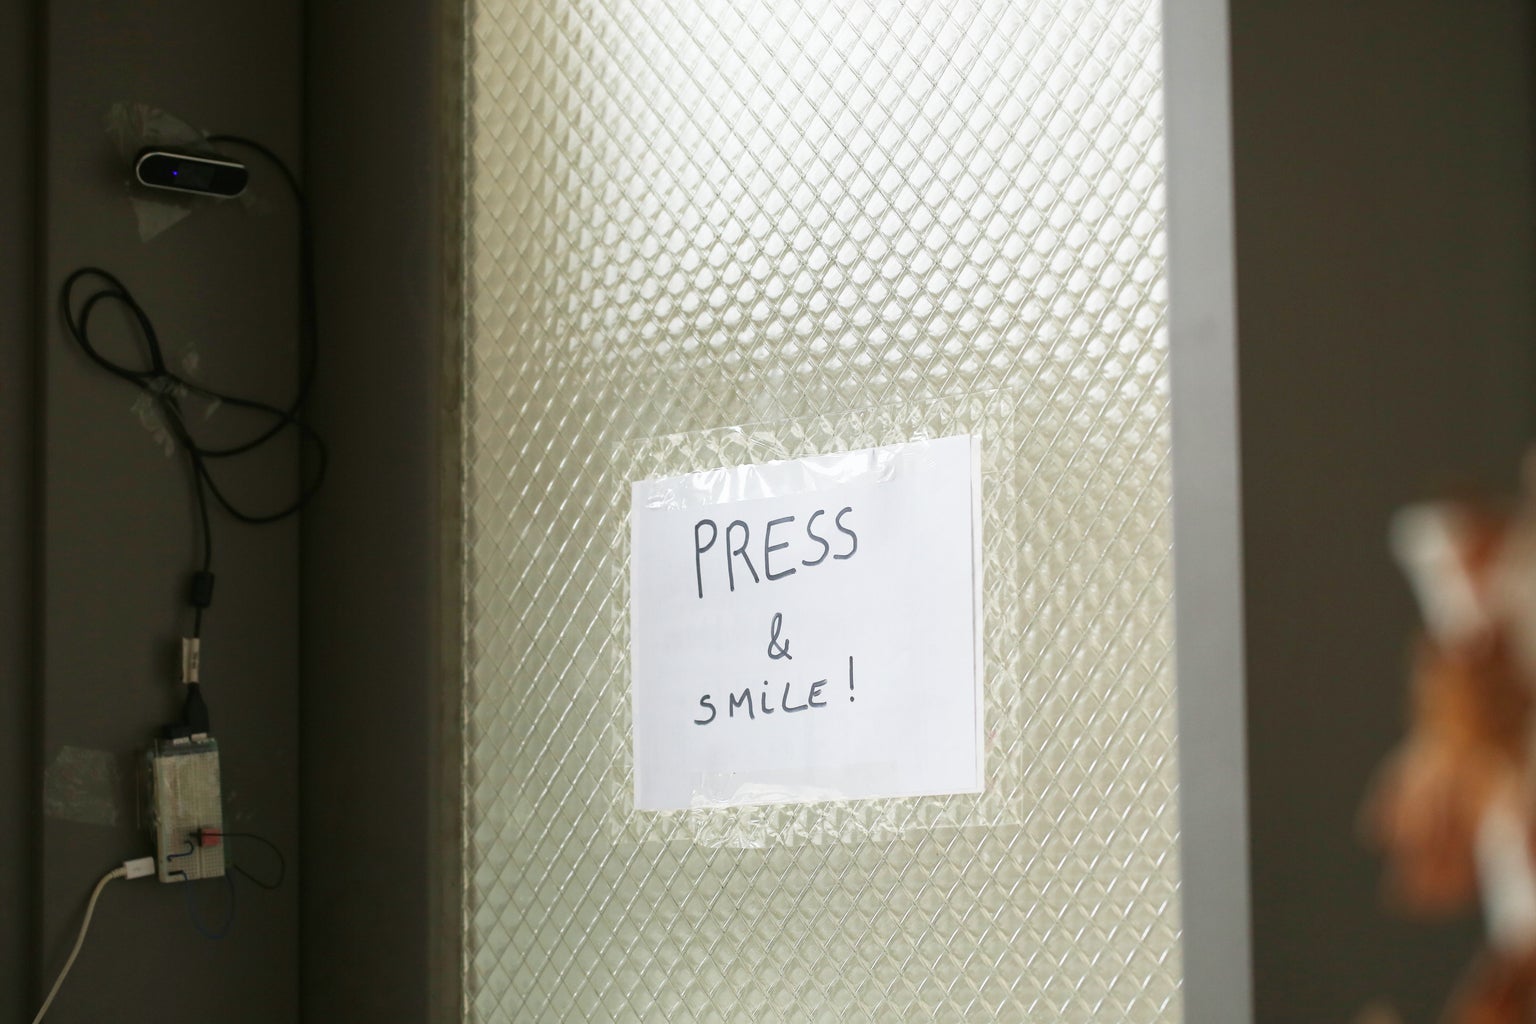


Let's see how it looks once installed!
We hoped you liked this Instructables and are ready to create your own smart doorbell.
If you enjoyed reading and testing this project, don't forget to "favorite" it and to follow us on Instructables and on Twitter!
BETA PROGRAM
You like Prota OS and want to test our newest apps before their release?
Subscribe your email address here to enroll or get further information on our Beta program.
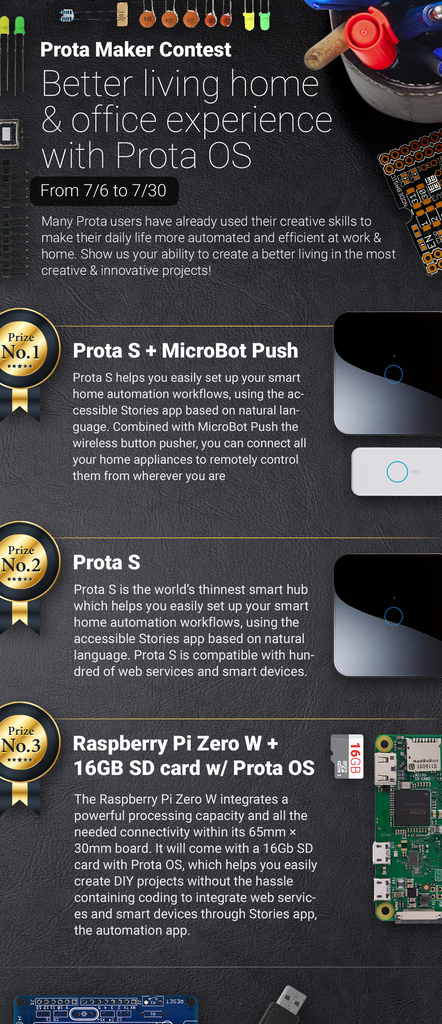
You like our projects? Make your own!
We are currently (and until July 30) running a maker contest. Show us the creative projects you can do with Prota OS and win awesome prizes!
More info here - https://support.prota.info/hc/en-us/community/top...

Participated in the
Microcontroller Contest 2017


