

Introduction: DIY Spectroscope


Save money with this DIY physics project, by making authentic scientific tools with recycled materials.
Step 1: Required Materials:


Now you can see the world in a whole different way.
In this project I'm gonna show you how to make your own spectroscope, for under 5 bucks.
Here is what you need:
a carton or pvc tube, I'm using a toilet paper tube myself.
a blank or recycled CD
two index cards
hot glue
pen or pencil
an utility knife or scissors.
paint
and tape
Step 2: Mark the CD

Mark a circle on the cd using the tube as a template
Step 3: Prepare the CD


Remove the reflective layer form the cd using tape, and cut the circle.
Sometimes is necessary to make a little scratch on the CD before use the tape.
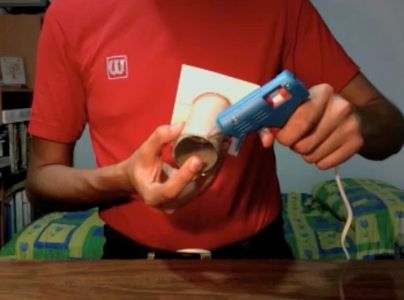
Step 4: Paste the Index Cards


Place the two index cards over one side of the tube, creating a vertical slit and use hot glue to stick it in place.
Step 5: Paste the CD

Paste the circle at the other side of the tube, and make sure the lines of the cd are parallel to de slit between the cards.
Cut the rest of the index cards.
Step 6: Finish

Use some paint and it is ready, don't paint the plastic.
Step 7: Look!
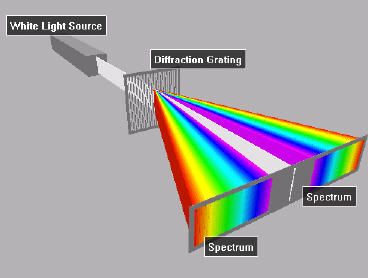
Look thought the cd plastic and you'll be amazed how it is acting as a great diffraction grating, breaking light up into its constituent spectral colors. Now you should see the spectrum at both sides (like the colors of the rainbow).
Step 8: Results


You can see the light spectrum of almost any source of light, but remember: Different light sources produce different spectra. Don't look directly at the sun!
Have fun!
This image: daylight spectrum
next image: blue neon sign spectrum


