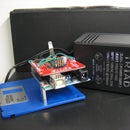
Introduction: DIY Stirrer/Hot Plate
DIYBio has become a big thing lately. Especially with builds like the Pearl Gel Box which literally costs a fraction of what a "scientific" labeled unit would cost. Having access to cheap and easily assembled devices to do garage science really does enhance the whole science community in my opinion. One reason why I think garage science is a good thing is that most people in the hacker space that do garage science like to communicate about what they have done, hence the need for a site like Instructables. Open communication is crucial for science to progress as I am a firm believer that progress is dictated by communication. And, if progress is to succeed, communication must be open. So, thanks to all those that participate in tinkering and are willing to share those endeavors. Scientists could learn something from the community at Instructables.
This build is cheap, easy and voids lots of warranties. With that said, do be careful with this build.
The video of this in action is not embedding properly so a link to it is here.
http://www.youtube.com/watch?v=YKWimlx2_44
Update 02-02-2011: Attempting to embed the video again. If you can't see it, use the link above.
Step 1: Tools and Materials
Materials
1x Modified Computer Power Supply
1x Electric Griddle
1x Computer Fan - Hopefully salvaged from the same computer you got the power supply from.
1x DC Motor Controller
1x Rare Earth Magnets
1x Stir Bar
Beakers and the like to do your science in.
2x Banana plugs - Any color. I'm partial to the Emerson / Johnson brand.
4x Banana jacks - Any color. Again, I like the Emerson / Johnson brand.
4x Spacers
4x 4-40 Screws
2x Banana Cables - Any color.
1x Epoxy
1x Solder
Tools
1x Soldering Iron
1x Wire Stripper
1x Diagonal Cutters
1x #1 Phillips Head Screwdriver
Step 2: Fan
Figure 1:
I salvaged the fans from the computer that I took the power supply from. Computer fans are great for just about everything so never throw them away if you can. I took the fins off of my fan but, it is not necessary. The only thing that is necessary is to glue the magnets into place. I epoxied the magnets on the fan such that the magnetic poles on the left post face South to North and the right post face North to South. So, in other words, the poles are anitparallel to each other.
Figure 2:
The fan I salvaged was a 12V fan which has 3 wires attached to it. In all honesty, I have no clue as to why it has 3 wires or what the difference between a 3 wire and 2 wire fan are. It doesn't matter as all I did was solder the banana plugs to the wires for ground and the other two for +12V.
Step 3: DC Motor Controller
Since the motor controller comes assembled, there is not much to do with it. I put it on standoffs and soldered banana jacks to the terminals on the end opposite the potentiometer. The red and green banana connectors supply power to the controller and the yellow and orange go to the fan. The jacks are positioned funny, i.e. they alternate at 90 degrees to each other. This is because they wouldn't fit all at the same angle so I improvised a bit.
Usually I am not a big fan of having exposed electronics. This mean I would normally put the controller in a project box. Unfortunately I ran out of project boxes so I have to deal with the exposed electronics appropriately. I would highly recommend that any one attempting this build put the controller in a project box.
Step 4: Assemble
Figure 1:
To assemble, I placed the fan under the griddle. Thankfully the griddle is aluminum so the magnetic field lines from the rare Earth magnets will penetrate the griddle. I did have to double up the magnets as was seen in step 2 in order for the stir bar to be affected by the magnets on the fan.
Figure 2:
I then plugged in the motor controller to the modified computer power supply and the fan to the motor controller.
Figure 3:
I then plugged everything in and fired it up.
Step 5: Results
The meter reads 80.6 degrees Celsius. This was after letting the beaker sit on the griddle on its highest setting for less than 5 minutes.
One issue with the system is that the griddle has a Teflon coating on it. The Teflon will make the beaker slide around on the surface so don't go bumping into it. It does work as expected and requires some calibration if you need a specific temperature. But, a really nice feature of this setup is that with multiple fans, there can be multiple spots where one can stir things. Depending on the size of the fan, I could probably stir anywhere from 4 to 8 things on the surface.
A few words of caution.
The entire griddle does get hot so be careful what you place around it and how you interact with it. You can severely burn yourself so wear protective gloves. Also, the griddle stunk pretty badly when I first used it so be sure to use yours in a well ventilated area or better yet, in a fume hood. Finally, be careful with the exposed electronics on the DC motor controller.


