

Introduction: DIY Kayak Paddle Drip Rings


The cheap kayak I bought came with a two-piece paddle that dripped water all over my lap and ran down my arms the first time I took it out on the water. A little bit of web research revealed that you can buy "drip rings" to put on your paddle which causes water from the paddle blades to drop off before it reaches either your hands or your lap.
Of course, since these little flat pieces of rubber have the name "kayak" in the name, the going rate is about $8 for about 3 cents worth of rubber. Being essentially a cheap guy, I decided to make my own and went down to the basement in search of something I could make work.
At first I looked for some flat rubber, thinking I would copy the standard "factory designed" products - but I was concerned about how I was going to cut a flat piece of rubber to just the right size to fit the paddle's shaft without being either too tight or too loose, and how was I going to get it to remain perpendicular to the shaft instead of flattening out and thus allowing those annoying water drips past?
Then I saw a stray "pool noodle" and it HIT me! (NO, not the noodle, at least not since the Great Drunken Pool Fight Of 2010.)
The center hole of the pool noodle was exactly the right size to fit over the paddle shaft, it was easy to work with, it would actually do double duty by keeping the paddle afloat should it be dropped - and best of all it was FREE! (OK, if you weren't at the Great Drunken Pool Fight Of 2010 you can get your own Pool Noodle at The Big Store Which Shall Not Be Named for under $4.)
This ain't rocket science, so feel free to chug a beer and follow me on this...though sharp instruments are involved, so caveat emptor.
Step 1: Materials

Here's what you'll need:
pool noodle (the kind with a 1" hole in the center)
masking tape
large sharp knife (preferably serrated)
kayak paddle
Step 2: Mask Off a Cutting Guide on Your Noodle (sounds Naughty, Doesn't It?)

Measure off an inch or two from one end and wrap masking tape around the pool noodle as a guide for cutting. Make it nice and square as it goes around the noodle. (Say that 3 times fast!)
I just used two widths of 3/4" tape to make my drip rings 1.5" wide. (Yes, I know, it's actually 3.81cm for you Euro folk.)
Step 3: Cut the Noodle! Cut the Noodle!

Using a gentle sawing motion cut around the noodle, following the tape.
Can you cut straight across? Well, yes, you can, but you're likely to get an uneven cut, and we only want the best, most squarely cut noodle chunks for our drip rings, don't we?
Now go back one step and make another one. Heck, make pairs for all your paddling buddies, you'll be the life of the paddle party!
That reminds me - paddlers should stay out of politics. Nobody pretends to prefer a political paddling party, capische?
Step 4: Installation
Remove the tape from the noodle chunks and slide your new drip rings over the ends of the paddle shaft(s) and up to a position about 3-4 inches from the paddle blades.
If you get it too close to the blade then it's likely that the drip ring itself will go in the water on the power stroke and dump it's own load of water on you on the return stroke, thus defeating the purpose.
On the other hand if you get it too far from the blade then it'll get in your way as you frantically try to paddle faster than the current that's ABOUT TO DRAG YOU OVER THE DAM TO YOUR DEATH!
So don't do that, either.
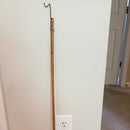
Step 5: Done!

There you have it!
While you may not survive your next kayak adventure, at least you'll die with a dry lap, or at least it won't be river water that's got it wet. I did my part.


