

Introduction: DIYers PVC Organizer Workbench/Table


Well being a DIY enthusiast PVC is the material of choice for me in almost all of my DIY Projects. Due to the flexibility, reliability and how easily this material is available in countless shapes sizes and colours this material is available in it helps me a lot to get most of my projects done.
So In this Instructable we are going to built a small DIY workbench or table completely out of a 20 feet PVC pipe, a plywood sheet and a whole bunch of rivets.
So if you like this project then don't forget to vote my project for the PVC Contest.
Lets Get Building....
Step 1: Required Material


The only material required for this Project is:
- A 20 feet length of 4inch diameter PVC pipe
- A sheet of 3mm plywood
- A handful of 3.2mm aluminium rivets
- Etcs
Step 2: Slicing the PVC Pipe and Cutting the Legs


First of I started with slicing the PVC pipe in small lengths so that I can easily cut the required parts without dangling with the whole length on the mitre saw bed.
After slicing the pipe in considerably smaller lengths,I started off by cutting the legs for the Table. There are going to be four of them, each measuring 28 Inch in length.
Note:
To make sure that each leg is exactly identical in length as compared to the other ones, I have made a temporary jig using a spare piece of 3mm plywood sheet held in place using a clamp on the mitre saw table. This allows me to limit the cutting length on the mitre saw and produces identical length almost each and every time.
Step 3: Cutting Slices for Table Top


Now here comes the most intense part of this built. As per my plans I have to cut down 29 slices each having a height of nearly 3.5 inches. So again I have set down the jig as eleborated in the previous step to make the overall process fast and accurate.
I have cut down 29 pieces out of the PVC pipe and arranged them in order along with the legs to have an idea about the feel of the actual dimension of the table.
I decided to keep the size of the table such that it has a maximum of 7 PVC pipes slices in columns and having 5 rows. The legs of the table goes at the corner of the table and the PVC slices comes in-between them. The arrangement is made such that the middle slices are arranged in hexagonal formation thus touching 6 corner along with their neighbouring PVC slices.
This formation seems to be the most strongest amount the rest possible formation, more likely a honeycomb type formation.
Step 4: Cutting the Plywood End Caps


To close bottom end of the PVC pipe I decided to go for a 3mm plywood sheet.
First off I sliced down the sheet of plywood into smaller sheets so that I can sandwich three to 4 sheets at the same time and cut down the circular pieces for closing the ends of the pipes.
One easy way is using a circular saw but the problem with this tool is that it leaves an unwanted hole in the middle of each piece which is not favourable in this case so I decide to go with a jig saw..... yes a bit more efforts but that seem worthwhile...
I cut down nearly 40 pieces using this technique and kept the diameter a bit larger which will be latter sanded down ensuring a smooth flawless finish.
Step 5: Washing the PVC Parts


As I have cut down most of the parts for the table, so during the process them seems to get some stains.
Well the best part about PVC is its flexibility so I decided to wash these parts which ended up giving each part a clean look.
I decided to go with the original look of the PVC parts in this project, no paints nothing .... just the way PVC is .... which literally is quiet nice when neat and clean.
After washing each part I let them to dry in a clean place.
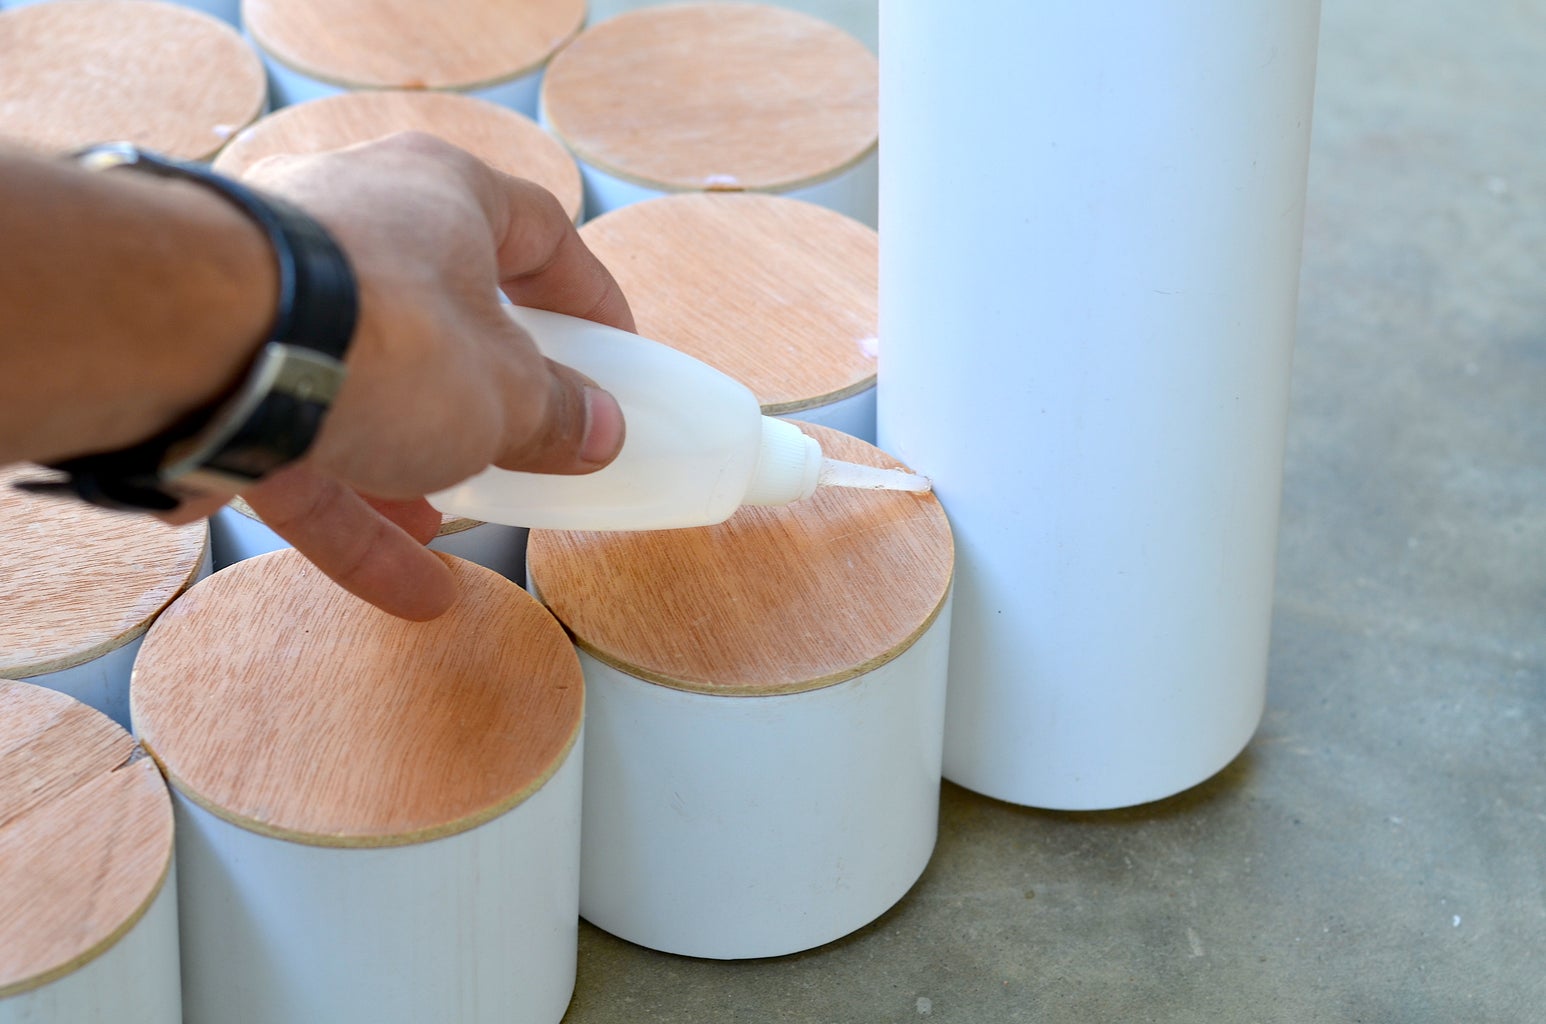
Step 6: Gluing the End Caps


After cleaning the PVC parts I started gluing the end caps to each leg as well as each clice for the table top using some super glue to fasten the process and give each piece a cleaner look.
Each piece is properly glued ensuring that it wont come apart under some weight.
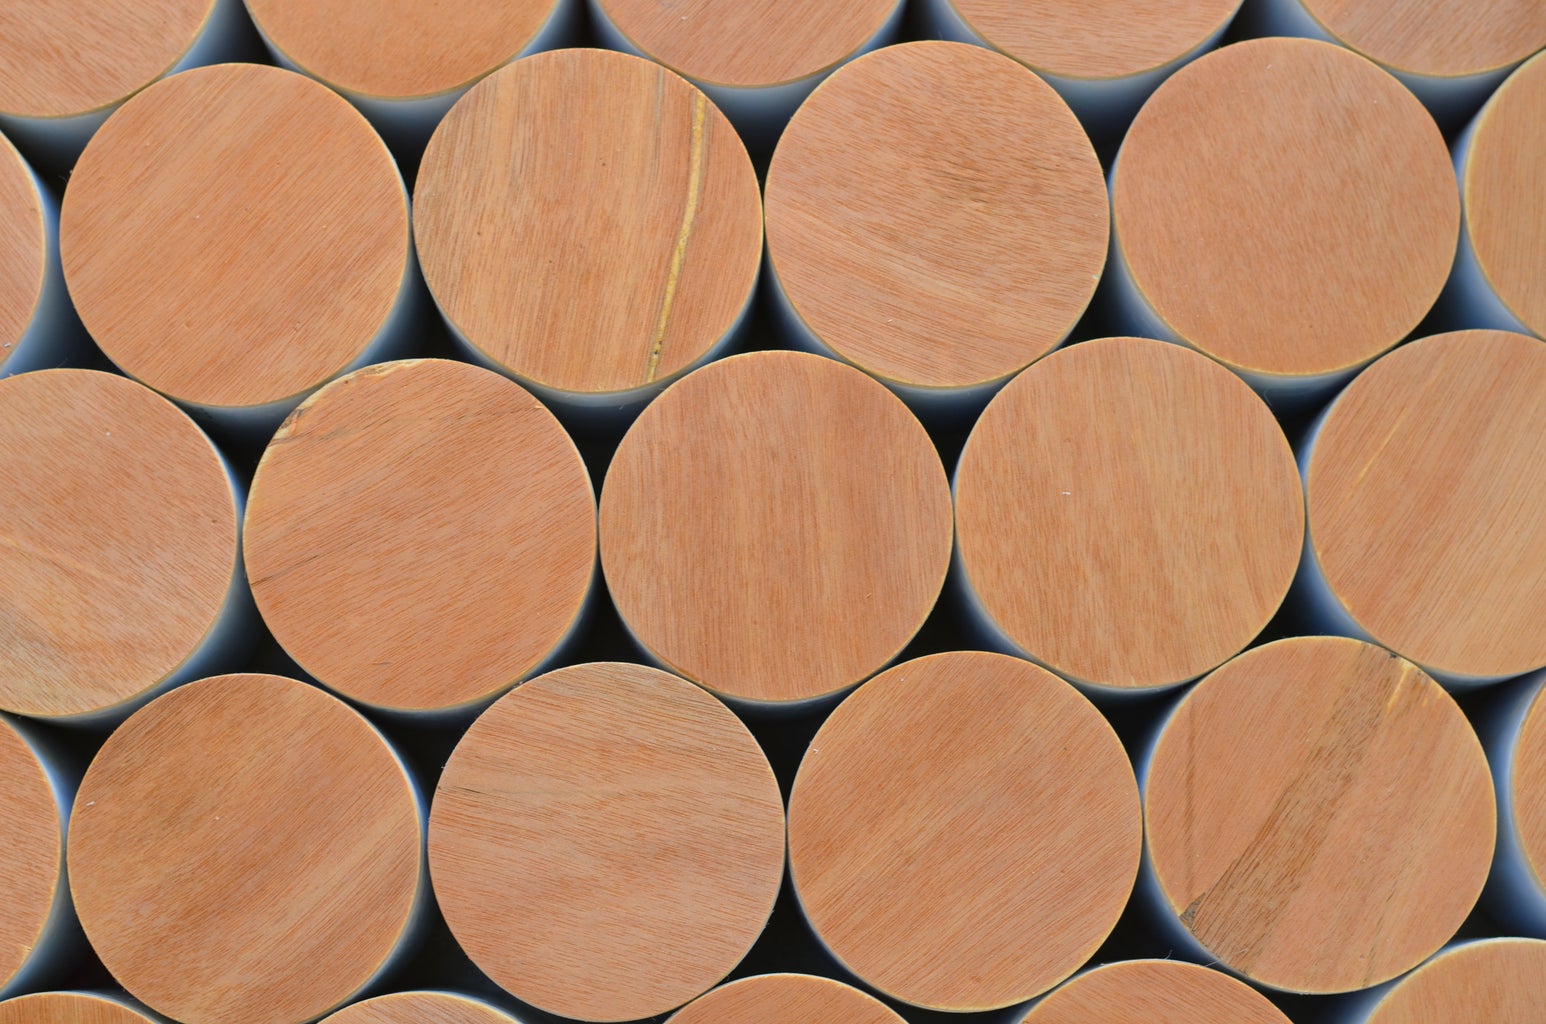
Step 7: Sanding the End Caps


As in the begging I kept the end caps a bit larger than the PVC pipe, so followed by the gluing process I have done a lot of sanding to ensure a smooth and perfectly round finish.
First I have sanded the larger edges using a file and then later a fine finish is given using a belt sander.
After a hole lot of sanding I ended up getting a bunch of nicely finished parts ready to put together.
Step 8:


Followed by the sanding process is the staining for wooden parts. It gives the wooden parts a classic look and weather proof them as well.
After the varnish is dried the wood PVC combo looks amazing.
Step 9: Drilling Holes


Initially I was planing to glue all the parts together with some super glue, but at this stage I decide to rather jump to a more reliable method of joining everything together and ended up finding the use of a whole bunch of aluminium rivets that are laying around in my workshop.
As the structure is a hexagonal type so I have to ensure that each piece have got the right number of holes and most importantly at the exact place.
Again to speed up the whole process i have made a jig to point the holes on each piece of PVC using a card sheet. I carefully pointed six equally spaced points on the card sheet by dividing the circumference of the PVC pipe into six parts. Later I formed a ring of the card sheet using some tape.
Now I have marked and drilled holes on each piece depending upon the position of each piece. The No of holes and the PVC slices for this formation is given below:
- 2 holes: Four legs
- 3 holes: Two pcs
- 4 holes: Ten pcs
- 5 holes: Four pcs
- 6 holes: Thirteen pcs
After drilling all the holes carefully, all the parts are now ready to get assembled.
Step 10: Assembling the Table


I started assembling the parts from the centre PVC slices having 6 holes. All the parts for the table top and the legs of the table are joined using 3.2mm rivets.
First off I have attached all the PVC slices for the table top and then latter joined the four legs at the corner using two rivets for each of them.
Using the aluminium rivets helps me to get. the job done neatly in a limited time and also gives the whole table a firm hold.
But there occurred a problem, as I have joined all the pieces from the holes that were near to the top of the PVC pieces so the whole table seems to bend in a curved shape towards the edges of the table.
Well we are going to solve this problem in the next step.... so keep rolling....
Step 11: Strengthening the Base


TO flatten the table top and to give the whole structure more strength I have used a bungee cord to first flatted the whole table structure and remove the bend.
Then I started by gluing the edges of all the PVC pieces using super glue which added a considerable strength and stability.
Later I have made a base supporting structure using four sticks that I have cut out of a 1 inch thick lumber having a width of 1/2 for each sliced stick. I have formed a rectangular structure with these wooden sticks.The two longer sticks are screwed to the plywood end caps by drilling a hole and using some wooden screws and using a washer in between to ensure that the screw wont tear the wooden sheet.
The shorter wooden sticks ate screwed to the PVC legs and then in the midden to the longer wooden sticks. This gives the whole structure a firm support and stability.
Step 12: Making the Drawers


I have decided to built three drawers using the remaining PVC pipe that is left after cutting the pieces for the table top and the legs of the table to fully utilise the whole 20 feet length of the PVC pipe.
First I have cut down five pieces each having a length of 11 inches. Three of these pipes are then glued with 3mm plywood end caps that we have cut down earlier. These pieces are now going to act as drawer holders and they are now screwed to the base frame just below the table maintaining an equal distance between each piece.
Later the drawers are made by slicing the remaining two PVC pipes into half. Now I have cut down semi circles for closing both end of the drawers and followed by a circular plywood piece to serve as the drawer front for each drawer. The drawer front measures a bit larger than the diameter of the PVC pipe to give it a nice look.
Each drawer front is then drilled and mounted with a polished cap nut to act as a handle for drawer.... a neat little one ...
Step 13: Glass Top


The table Top is made out of a 5mm thick lear glass sheet that I got from a hardware depot near to my house.
The glass top have the following dimensions:
- Width: 18 inches
- Length: 28 inches
- Thickness: 5mm
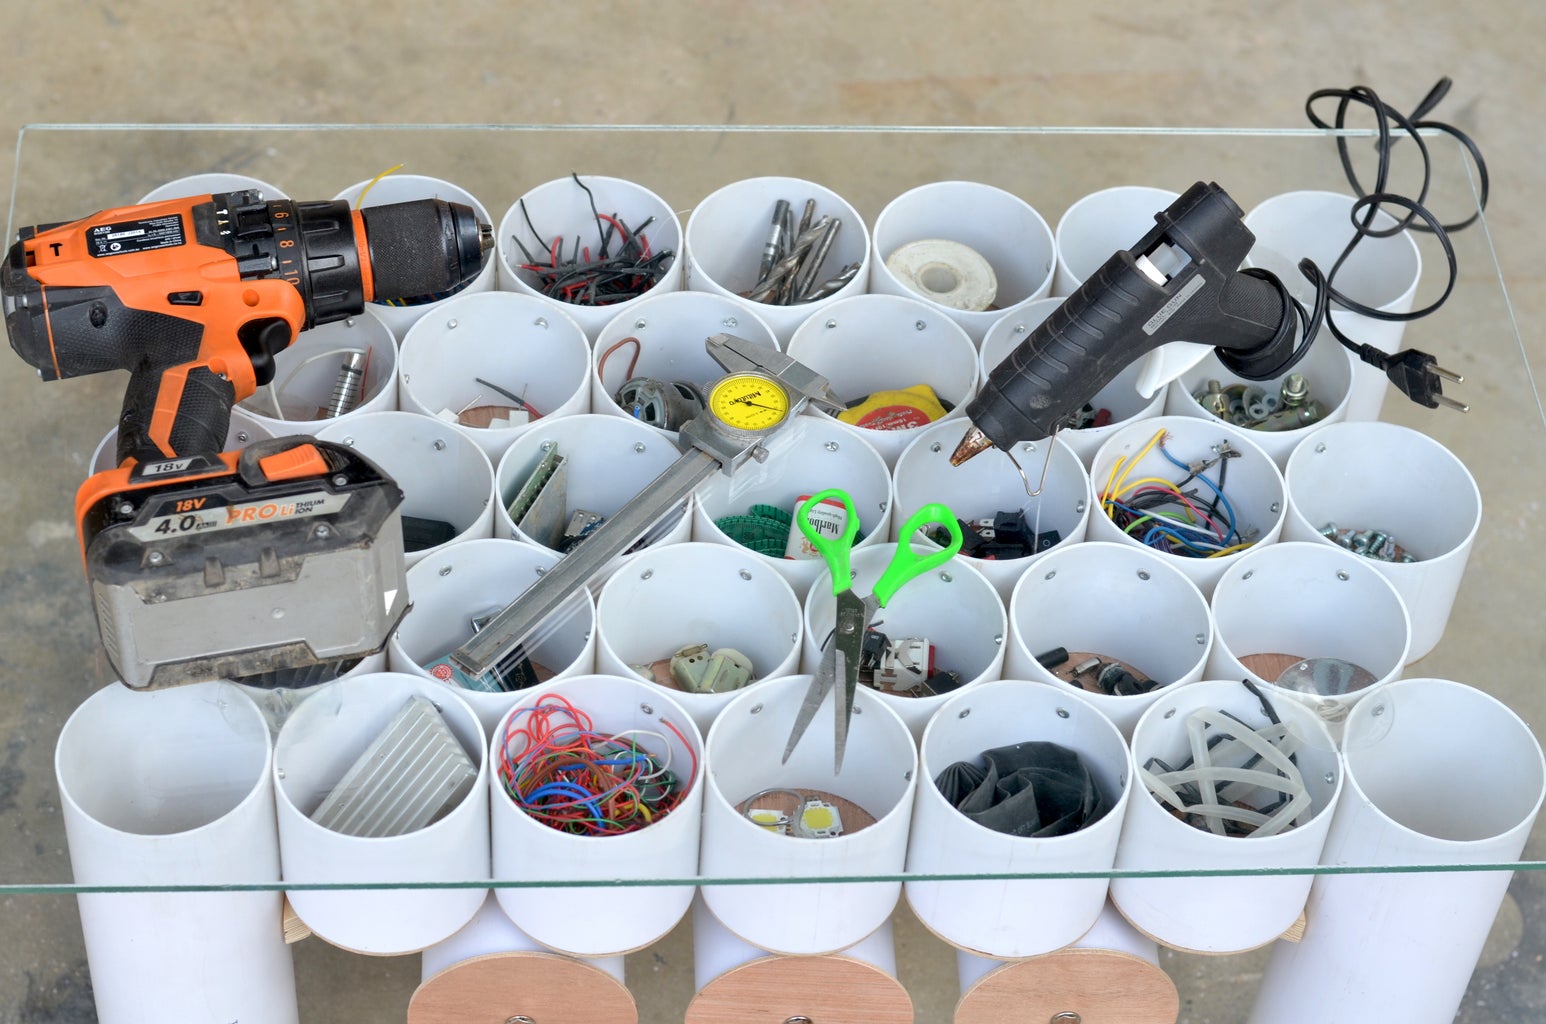
The glass top is placed on the table using four rubber pads making it to safely keep the glass in place while making is easier to remove the top to access the partitions just beneath the table top. These rubber pads fits tightly in between the spaces in the PVC pieces.
The idea behind using a clear glass is that we can use any background colour by placing a coloured cardboard sheet while having a smooth glass top to work on. Still in the stock condition the table top is adorable to have it as a background while shooting some DIY project videos.
Step 14: The PVC Table Lamp


To give this whole table is finishing look I decided to built a removable and movable table lamp using 1 inch PVC pipe and a bunch of PVC joints.
The lamp measure a 12 inch high and 5 inch wide approximately so all the pieces are cut accordingly as shown in the pictures above.
The base is made using a T joint having a slit cut out of it which make the whole thing movable around the edges of the table top.
The lamp is made out of a 12v SMD LED that are super bright and are cheaply available. The LED is simply connected to the adapter chord having a 5mm jack that can be plugged into any 12v adapter to get power from. The LED is glued to the top end of the PVC joint and the wire come all the way through the PVC pipe and comes out at the bottom T joint.
This table lamp looks super neat and handy.
Step 15: End Results


As always, the project ended up nicely due to the fact that this super amazing material act in thousands and thousands of new ways for DIYers.
This whole project took me around 4 to 5 days to finish from just a bare idea of building myself a workbench for my small DIY projects and I am really happy with the fact that the whole project improvised due to the flexibility and convenience offered by PVC pipe.
So if you like this project then don't forget to vote my project for the PVC Contest and your suggestions are more then welcome.
For more DIY projects don't forget to visit to my youtube channel and subscribe to it.
Regards.
DIY KING

Runner Up in the
Workshop Hacks Challenge 2017

Participated in the
PVC Contest 2017

Participated in the
Furniture Contest 2017


