

Introduction: DORM ROOM GUITAR (my First Custom Guitar!)


Introduction
I am a sophomore Technology Education undergrad at the college of New Jersey. This past fall I took an introductory materials course and decided to push my skills and make a playable electric guitar for my final project. It was a sporadic decision; I only gave myself two and half weeks to make the whole thing. I have had wood working experience in high school but this was by far my most extensive project with a lot of room for error. But I pulled it off! In just two and half weeks I created a custom guitar (not the neck) in a college lab and my dorm room that actually looks ok and to my surprise, actually sounds pretty good. The guitar is not finished; there are plenty of finishing touches left, which I plan to do once the spring semester is over in May. This guide however, is my step-by-step guide beginners guide on how to make a custom guitar of your very own! I apologize for the lack in pictures when actually making the cuts, I was working alone for most of this and everything happens so fast when you’re in the moment, the last thing you remember is to take pictures. Happy woodworking everyone!
Project Overview
Before we get started, I want to lie out each step of the build process so we can wrap our mind around the whole project.
1.Materials- Get your materials first, trust me, I know it sucks to dish out the cash up front but it is important to have all of your parts
before you start when you make anything custom. Everything is fabricated to fit your parts.
2. Design and Templates - Figure out the general design of the guitar up front. You will wind up making small adjustments as you go
along but you need a general direction to shoot for. Once you have your design you should make templates regardless of whether you
plan to make one or one hundred guitars. I’ll cover templates more down the road.
3. Prepping the Wood- You may or may not get a perfect slab, regardless, there will still probably be some wood preparation.
4. The Pick Guard- Note: This step does not need to be completed yet, however I do recommend it.
5. The Neck (part 1)- The neck is arguably the most important part of the guitar, might as well get the cuts out of the way first. (NOTE: I
did not make a neck, I purchased a neck, maybe I’ll make one on my next guitar ☺ )
6. Routing out the Body- Its easier to align templates up to a straight square edge, thus why I chose to do this step early in this
process.
7. Cutting out the Body- FINALLY! It looks like a guitar!
8. The Edges and Sanding- Oh how tedious, but when its all done it makes you look damn good.
9. The Neck (part 2)- The bridge was the hard part, now its time to attach the neck!
10. The Bridge- This where boys turn into men, make it or break it.
11. Wire it Up- Time to make her speak!
12. Mock Up- But will she actually play?
13. Finishing Touches- The artistic standpoint.
Step 1: Materials


Materials
These are the materials I purchased for my guitar. The materials really can vary quite a bit, if they do vary, any measurements I include in this tutorial probably won’t work but that’s ok! That’s what makes it custom!
Hardware
• 2 black passive humbucker pick ups
• 3 way selector switch
• Black input jack
• Epiphone style curved jack plate (black)
• Black tuning keys (6)
• Black fender style neck plate & screws
• Black tune-o-matic single piece wrap around bridge
• Pack of Fender Stratocaster Pick guard screws (black)
• Black “glass” (plastic really) Gibson style knobs
• Gibson (1) volume and (1) tuning pot
• Bone string nut
• 10 gage nickel guitar strings
• Dunlop strap lock strap button (2)
• Preassembled hand made unfinished guitar neck (epiphone style) purchased from songtielun on ebay
Lumber, Build and Finish Materials
• 22”x18”x2” hard white maple slab
• 8’x6”x.5” milled walnut board
• 3’x4’ sheet of Masonite
• 22’x30” pink ¾ foam
• ¾” wooden dowel
• Danish Oil
• Tru Oil
My overall cost for this project was around $300
Step 2: Design and Templates


Design and Templates
So you need a design. I often refer to my guitar as a frankenguitar. That’s because it is an awesome combination of Fender, Gibson and Epiphone style guitars. The body and pick guard are of the Fender Stratocaster, the bolt on neck is of the Epiphone style and most of the wiring and electronic components are of the Gibson style. I had reasons for my design though, I swear. I chose the fender style body because I wanted to make the guitar one solid piece, the pick guard allows me to have a ton of space to hide my electronics and cover all of my routing. Its also an easy shape to work with over all and I had a strat on hand for inspiration. I chose the epiphone style bolt on neck, for one reason because I prefer the 3 and 3 headstock compared to the 6 in a row strat style. I also knew I wanted to have a bolt on neck so I could play with the neck angle and adjust it as I went along compared to have a glued neck, I wasn’t ready for that, nor did I have the time to play around and prototype it. And as for the Gibson wiring, its modeled off a les paul junior. I love the humbucker sound and the simplicity of one knob for tone and one for volume. For my style playing, that’s all I need.
Great! You have a design! Good job! Hopefully you put a lot of time into and didn’t rush through it like I did. I did however make a vector rendering of my design and it really helped me get my thoughts together. Regardless whether you’re going to make one guitar or one hundred, make templates. So now we need templates and we need to test our tooling. If the template is perfect, your guitar will be perfect and Masonite or MDF are a lot cheaper that wooden slabs. Also, when routing out the neck slot or inside of the guitar, you can use a collar (see image) that will follow along the edge of you template. NOTE: the collar adds 1/8 or so of material so the templates need to be a bit big. I made 3 body templates. One that was a rectangle with the neck the width of the neck cut out. I did all the cuts on that template using a table saw and jig saw for the last horizontal cut. I made a template of the overall body outline that I cut out using a bandsaw. This is really so you have a solid template to trace over 100+ times. Now, I used a physical fender Stratocaster to trace onto the Masonite. Don’t do that. If you’re modeling off of a guitar I’m positive you can by full scale plans with all of the measurements for less than 20 bucks online. That will give you a sold paper template to make all of your Masonite temps with. I used all my parts and a strat because I was short on time and not really trying to make an exact replica of anything, yet not trying to reinvent the wheel at the same time. My next template was the body, but with the inside routed out where all the components are stored. I left tabs off to the side of the body on this one where I screwed (or taped) the template to my slab of wood. My last template I made was of the pick guard. You can see from my pictures I used MDF instead of Masonite to make that template, Its what I had. I don’t recommend it because I had to switch collars constantly due to the difference in thickness, stick to one uniform material. To cut this template out I used the bandsaw for the outer cuts, forstner drill bit and skill saw for the pickups and drill press for the holes. Then made it perfect using an oscillating sander.
Once your templates are finished and PERFECT, make the guitar out of material. I used foam because it responds great to the router. If I had used thicker foam it may have been more realistic. MDF would work great as a test as well if you can get it thick enough. The more perfect this is, the better everything else will fall into place, I promise.
Step 3: Prepping the Wood


Prepping the Wood
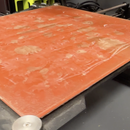
So my maple slab was gorgeous. I just had to square all of the sides with a table saw and jointer. However, I decided to be fancy and add a “racing” stripe of walnut up the side to contrast the maple and compliment my walnut pick guard. To do this, I cut the maple using the table saw about 6” from the edge. I then cut a 1/2 “ piece of walnut off my board. I ran all sides through a jointer and glued them all together and clamped the hell out of it for two days. After it was dry, I had to run the board through the surfacer multiple times until the slab was 1.75” thick. I think squared up all of my sides again and the slab was set. For my pick guard, I had to book match two 6” wide pieces of walnut. Book matching is when you align two pieces of wood so the grain patterns are inverted away towards the edge and they are glued at the edge. After I book matched the pieces, I ran it through the surfacer so it was a flat board. I then re-sawed the board 1/8” thick. I did this by using a bandsaw with a really wide black and two straight edges. It’s extremely important to make sure you keep even pressure and speed when pushing the board through, watch your fingers! Also, makes the piece of wood isn’t too tight in the straight edges. A piece of paper should fit between it and the edges. That will keep the wood from binding. I recommend making multiple pieces incase you mess one up like I did, numerous times. After re-sawing a piece of wood, clamp the hell out of it flat. It will roll if you don’t. Keep it clamped until you screw it onto the guitar.
Step 4: The Pick Guard


The Pick Guard
So this step doesn’t really need to be done this early in the process, I recommend doing it first so it is out of the way and so you have it when you’re ready to start test fitting everything together. I also did mine while I waited for my maple slab to dry after adding the walnut inlay. I took one of my 1/8” walnut pieces and traced my template onto it. I cut the outer shape out using a bandsaw, then I drilled ½” holes using a forstner bit into where the pickup holes are. I finished cutting the pickup holes out using a skillsaw. Because I made a template, I probably could have used a router with a collar to cut these holes out looking back on the job. I then drilled my holes using a drill press. I needed 2 ¼” holes for the pots and one ½” hole for my switch. I then sanded the edges smooth using an oscillating sander. I then tapered my edges super thin by hand. First I cut material by using 60 grit paper, then I made it smooth using 220 grit. It took a while but I felt much more comfortable doing the process by hand because of how thin the pick guard was. I then clamped it to a flat board and put it aside until later in the process. I know I mentioned earlier I ended up making up multiple of these. That’s because I cracked two and one was the wrong size because my original template was not perfect!
Step 5: The Neck (part 1)


The Neck (part 1)
It is important to create the neck groove early in the manufacturing process for a few reasons. The neck should be fixed to guitar somewhere between the 14th fret and the 16th fret. Once the neck location is set, you can draw the guitar around it and ensure that it is in the proper location. If the neck groove is slightly off center, compensation can be made when placing the location of the guitar body. To create the groove, we will use the long, straight template. Screw the template to the slab of wood in locations that will be scrap. I used some duct tape in locations I could not place a screw. Now choose a router bit that the diameter is the same as the curves on the bottom of your neck, that way when the corners are routed out, the neck will fit snug press all the way against the back of the groove. Once your template is secure and squared up to the right location, its time to cut away material! Using a plunge router with a collar attached to it, begin to to cut material. Remember, the collar will take up some room, so the template should be approximately an 8th of an inch larger than the width of the neck. You want this groove to be tight. The neck should slide at least two and half inches into the groove, but that depends on the neck style and design of the guitar. As far as the depth of the groove, that will be determined by the thickness of the neck, as well as if part of the fret board hangs over and if a pick guard needs to slide underneath the fret board.
Step 6: Routing Out the Body


Routing out the Body
On my guitar, the pick guard covers up the internal pocket housing the electronic components like a fender Stratocaster. It’s also important to remove material on the inside of the guitar to lighten it up and add tone regardless of the electronic set up. To create this pocket, I used my template that has the pocket shaped cut out of the center and I used a plunge router fixed with a collar again. I left tail pieces coming off of my template so I could place a screw through it in scrap locations. Again, I used tape in a few places I couldn’t place a screw to secure it. I first routed out the perimeter of the pocket to depth. I followed along my template and cut about a ¼” away at a time. After the perimeter was routed out, I began to cross back and forth over the pocket removing the interior of pocket. This is a slow process removing the material. My router was not wide enough to travel across my template smoothly so I used insert pieces and routed out the interior in sections. I also plan on adding a N-Tune on board chromatic tuner down the road, so I wanted to add a trap door on my guitar so I can replace a battery without removing the pick guard. This would also be useful if you choose to use active pickups. To drill this trap door, I used a large 2” forstner bit. I then routed a lip around the outside of the hole approximately a quarter inch deep for my door to rest on and be bolted onto the guitar. There was also a section in the back of my interior pocket that I routed out deeper to accommodated room for the N-Tune chromatic tuner battery. After routing out the interior section of the pocket to the same depth of the perimeter, you’re set to go!
Step 7: Cutting Out the Body

Cutting out the Body
You did it! You’ve waited to so patiently through this process and now its time to finally make this slab of wood look like a guitar! Whoo Hoo! So, throw on your body template you made and trace it onto the slab if you haven’t done so already. Then its off to the band saw to cut it out. This can be a relatively rough cut. You’ll end up sanding this thing for days (not literally but it’ll feel like it).
Step 8: The Edges and Sanding

The Edges and Sanding
So this is tedious but you’ll be so excited to see the end result it won’t really matter. Now that the guitar is rough cut, its time to smooth it out and add the curvature to the sides and surfaces. I used a combination of disk sanders, belt sander, oscillating spindle sanders and a ton of hand sanding. First I removed the excess wood around the edges all the way up to my template lines using a disk sander for the outer curves and a spindle sander for the inner curves. After the guitar was the right shape, I started working on the curve that digs into the back that rests against the player (see the back of a Stratocaster). I first used a belt sander to work in the side, then resorted to a oscillating spindle sander with a very large spindle on it. It took a while and a bit of handling but I was able to work away the material into a pocket. I then did a similar process on the front bottom of the guitar, making the bottom curve down for the forearm to rest. I created both of these curves by eye and looking a pictures or other guitars for inspiration. Next, it was time to bevel the sides all the way around. I was first thinking of using a table router, and if I did that before and of the other curves it probably would have worked I did the edges entirely by hands sanding. I started with a 60 grit and worked my way up to 220 for now.
Step 9: The Neck (part 2)


The Neck (part 2)
So now your guitar looks like a guitar, you’ve probably put it on your lap and air strummed it a least 5 times now, lets add a neck to that. Bolting on the neck is pretty straight forward. The hard part has been done when routing out the slot. Many guitars do not have a flat neck, they often angle back a few degrees or so. The neck slot could be cut at that exact angle, or shims could be added to achieve that angle. I’m not entirely sure of what I want, so I bored out a ½” hole in the center back part of the neck slot using a forstner to place a ½” dowel or bolt so I can adjust the neck angle. I purchased a fender stratocaster neck plate that came with my four screws and a plastic plate holder. You’re going to want to position the plate centered in the slot area. Make it equal from both sides and the edge and back of the slot. Then trace out where the holes should be using the plate itself. Now we want to drill pilot holes for the screws. I recommend using a drill press if available; drilling the holes straight through the body is crucial. After drilling the pilot holes, clamp the neck to the body in place. You can drill pilot holes into the back of the neck too at that point using a hand drill through the pilot holes you’ve already drilled. To clamp my neck, I put a piece of foam and masonite over the fret board and a paper towel on the metal plate, then a c clamp clamping it all together. The foam, Masonite and paper towel are just for protection against pressure and scratching. Once it is all in place and straight, grease up the screws and screw them in. I used a screwdriver rather than hand drill because it was rather easy to screw them in once they were greased and the pilot holes were drilled. Once its tight, remove your clamp and wipe of the excess grease. Now she really feels like a guitar!
Step 10: The Bridge

The Bridge
So for me, this may or may not have been the most stressful part. It was probably because I have done so much already, its make it or break it and it’s a long way down. The position of the bridge depends on the scale of your neck. First measure the distance from the 12th fret to the nut of the neck. Mine is 12.5” inches from the nut to the 12th fret, making the scale 25” (double that distance). I am using a tunomatic bridge that allows me to adjust the angle and saddle position. The bridge saddles should be located the same distance from the 12th fret as the 12th fret is located from the nut, so 12.5”, or 25” from the nut. When measuring this, the saddles should be all the way forward. It was important to bolt the neck in first because we can now use it to draw our guidelines. Using a ruler, draw lines straight down either side of the neck, then draw a line across at the 25” mark. Your bridge will be wider than the guidelines that you have drawn, it should be centered on the guide lines so the posts should be equal distances from both guide lines. My bridge also allows me to adjust the angle of the bridge. If yours does not, may guitar makers drill the bridge holes at a 3 degree offset, where the post of the low e string is 3 degrees farther from the neck. My bridge is also a single piece wrap around bridge. I chose this bridge on purpose because it was clean, simple and allowed for the maximum intonation adjustments, which I figured, would be crucial because this is my first time and I didn’t want to bet on beginners luck. If you are using a tail piece, I would do some more research about the tail piece location. I know many guitar makers actually install strings and using them as an alignment tool when actually placing the bridge on the guitar to be sure it will intonate right. After you have the exact location of where the posts should go, its time to drill. Use a drill index card or calipers to figure out which size bit you will need for the posts to slide in snug, Place a piece of tape, and or adjust the depth stop of the drill to show when the hole will be deep enough for the posts. It is better to drill a slightly deeper hole than a slightly shallower hole. Using a drill press, drill your postholes. Drill nice a slowly, be sure to pull the bit in and out to allow chips to exit the hole. After the holes are drilled, we need to drill a hole going from inside the interior electronics pocket to a posthole. This will be a wire that gets soldered to a post to ground you connections to the bridge. I drilled the hole at the very bottom of the posthole so it does not get in the way of the post sliding in. After that hole is drilled, scrap the paint off of the bottom of your post and solder the wire to the post and feed it through the hole. Now using a mallet, hammer the posts into the postholes. If the placement is right, the bridge should slide on and off the posts with ease.
Step 11: Wire It Up!


Wire it Up!
Congratulations! The hard part of this manufacturing process is over. You can breath, you made it. Now its time to do some wiring to make this puppy talk. Guitar schematics are located all over the internet. Gibson supplies official schematics for just about any guitar they have ever released. I wanted this guitar to be clean and simple. I wanted two humbuckers, one tone knob, one volume knob and one selector switch. First, I had to drill the hole for the input jack. I chose to use a Gibson or Epiphone style input jack on the bottom. If you would like to do a fender style jack on the face of the guitar, I recommend using a plunge router and template to create the slot rather than drilling it. To create my jack hole on the edge, I mounted the guitar body at a 45 degree angle on a drill press table turned 90 degrees. I then used a ½” forstner bit to drill a hole through the side into the interior pocket of the guitar. Warning! This will drill an oval! If you want to drill a perfect circle you will have to rotate the guitar after drill the initial hole onto the surface. I was using an oval plate, so it worked out well for me. Like any other hole we drilled on this guitar, slow and steady, pulling the bit on and off of the guitar to allow for chips to exit the hole. Now that the holes are drilled, lets wire up the pick guard. I placed a sheet of non-conductive vinyl on the back of the pick guard to protect the wood surface from the solder. First, screw the pickups into the pick guard, as well as screwing the pots and switches onto the pick guard. I then soldered the positive lead off of each pick up to the top (neck) and the bottom (bridge) of the pickup switch. Then solder the middle pin on the pickup switch to the left pin of the volume pot (looking a the bottom of the pot). Then solder the middle pin of the volume pot to the positive tip of the input jack and the right pin of volume pot to ground. Solder the left pin of the volume pot to the center pin of the tone pot as well. As well as soldering the right pin of the tone pot to ground, solder it to the back of the pot and a .22Ω capacitor. Now connect the remaining ground connections together, including the one that is connected to the bridge.
Attachments

Step 12: Mock Up!


Mock Up!
Now its time to test it out so we can make any last minute fixes and changes to the design before the finishing touches. Screw on your pick guard and make sure you use pilot holes! I hate to admit it, but I cracked my pick guard by rushing through this process. I would also countersink your screws. In these pictures, mine are not countersunk into the pick guard but I plan to countersink the holes before adding the finish. Bolt on your tuning keys onto your headstock and string up the guitar. To intonate the guitar, open tune the guitar, and then check to see if the note is the same an octave down at the 12th fret. To adjust, slide the saddles on the bridge. You may also want to adjust the action, or the height of the strings. To do this, it’s a combination of adjusting the neck angle using the dowel or bolt we placed in earlier, the height of the string nut and the height of the bridge. Changing any of those will change the intonation of the guitar. It really just took a lot of playing with to make it sound right and be intonated right. I left myself a lot of wiggle room when setting up the bridge location, which made the process easier. There are numerous guides and videos online about how to intonate a guitar. I highly recommend watching a bunch because there are so many different techniques in doing it. Once it’s tuned, plug it in! Your pickups probably have height adjustment screws, use them to adjust the space between the pickups and the strings. It’s important to make sure the guitar is working at this point and that you are happy with the product and design, but it does not have to be absolutely perfect just yet. You are going to take it apart and have to essentially repeat this process after the finishing touches.
Step 13: Finishing Touches


Finishing Touches
Now I have not yet completed this stage in my guitar yet. In fact, my guitar is still in the mock up stage. I unfortunately had to put the guitar on hold due to work and school and I plan to finish it up as soon as the spring semester is over and my summer begins! I have planned out my finishing process though and I’m going to walk you through the steps that I will follow. I still need to manufacture the back door of the guitar. I plane to create a vector template in illustrator and cut the door out of the same walnut I used for the pick guard using a laser. I’m going to etch in my initials and the year I made the guitar on the door as well. I also still need to drill the holes for my strap buttons. I plan to use a drill press for this process similar to some of the other processes that I have done earlier in this process. Unfortunately, we have to take the whole guitar apart, down to the bare parts. This will probably involve clipping some of your solder connections unless you chose to pig tie them earlier in the process. Once it’s bare, sand it to a very fine smoothness. We left off at 220 grit, I plan to go all the way up to 400+ wet sanding it to make the body smooth. I don’t want to stain my guitar, I want to keep it natural but add an oil finish to darken my white maple into a more golden appearance. I’m going to use a rub on Danish oil finish and rub it on the body, pick guard, back door and the back of the neck. After the rub on oil is on the guitar I’m going to add a tru oil rub on finish. The tru oil finish is a gunstock finish that adds a deep, glossy and strong clear coat finish to the guitar. It involves rubbing on a heavy coat, the sanding with steel wool and repeat numerous times. I will probably put on 6-10 coats of tru oil. I’m going to rub it onto the body, pick guard, back door and neck (not the fret board). It is important to not add any finish to locations that are connected on the guitar, like the neck slot, bottom back base of the neck, back door groove or interior pocket of the guitars. I will be taping off those locations. Once the finish is complete and buffed, I will reassemble and re intonate the guitar to a perfect finished state. I will be updating this tutorial as a complete the process of my guitar.
Step 14: Conclusion and Reflection

Conclusion and Reflection
Thank you for taking the time to read this instructable. This process was a huge learning process for me and something that I am truly passionate about. I’ve been wanting to build my own guitar for sometime now, and I don’t plan on stopping here. After I finish this guitar, I’ll start designing my next guitar which I plan to make using CNC based tools. If I were to this process again, I would have given myself more time and more space. I researched this process for months prior to building, but I only had two weeks to complete the guitar from the raw materials to the mock up stage in order to use it as a project for a class I was in at the time. I admit, it was slightly impulsive, naive and overwhelming but I couldn’t help myself from taking the challenge and jumping on the opportunity. I built it largely in my dorm room and the materials lab in my colleges engineering building, the conditions were not always ideal (sanding in a shower for example) but I am overall pleased and proud of the process. Wood working was not my strength in industrial arts prior to this process, but now I am proud to say it is in my top 5. I highly encourage anyone who has a interest in woodworking to take a challenge like this if they have the opportunity. I hope that my tutorial helps you in anyway by supplying my good ideas and bad ideas. I do recommend you put in a lot of research prior to building, my instructable is not enough! Thanks again for taking the time to read this and all of your input you may or may not place in the comment. I am looking forward to finishing this project and updating this instructable in the near future (the day after finals!) and I am looking forward to my next build as well!

Participated in the
Woodworking Contest

Participated in the
Full Spectrum Laser Contest


