

Introduction: DSLR Pop-up Flash Diffuser


DSLR pop-up flashes are very usefull when you do not want to carry your large hot shoe flash around, but are quite limited in both power and control. They tend to make harsh shadows and blow out close subjects.
To make photos more pleasing, many people use a diffuser.
You could buy one, but most people make them They are homebrewed with everything from a simple sheet of paper to plastic cards and even fancy "origami" folded papers.
This is yet another diffuser, but I think it shines by it's simplicity. It's made from something almost all photographers have in the bottom of a drawer... a film canister.
Step 1: Measure Your Flash and Cut the Canister

Well, this step is simple... pop up the flash on your DSLR and measure the depth of it's base. You need this to know how wide to make the cut on the film canister.
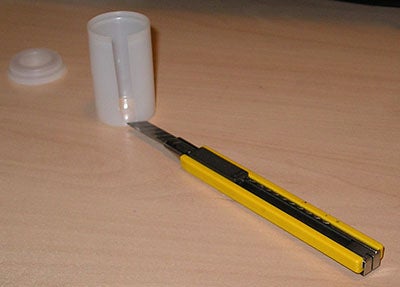
Then grab your canister, a box cutter or X-Acto knife and cut a slit down the side of the canister. Make sure that slit is barely wider than your flashes stalk.
Step 2: Insert the Canister and Use the Camera!


At this point you slip the canister on the flash, close it with the cap and try it out!
Step 3: Why Use a Diffuser?


You'll now find that the flash is no longer as harsh and overpowering when taking portrait photos close up, as well as macro and normal close-ups of stuff. Skin tones will also be more natural.
Of course since the ligh is diffused, this does limit the reach of the flash... but you are doing this for close up work anyways so thats not a problem.
Diffusing your flash is always a good idea when taking close up pictures to make an instructable.


