

Introduction: Deep Clean Your Apple Keyboard So It Looks Pristine


Have a grime encrusted white plastic Apple Keyboard and a can of air cannot do any justice? My answer was "oh yes." My keyboard was so nasty that the keys got stuck and it wasn't pleasurable typing anymore. I determined that normal cleaning will not work and I had to disassemble the whole keyboard for a deep cleaning. Most of the keyboard was disassembled and gently cleaned. Keys were washed and the housing was cleaned out. After cleaning, the keyboard looked like it was new. It was pristine almost. With this guide, I will show you how to clean and polish nearly every nook and cranny of the Apple Keyboard.
Before you start: unplug keyboard or remove the batteries from the keyboard. Also be gentle.
Step 1: Supply List
Time required: 30-60 mins
Tools you will need:
Apple Keyboard or Bluetooth Keyboard (i am using the BT one in this instructable)
Torx 5 Screw Driver
1.3 mm Hex wrench
Microfiber towels (1 damp)
A bucket of warm water with a drop mild dish washing fluid
Small pliers
Fingers
Grease (optional)
Step 2: Take Off the Keys


Using your fingers, take off the keys. Do not use a flathead screwdriver or any other tool as that will apply too much pressure and break the plastic clips under the keys. You might even scratch your housing or keys if you use a tool for key removal. I suggest starting at the arrow keys as it provides the most room for your fingers. Slide your index finger under an arrow key and lift up a little bit. Very little pressure is required to remove the keys. If you finger is big enough, you may be able to pop off the key by sliding your finger under the keys. Slowly remove all the keys across the keyboard.
Take special precaution when removing the wide keys (space bar, return key, delete key, etc). There are metal clips under them. Do not bend these or your key strokes will be hindered. Gently remove the metal clips with the small pliers near the hinges. Remember which metal clip goes with which key. Also observe how the metal clip actually works. This will save you the trouble when you have to reassemble the keys. Do not wash the metal clips.
Step 3: Wipe Down the Keyboard and Wash the Keys


Toss all the keys into the bucket of warm water with the mild detergent. Let it soak for about 15 mins. This will loosen up the gunk.
Using your damp (not soaking wet) microfiber towel, wipe down the keyboard. Don't forget to wipe down the edges of the keyboard. Slide your microfiber towel under the area above the arrow keys. The microfiber towel should help you clean off the grim and dirt. I suggest not using paper towels as it will break up and leave fibers in your keyboard. One reason why microfiber towels are great is that its thin enough for the crevices of the keyboard. Once the keyboard is a nice white, you could move on to the next step. There will still be dirt and grime stuck between gaps of the different housing pieces. We will address that in the later steps.
Step 4: Dry the Keys

Retrieve your keys from the water. Dry them and polish them with your microfiber towels. Another reason why I suggested the microfiber towel is that its great for polishing. If there is still grime on your keys, use the microfiber towel to scrub the grime off. Clean off the metal clips. Do not rub off the grease on the metal clips. Without grease, the key strokes will be rough. If you did clean off the grease, reapply new grease onto the clips.
Step 5: Reassemble the Keys


Once the keys are dry and clean, insert the keys back into the proper location. Insert the keys vertically and not at an angle. You could damage the keys' plastic clips if performed at an angle. Reinstall the metal clips to the wide keys. When inserting the wide keys back on to the keyboard, make sure the metal clips slide back into their slots on the keyboard. You could stop here if you do not want to clean the insides of the clear housing.
Tip: Insert all the wide keys with the metal clips first.
Step 6: Screw Removal

Once all the keys are reinstalled. Flip the keyboard over and remove all the screws. Some screws will be Torx. Some screws will be Hex. Some older models will have philips screws. Be careful not to use the wrong bit. Depending on model, the screws will be in different locations. For the bluetooth model, there are 5 screws inside the battery compartment.
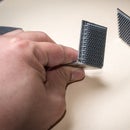
Step 7: Remove the Clear Housing


Once the screws are removed, lift the clear housing up. The keyboard will drop out. Be careful not to damage the cable going from the battery to the keyboard. Pop off the clear part of the housing by running your fingers along the edge of the clear housing. When the clear housing is fully separated from the rest of the keyboard, remove the battery holder. The battery holder drops out from the bottom of the keyboard.
Step 8: Clean the Clear and White Housing


Using your damp microfiber towel, polish and clean the clear and white housing. Clean the edges too. Dirt is usually trapped between the white and clear housing pieces. Don't forget to clean the battery holder. Using a clean microfiber towel and dry the two housing pieces.
Step 9: Reassemble the Housing


Insert the battery holder in place first. With the clear housing resting in the normal position, drop in the white housing and snap the edges back into place. Flip over the keyboard and reinstall all the screws. If your keyboard is dry you could try it out now. YOU'RE DONE!, You've just cleaned your Apple Keyboard! No compressed air or cleaning wipe can match this deep cleaning process. Final thought: make sure the pieces you are assembling are clean before reassembling. You don't want to go through the trouble of disassembling. Enjoy!


