

Introduction: Design Your Own Watch


Firstly I'd like to apologise for the poor lighting in the photos and any omissions, mistakes etc. in my instructions I'm a posting newbie. Secondly, I'm not actually making a watch from scratch but rather editing and adapting one to fit my own needs.
Now that's out of the way I'll begin, like many I had seen Urban Influence's 5 Year Anniversary Watch (http://bit.ly/b2xNa5) and feel in love with it and immediately thought I have to have it, but alas, after searching everywhere, I couldn't find it, so like the title of the competition I thought 'I could make that.'
So here's my attempt:
Step 1: Selecting Watch
You'll need to find a suitable watch, after some consultation with my local watch dealer, I decided to go for this model from Rotary, though you'll find various suitable models on ebay (http://ebay.eu/12a1Gcg) you are basically looking for anything with a Swiss mechanical movement to it.
My first step was then to take this to the said watchmaker to remove the dial, this was seen as a rather peculiar request, but he was happy to oblige as he'd never seen anything like this attempted before and was keen to see the outcome.
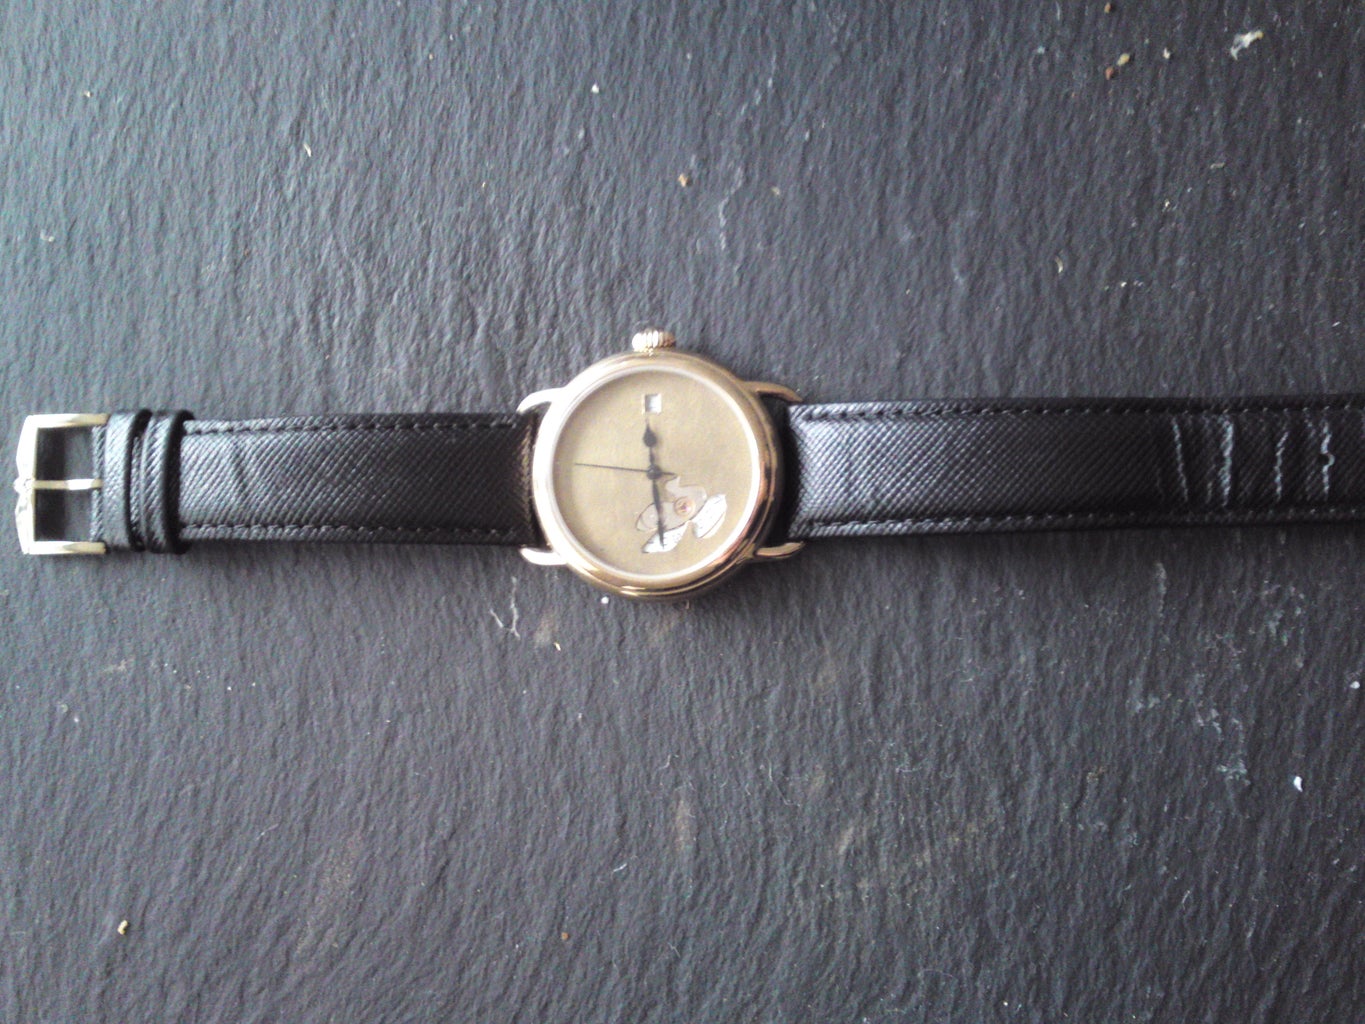
Step 2: Design and Cutout
This was the tricky part, if I had access to one I would have liked to have used a laser cutter, but unfortunately this wasn't possible so I had to go by hand. I hand to sand off the dial numbers etc off the face using my trusty dremel. Once this was done I found a suitable vector of a bird online and copied this by hand onto the newly blank dial. I did first try gluing this onto the dial and cutting the bird out with it on but the paper just ended up fraying and tearing and well, no use what so ever.
So, now the bird was drawn (a fine nibed Sharpie worked best) I drilled a small pilot hole into the centre of the bird, now for the difficult part, using pretty much every attachment in the box, I painstakingly and carefully traced to the outline, do not rush this bit. Don't worry if you mark around the surface (as I did), this will be covered by the colouring process.
Step 3: Colouring
To match the Urban Influence watch, I decided to go for a gold coloured dial, my first attempt was to try and go fancy and use alcohol ink, though I didn't find this dried overly well and wasn't as keen on this finish, I know it's not the easiest to see the difference here, but to my eye there was, so instead referred to a good old fashioned gold marker.
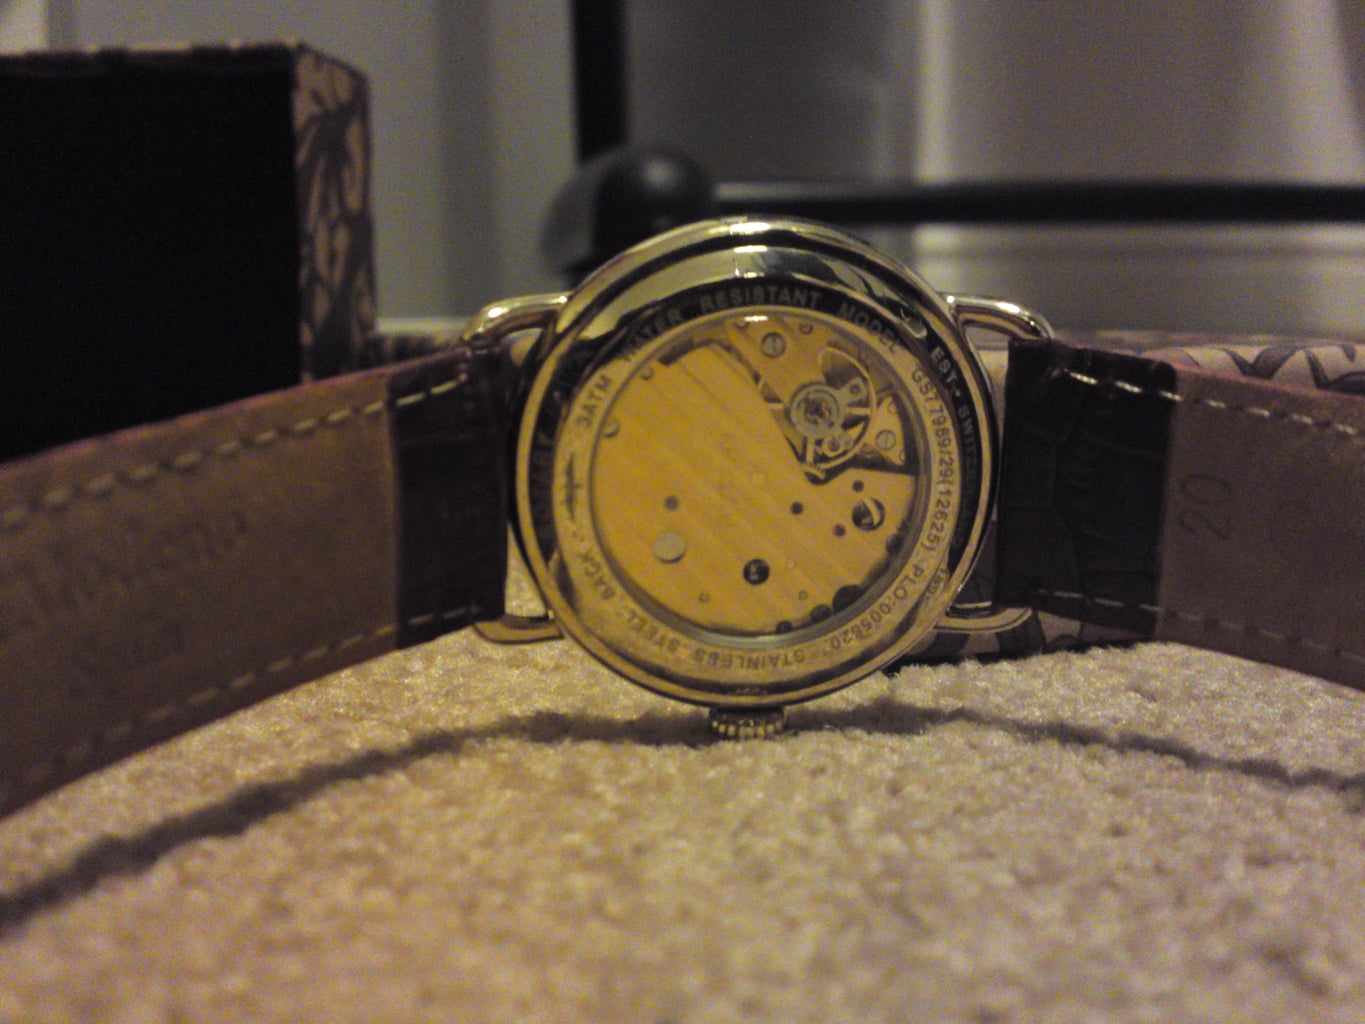
Step 4: Re-assembly
Now the dial was cut-out I took this back to the trusty watch maker for reassembly, impressed by my results. (I would hasten to add to not try opening or taking apart the watch yourself, purely as you could damage the case and the waterproof seal. You'll notice to match the inspiration watch I replaced the strap with a crocodile effect leather strap and the clasp with a flit clasp, though again was personal preference.
Step 5: Finished Article
Now the watch was back together it was time for the presentation. For this I found some wrapping paper to my taste and wrapped around a suitable sized box and completed by making a fabric envelope out of an old glasses cleaning cloth and stuffed with well stuffing. Set the time and date and we were away to go.

Participated in the
I Could Make That Contest


