

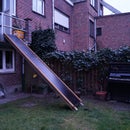
Introduction: Detachable Ball Launcher


This tennisball launcher is designed for a woman in a wheelchair that can't throw tennisballs far away to play and reward her dog.
This launcher is inspired on a professional baseball/tennis ball thrower There are two wheels which are made to spin by one electromotor and two gears. The tennis ball is pushed through these wheels and accelerated; the ball is then airborne for several meters.
Since Jana is in a wheelchair, she has to be able to attach and detach the launcher in an easy way and still be able to pass through doors. With the attachment system presented in the movie, she doesn't have to lift the weight by herself.
Ofcourse this tennisball launcher has a big fun-factor and can defenitly be made for use without a wheelchair too!
Good luck!
Jente, Francis, Claudia and Lore
Step 1: Collecting Materials

- Aluminum lath: 3 x 50 x 2000 mm
- to make the frame
- to make a battery- & motor-holder
- Steel plate: 80 x 100 mm
- to make a pick-up system
- ABS 4 mm (3 plates to lasercut - 450 x 600 mm)
- Wood for the wheels (2x): 95 x 70 mm
- PVC-tube: ᴓ 80 mm + 45° bends (2x)
- Bolts and screws (M6 - 10 pairs)
- Adjustable screw M8 (star knob)
- 4 wood screws: ᴓ 4 x 20 mm
- Copper glide bearings (4x): ᴓ 10 x 4 mm
- Axis (2x) : ᴓ 10 x 100 mm
- Battery 12V: 7.0 Ah (40 minutes continuous shooting)
- Switch (on/off)
- Connector pieces for the charger
- Battery charger 12V
- Electrical wires: ᴓ 2 mm - thick enough to withstand the current
Motor 12V: look for high torque (>25 Nmm) - necessary to spin the wheels
Motor connection part: ᴓ 3,2 to 10 mm
Fuel tube ᴓ 10 x 50 mm
Step 2: Measurements Wheelchair


To make the tennisbal launcher adapted for your wheelchair, it's important to measure several sizes of the wheelchair and adjust the size of the wheels/gears/case to these measurements. But, it's a matter of making compromises, because if sizes are made smaller, the bal won't go so far anymore.
The sizes we used are adapted for a Permobil C500 Lowrider. You can see all the specifications in the attached picture.
Step 3: Wheels


MATERIALS: Wooden block
TOOLS: Turning lathe or holesaw
To make the wheels perfectly round, you can use a holesaw or a turning lathe. The dimensions are illustrated in the drawing. If you 're working with the holesaw, the thickness of 70 mm can be created by glueing thinner wheels to eachother.
Step 4: Gears

TOOLS: Lasercutter
MATERIALS: ABS 4 mm or ABS 8 mm (cheapest solution, and ABS works perfectly)
We need 2 gears for the tennisball launcher, you can find the illustrator-file to lasercut in attachment. The gears have to have a thickness of 8mm, we had ABS 4mm, so we printed 4 gears and glued two of them to each other. The crosses in the middle of the gears are necessary to attach them on the axis.
Attachments

Step 5: Frame


TOOLS: Drill (ᴓ 6, 13) - bending bench - bench vise
MATERIALS: Aluminium 50x3
The frame exists of two parts. It is important that you drill the holes before bending.
The first part is the easiest, the folding sequence doesn't really matter to bend it. The dimensions are on the drawing above. The most important size is the 80 mm inside and the center distance between the two ᴓ 13 mm axis holes!
The second part is the middle piece with the loop. Follow the numbers to bend the first 3 corners. The last corner will have to be folded with the bench vise. If you want a good corner, saw a little block to fit between the plates, fix it between the plates with a screw-spanner like you can see on the picture. Then put it between the bench vise and fold it. (use blocks to protect the material)
To attach the motor and battery, it's best to make two small extra plates, these can be done using the rest of the aluminium lath. The holes indicated on the motor plate are depended on the specifications of the motor. Those are the sizes we had to use.
Step 6: Case


TOOLS: Lasercutter
MATERIALS: ABS 4 mm (2 plates of 450 x 600 mm)
The case is connected by lasercutted parts, snaps and tension straps . The illustrator files are in attachment.
Step 7: Assembly


TOOLS: Wrench, hammer, ...
MATERIALS: All the parts made and listed in the first step
Follow the pictures to assemble the parts in the right sequence.
Step 8: Launching Tube


TOOLS: Saw
MATERIALS: PVC-tube diam. 80 + 2 x PVC bend (45°) diam 80 + black paint (spray)
It's best to make the tube when the case is already put together with frame, wheels and gears because then you adjust the tube, avoiding it hits the gears and wheels (use a dremel for . You can saw the tube similar as on the picture.
The bend before the wheels is attached with tension straps to the case and fits between the frame.
The bend after the wheels that sticks outside fits in the hole, so no other attachment is necessary. The bend is also shortened so the launching angle is ideal. The angle should be 25 - 30° for an ideal launch.
We painted the bend in black to match the color of the case.
Step 9: Electronics


TOOLS: Soldering iron
MATERIAL:
- Motor (12V)
- Battery (12V)
- Connection parts
- Charger
- Switch
- Electric wire
The wires have to be connected like the electrical scheme above. Make sure you don't make a mistake with the polarity. If the battery is connected wrong, it can be damaged. If the motor is connected with the wrong polarity, it's not such a big problem, but your wheels will turn in the wrong direction.
Important: attach the wires to the case so they can't turn in the gears!
Step 10: Pick-up System for Wheelchair


TOOLS: Drill - bending bench - dremel or grinding wheel - M8 thread tap
MATERIALS: Aluminium / steel => best: more stiff (size in the drawing)
To load and unload the tennisball launcher to the wheelchair, we provide a system like you see in the pictures (and already saw in the movie). The measurements of the plate and folding lines are included in the drawing.
As with the case, it's best to drill the holes before bending. To make the notches, you can use a Dremel or grinding wheel.
The other side of the attaching system exists of 2 screws and 4 bolts in the upper frame. The holes are already drilled if you made the frame as told in step 5.
The tennisball launcher hangs steady on the wheelchair, but to make sure it doesn't fall of, a adjustable screw (on the picture) with a soft patch on the bottom can be put in the threaded hole in the top of the frame. We used a M8 screw to fit in the pre-drilled ᴓ 6 mm hole, threaded to M8.

Second Prize in the
Battery Powered Contest

First Prize in the
Launch It! Contest


