

Introduction: Don’t Upset Kitty! (LittleBits Project)


Using LittleBits parts, this project displays a happy cat until you pull his tail. Then you upset kitty.
Total Build Time: 30 mins
- Draw and cut out cat – 10 mins
- Arduino coding – 5 mins
- LittleBits parts assembly – 5 mins
- Foam board assembly – 5 mins
- Testing – 5 mins
Attachments

Step 1: Gather All the Parts Needed for This Project.
LittleBits (from the Deluxe Kit):
- (1) 9v battery and connector cable
- (1) power supply
- (1) LittleBits Arduino board
- (1) buzzer
- (3) connector wires
- (2) LEDs
- (1) slide dimmer
Craft Parts:
- Construction paper
- ¼” thick foam board
- Fabric/felt heart
- Scissors and/or x-acto knife
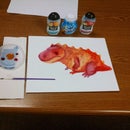
Step 2: Draw and Construct the Cat.

Draw and color a cat to your liking or print one out. In this example, the body and the head of the cat are cut separately. The tail is also cut as a separate part as it will be a moving part. The head and heart are then glued to the body. The tail will remain on the side until the LittleBits are connected later.
Step 3: Assemble the Foam Board and Stands


First, we’ll create the backing board. Using ¼” foam board, cut a rectangular piece as wide as the cat and about 3” taller than the cat. This will allow room for the stands at the bottom to be created.
Determine where you want the cat to sit on the board, then glue it to the foam except do not glue the hind quarters of the animal down. You’ll want to leave this accessible so the tail can be attached later. Using the image below (image is facing front), puncture a hole at the mouth and another in the center of the heart. Later, the LEDs will shine through them. About where the tail will be positioned, cut a 2” horizontal slit into the board so the dimmer switch and easily glide back and forth through the foam.
To create the stands, cut (2) rectangular pieces. In
each piece, measure about ¼ of the way down the long side of the foam, then cut a ¼” wedge about ½ the way through the foam.
Step 4: Program the Arduino
The sketch allows the heart to glow red until you pull the cat’s tail connected to the dimmer switch. When that occurs, the mouth glows green and the buzzer goes off.
/*
Don't Upset Kitty Sketch
Red LED stays lit until the dimmer switch is slid to the ON position. This turns on the green LED and sounds the buzzer.
*/
int dimmerPin = A1; // Define the dimmer pin connected to the Analog pin
int redLED = 9; // Define the green LED (mouth)
int greenLED = 1; // Define the red LED (heart)
int dimmerValue = 0; // Define the dimmer's setting at 0 (OFF)
void setup()
{
pinMode(dimmerPin, INPUT); // Define the dimmer as input device
pinMode(redLED, OUTPUT); // Define the green LED as an output device
pinMode(greenLED, OUTPUT); // Define the red LED as an output device
}
void loop()
{
dimmerValue = analogRead(dimmerPin); // The dimmer will input analog data
if (dimmerValue > 0) // Create the scenario that if the dimmer's setting is greater than 0 (ON)...
{
digitalWrite(greenLED,HIGH); // Then the green LED will turn on
digitalWrite(redLED, LOW); // The red LED will turn off
tone(5, 100, 1000); // The buzzer on pin 5 will buzz at 100 frequency for 1 second
}
else // When the dimmer's setting is at 0 (OFF)
{
digitalWrite(redLED, HIGH); // The red LED will turn on
digitalWrite(greenLED,LOW); // The green LED will turn off
noTone(5); // The buzzer will make no sound
}
}
Step 5: Assemble the LittleBits and Arduino Pieces.

After you’ve programmed the Arduino, assemble the LittleBits pieces to the back of the foam board.
1 – 9v battery
2 – Connector cable
3 – Power supply
4 – LittleBits Arduino board
5 – (3) Connector wires
6 – Buzzer
7 – Dimmer switch
8 – LED set to red color (heart)
9 – LED set to green color (mouth)
Step 6: Attach the Tail and Completion.


Pull the hind quarters of the cat away from the foam board. Make sure the dimmer switch is sticking through the board, then puncture a small hole in the base of the tail and secure with tape. Test and pull the tail to make sure the dimmer switch can move easily and the tail stays attached.
Turn on the LittleBits kit. The red LED should be lit at the heart. Pull kitty's tail and the buzzer should sound and the green LED should light at the mouth. This is kitty yelling at you not to pull his tail.


