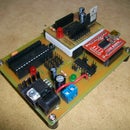
Introduction: Dual Motor Driver With Arduino Using a SN754410NE Quad Half H-Bridge
A step by step project guide by ArduinoFun
With this Instructable I am going to show you how to use a SN754410NE Quad H-Bridge IC to control two 12 volt DC Motors.
I have added a video so that you can see the Dual Motor in action. As you can see in the video, all the wires can be a little confusing to look at. To make things easier to view and understand as we go along, I have also created an illustration for you to refer to. You may also download a printable PDF file of this illustration. I have depicted an Arduino board in the illustration, if you already have one you are good to go, if not... you can do like I have and Build Your Own Arduino following another one of my instructables.
Breadboard Illustration - You may also download a printable PDF file of this illustration

Step 1: Parts List
- Arduino board - $29.95 at CuriousInventor.comor...
- Build Your Own Arduino - Total build cost $15.95 at ArduinoFun.com
- SN754410 Quad Half H-Bridge - $2.50 available at ArduinoFun.com
- 840 Tie Point Breadboard - $6.95 available at ArduinoFun.com
- Wire Jumper Kit - $12.95 available at ArduinoFun.com
- Two DC Motors - $3.99 ea. available at ArduinoFun.com
Step 2: Build the H-Bridge Driver
As you are looking at the SN754410NE chip, you will notice a u-shaped notch at one end. This will help to identify pin 1.
Pins 1, 9, and 16 are +5V
Pin 8 is +12V and will run the +12V DC motors.
Pins 4, 5, 12, and 13 are for GND
DC Motors have two hook ups on them. If you hooked one up straight to the source power you would have one lead going to positive and one lead going to GND.
For our H-Bridge driver, you will hook the left motor leads to pin 3 & 6. The right motor leads will hook up to pins 11 & 14.
Connect h-bridge pin 2 to the Arduino digital pin 2, and h-bridge pin 7 to Arduino digital pin 3.
Connect h-bridge pin 10 to Arduino digital pin 8, and h-bridge pin 15 to Arduino digital pin 7
Step 3: Arduino Sketch
Once you have your h-bridge circuit completed, you can upload the sketch to your Arduino. The sketch will cycle back and forth on the dc motors driving them forward and backwards and then light an led connected to pin 13 on the arduino.
// Use this code to test your motor with the Arduino board:
// if you need PWM, just use the PWM outputs on the Arduino
// and instead of digitalWrite, you should use the analogWrite command
// ————————————————————————— Motors
int motor_left[] = {2, 3};
int motor_right[] = {7, 8};
int ledPin = 13; // LED connected to digital pin 13
// ————————————————————————— Setup
void setup() {
Serial.begin(9600);
// Setup motors
int i;
for(i = 0; i < 2; i++){
pinMode(motor_left[i], OUTPUT);
pinMode(motor_right[i], OUTPUT);
pinMode(ledPin, OUTPUT);
}
}
// ————————————————————————— Loop
void loop() {
drive_forward();
delay(1000);
motor_stop();
Serial.println("1");
drive_backward();
delay(1000);
motor_stop();
Serial.println("2");
turn_left();
delay(1000);
motor_stop();
Serial.println("3");
turn_right();
delay(1000);
motor_stop();
Serial.println("4");
motor_stop();
delay(1000);
motor_stop();
Serial.println("5");
digitalWrite(ledPin, HIGH); // set the LED on
delay(1000); // wait for a second
digitalWrite(ledPin, LOW); // set the LED off
delay(1000); // wait for a second
}
// ————————————————————————— Drive
void motor_stop(){
digitalWrite(motor_left[0], LOW);
digitalWrite(motor_left[1], LOW);
digitalWrite(motor_right[0], LOW);
digitalWrite(motor_right[1], LOW);
delay(25);
}
void drive_forward(){
digitalWrite(motor_left[0], HIGH);
digitalWrite(motor_left[1], LOW);
digitalWrite(motor_right[0], HIGH);
digitalWrite(motor_right[1], LOW);
}
void drive_backward(){
digitalWrite(motor_left[0], LOW);
digitalWrite(motor_left[1], HIGH);
digitalWrite(motor_right[0], LOW);
digitalWrite(motor_right[1], HIGH);
}
void turn_left(){
digitalWrite(motor_left[0], LOW);
digitalWrite(motor_left[1], HIGH);
digitalWrite(motor_right[0], HIGH);
digitalWrite(motor_right[1], LOW);
}
void turn_right(){
digitalWrite(motor_left[0], HIGH);
digitalWrite(motor_left[1], LOW);
digitalWrite(motor_right[0], LOW);
digitalWrite(motor_right[1], HIGH);
}


