

Introduction: Dutch Bucket Hydroponics


This instructable gives details on how to build a Dutch bucket hydroponic system for reasonable inexpensive cost (this system cost me approximately $150).
Dutch buckets are a type of dripper hydroponics, and this is a double dutch bucket system (two buckets inside each other). Whilst the double buckets aren't necessary it helps with the end of season cleaning as one bucket can simply be lifted out of the system and cleaned and the rest of the system can stay behind.
Water with nutrients are pumped from a reservoir, and drip into a inert medium where the plant is growing. The plant then extracts some of the nutrients and water that it needs from this solution. The excess flows down the bucket, into the second, outer, bucket and then overflows back into the reservoir. This system is idea for hobby growers who wish to grow large plants (eg tomato,cucumbers, peppers).
Please note that this is a very flexible instructable, you can make your system with as many or few buckets as you wish, and can change the layout etc. I also didn't take exact measurements for this project, so I'm not going to explain exactly where to drill holes etc, it is relatively straight forward.
This system can be used, indoors, outdoors or in a greenhouse. (mine is outdoors, and if you plan on doing it indoors make sure your plants get enough light).
I have been watching a lot of Brock Hughes hydroponic videos
https://www.youtube.com/channel/UCdCssvccatWGY1wQe... and need to give him credit as my system is based on how he does his dutch buckets.
Step 1: Materials
The following is a materials list for the build:
14 x Buckets (I used 15 litre construction buckets)
1 x 5m 20 mm Black irrigation pipe
2 x 2m 40mm PVC pipe
1 m Shade netting
5 m Irrigation drip tube
7 x Irrigation drip tube nipples
15 x 20 mm Irrigation elbows
1 x 40 mm PVC join
1 x 40 mm PVC end piece
1 x 40 mm PVC elbow
2 x 40 mm Mounting bolts
6 x 30 mm c hook screw
1 x 1000 l/hr Submersible pump
100 l Perlite
70 l Reservoir
Step 2: Tools Required
The tools needed were as follows:
Drill
Several drill bits (25 mm hole saw, 20 mm hole saw, 4-5 mm bit)
Hack saw
Marker (pen, pencil etc)
Kettle
Step 3: Benches


I needed benches for my dutch buckets to rest on. If you have something that will work as a bench/stand for your dutch buckets then you can skip this step.
I made two benches and needed the following materials:
6 x (3 m x 11 cm x 38 mm) Pine planks, I wanted to use pallets but couldn't find any on the day so i bought the cheapest planks i could find ($4 each).
50 odd screws at least 50 mm long.
The tools needed were:
A drill, drill bit and screwdriver (saw if you need to cut the wood but my local hardware store cut mine to size).
I wanted two 1.5 m long benches, so cut the 3 m planks into the following lengths. 4 x 1.5 m planks, 4 x 60 cm planks and 2 x 30 cm planks.
The process of making the benches was pretty straight forward, 2 of the 1.5 m planks made up the frame with the 30 cm planks. The 60 cm planks were used as legs and the other two 1.5 m planks were used as the top of the bench.
I drilled holes where the screws were going to go (1 size smaller than the screw size) and then screwed the frame together. Then screwed the legs on and finally screwed the top planks on, and repeated for the second bench.
I still need to treat the benches as they are sitting outside, I will either varnish them or I will simply oil the wood.
Step 4: Buckets


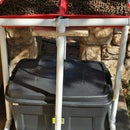
Since this is a double dutch bucket system we will be working with two buckets per planting "pot". I shall refer to these as the inner and outer bucket.
Outer bucket.
The outer bucket will be the one with the overflow in. To start this bucket we need to drill a hole for the overflow. I drilled a 20 mm hole just high enough so that the irrigation elbow doesn't touch the bottom of the bucket. (See image 1). I then cut pieces of the 20 mm Black irrigation to length (so that they go to approximately the centre of the bucket). I soaked this in boiling water so that it was easier to insert the elbow. See image 2 and 3 for the cut pieces and inserted elbow on one side.
I then heated the pipe again as well as the bucket to make it easier to insert the pipe into the bucket. I forced the pipe in as deeply as I could to try ensure that the system wouldn't leak. (see image 5). I then heated the pipe still sticking out of the bucket and put a elbow on the outside as well (see image 6).
You can see in image 7 and 8 , I was testing for leaks. The buckets didn't seem to leak and I was happy with the outer buckets.
Inner bucket.
The inner bucket is the bucket which will hold the growth medium and plant. This bucket needs to drain well and not allow to much growth medium to fall into the outer bucket. I used a small drill bit and drilled several holes into the bottom of the inner bucket. I then cut a piece of shade netting to size and placed it inside the bucket. (see image 9 and 10).
This completed the work needed for the buckets
Step 5: Drippers and Drainage


With the buckets completed we now need to get the irrigation up and running.
The first step is making and mounting the overflow of the system.
For this we are using the 40 mm PVC pipe. we firstly need to cut the PVC to size. We need 3 m so we can cut 1 m from the one pipe and use the full length of the other. We join these two with a joining piece and weld it with PVC weld glue. We then need to drill the holes for the overflow to enter the PVC pipe. I used a 25 mm hole saw (note a spade bit or frostner bit will not work). I measured where the holed needed to be and drilled the holes. you can see the joined and drilled PVC pipe in Image 1 and 2. I then added the end piece, blocking one side of the PVC pipe, again using PVC weld (see Image 3).
I used u bolts for the mounting of the PVC pipe (see Image 4). I drilled holes in the benches and added the two u bolts (See Image 5). Make sure that your pipe is at a slight incline so that any water will flow, with the aid of gravity, back into the reservoir.
Black irrigation pipe was then added to the outer buckets elbow and inserted into the overflow PVC pipe (image 6).
The next step was sorting the inlet drippers.
I again used 20 mm black irrigation pipe, I measured and cut the pipe to size. Holes were then made in the 20 mm pipe with the tool used for mounting the nipples into the pipe (see image 7 and 8). Dripper pipe was then measured, cut to length and joined to the nipple (image 9). I mounted the irrigation pipe to the benches using c screws (image 10 and 11).
A elbow was added on the pump side and and the pipe was connected to the pump (image 12 and 13).
The final two images show the completed irrigation from the front and back.
Step 6: Pump and Final Adjustments


The pump can now be put in the reservoir and water added to the reservoir.
I chose to use perlite as my growing medium, which I bought from my local hydroponics store. The inner bucket can be filled with perlite (I suggest rinsing the perlite first).
The system can be tested and as you can see I added some cheesecloth on the overflow as a filter (as some perlite was coming through the system and blocking the drippers). This is a temporary solution as I will put a filter bag around the pump to stop any perlite from circulating through the system.
I cut a hole in the lid of the reservoir for the inlet and outlet pipes.
Step 7: Final Product


Here you can see the final dutch bucket system up and running with my first plant in the system ( a pea moved from one of my other hydroponic projects as it was outgrowing that system https://www.instructables.com/id/Backyard-Ebb-and-...
My system is currently running 24/7, I will adjust and add a timer if i find it necessary. The nutrients in the reservoir were also purchased from my local hydroponics store.
There are still one or two things that i need to do to this system. The first is a wish to cut plastic sheeting and place it over the perlite to keep the perlite out the sun and decrease the amount of algae growth. The second thing is i might need to get an airpump and airstone to ensure that their is enough oxygen in the nutrient water.
When summer comes I might need to cover my buckets as well as reservoir in white plastic to try keep the temperature of the nutrient solution and plant roots down, however it is currently winter so I want as much heat as possible.
Step 8: Quick Update


Hey guys so quick update, very little has changed just thought I'd show you some of the stuff that has grown.
My garden pea is loving the system and has been doing the best of the lot, lots of fruit almost ready to be picked. I've also chowed some of the cos lettuce and freckled lettuce that I have been growing. Very happy with the results.
The only things that have changed, is that I have added an air stone and airpump to give the plants a little bit more oxygen. I have also added covers that go over the perlite to stop algae growth. You will see that I was having a problem.
Other than that all is good and very happy with the setup, no leaks and very low maintenance


