

Introduction: Dye a 3D Printed Part


Ever feel frustrated that your 3d printer can't print in the color that you want? Now here's a way to dye your 3d printed part and create various color effects you desire. In this Instructable I'll demonstrate how to dye a 3d printed resin part from a Objet 3D Printer Model 500 Connex.
Step 1: Materials & Tools

Things you'll need:
- A clean working surface (better stainless steel, I worked on a wood countertop and stained it unfortunately)
- A boiling pot (stainless steel, or porcelain)
- A pair of tongs
- Rubber gloves (you don't want to dye your hands)
- Jacquard iDye Poly (I used Blue here)
Jacquard iDye Poly is a powder fabric dye for dyeing synthetic fabrics such as polyester and nylon. The material that the Objet 3D Printer use is a kind of UV cured resin, and iDye Poly works great with it. Jacquard also provides iDye for natural fabrics like cotton and silk. I didn't test it but I would assume that iDye Poly works better in this case.
Jacquard iDye Poly is also one of the fabric dyes available on market that doesn't contain much hazard. You can pour any left-over dye solution down the sink once it cools down. Very convenient indeed.
Make sure you have a designated pot and tongs for your dyeing project to avoid food contamination.
Step 2: Boil in Dye Solution


Mix iDye Poly powder with a small amount water and mix them evenly. The amount of dye you need to use depends on the color intensity you want. It's always worth doing a few test before you dye your precious final piece.
Bring the dye solution to boiling hot and you're ready to put your 3d printed parts in. Keep your dye solution boiling during the dyeing process.
Step 3: Examine Results


I put 4 vero white test pieces in the dye solution with a 5 minutes interval. So the 4 pieces were in the dye solution for 20min, 15min, 10min, and 5min. You can see that there's not much difference between the 20min, 15min and 10min ones, but the 5min one is definitely lighter than the rest. I think if I had put less dye power in the solution, there might be a bigger difference between them.
I used color blue but the result is a really dark blue. Two ways to adjust color intensity: a less-saturated dye solution, or a shorter dyeing time.
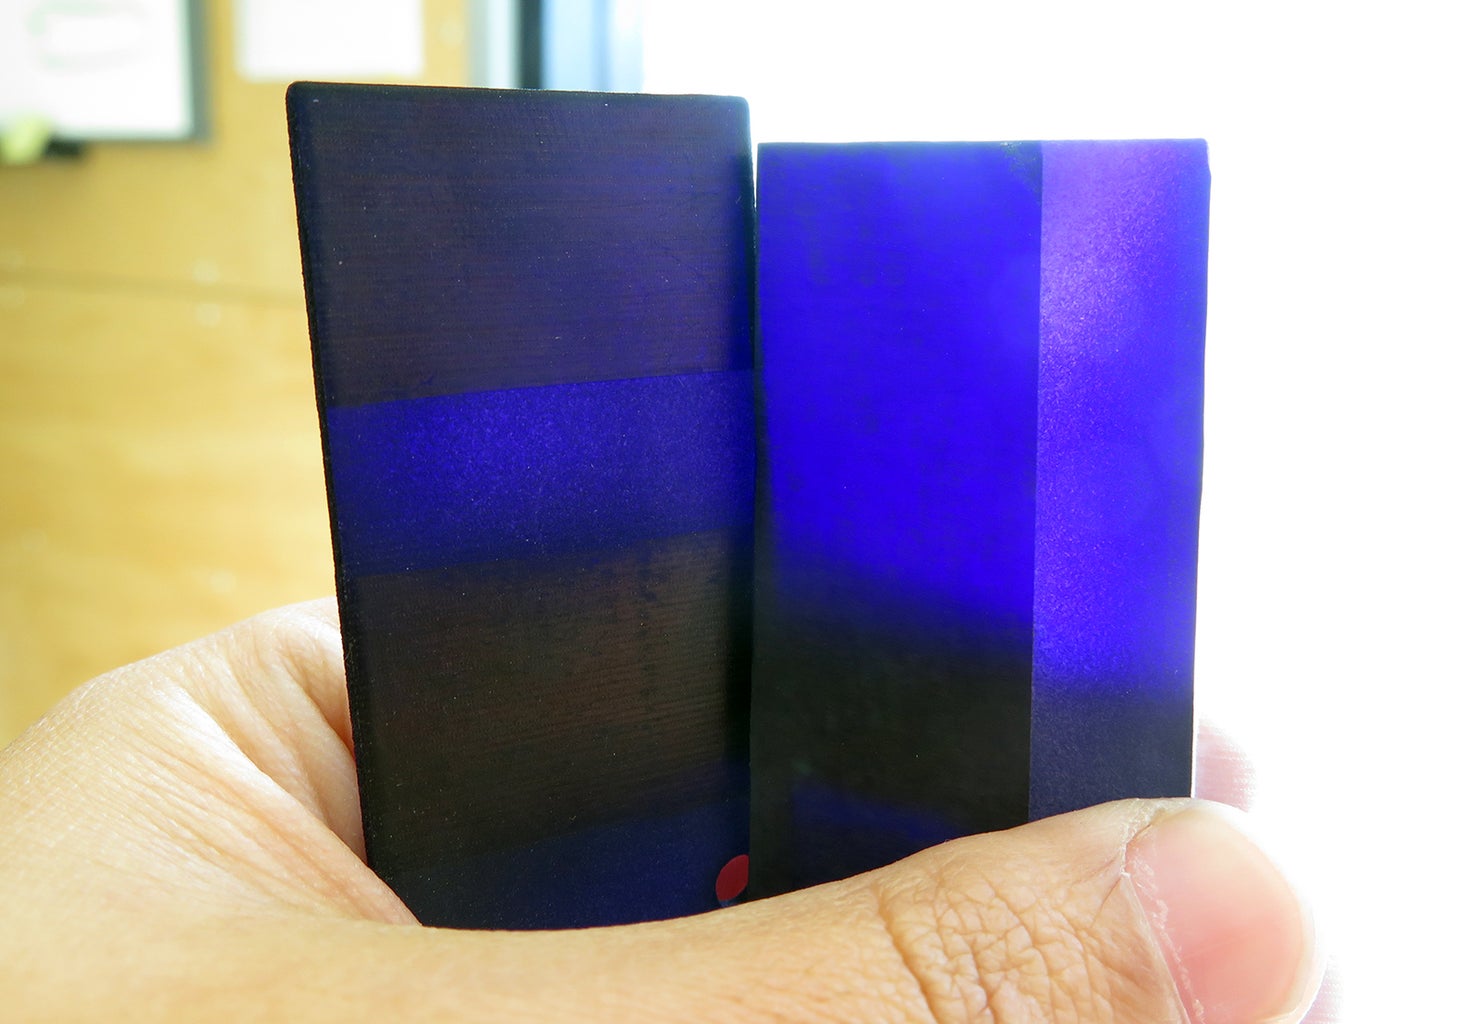
Step 4: Create Different Shades Using Other Finishing Techniques


With other finishing / polishing methods it's possible to achieve different color effects on one 3d printed piece. Here I masked part of the dyed pieces with tape and then sandblasted the exposed parts. You can get a much lighter shade from sandblasting, or even remove the color all together if you keep sandblasting for a while. It can be super easy to achieve multiple shades if you take time to mask your part and think strategically about your polishing process.
Step 5: Test on Clear 3D Printed Part


I did a quick test on vero clear 3d printed parts as well. The different shades of color look very beautiful when you look through them under light.
Step 6: Make Your Own Color

Jacquard offers a wide range of colors, and by mixing, you can achieve almost any color you want.
http://www.jacquardproducts.com/idye.html
Stay tuned for the next instructable on how to dye a color gradient with multiple colors.


