

Introduction: Easy 3D Topographical Maps With Slicer


NOTE: Some of the software used in this instructable is no longer available. Please check out my tutorial https://www.instructables.com/3D-Contour-Map/ for an alternative approach.
Here's a super easy way of making a 3D topographical map of anywhere in the world: you could literally be laser-cutting a map within 10 minutes of reading this instructable. I've always liked maps like these and there are some great tutorials out there... but the complexity had always put me off. But I recently learned how to use Slicer for Fusion 360, a (sadly no longer supported as of August 2020, but still available at that link) plugin for Fusion 360 (free to educators and students) that slices up STL files into pieces that you can stack together and make a 3D model. So I figured all that I needed was a utility that converted terrain into an STL, and happily, there exists one in Terrain2STL.
Note: this instructable was updated in January 2018 and again in May 2021 to reflect changes in the software. The redirect at the top was added in January 2022, when people were reporting they could no longer download Slicer.
Step 1: Select Your Area of Interest

Go to the wonderful Terrain2STL utility. You will be greeted by an interactive Google map. Navigate to the geographical area of interest by zooming and dragging, and click "Center To View". Go next to Model Details, and use the Box Size slider to make the red box large enough to incorporate the feature you want. Be aware however that the larger the feature you select, the bigger the STL file you will end up downloading. To start with, I suggest you pick a box size of 1080 or smaller. You're ready to make your STL file! Click Create and Download.
Step 2: Slice It


Open Fusion 360 and make sure you're in the DESIGN space, and select Insert... Mesh. Browse to your downloaded STL file, and open it. Now go to Tools... Make... Slicer for Fusion 360, and it will launch as a new program (which used to be a standalone product called 123D Make).
KNOWN BUG: if you get the error message "File has failed to open in Slicer for Fusion 360, please try again", select instead a simple non-STL geometry (e.g. draw a sphere) and open that. It will launch Slicer, and at that point you can open the STL file you want to use just fine. Thanks to jon-a-tron for answering this on the Autodesk Forums.
You will end up slicing the model, and you may have to rotate the Slice Direction so the material stacks as horizontal layers.
It is important to consider what you are going to make the model out of. Click on the pencil under Manufacturing Settings and specify the width, length and exact thickness of the material you are going to use. Under Select a Technique... choose Stacked Slices. Now, adjust the model size until you get a form that is pleasing. Very often, you will need to exaggerate the vertical scale to get interesting topography, and to get the features you want accurately displayed you may have to tweak the overall size of the model. Once it has taken a form you like the look of, click on Get Plans (the Nested option uses material slightly more efficiently) and export the plan as an EPS file.
I strongly recommend starting with cardboard - the material itself is cheap and the cutting time is fast.
Step 3: Clean Up the Files and Prepare for Laser Cutting
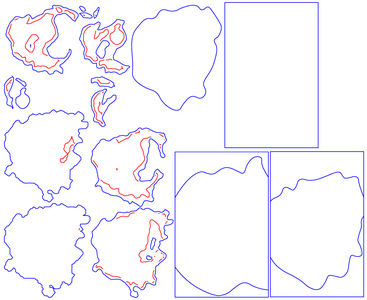
Open the EPS file in Illustrator or Inkscape or CorelDraw or whatever vector drawing program you like, and tidy up the files. I delete the border, delete layers I don't need (often full sheets with no features on them that are generated because the feature I'm mapping is at high elevation), and improve the nesting for efficient cutting. I also delete the numbers and pinholes* from the top layers.
I then set the line thickness to 0.001" (which the Epilog lasers I was using recognize as cuts rather than rasters), and enable color mapping. Set blue up to cut (whatever setting is appropriate for that on your machine) and red up to cut but at maximum speed and a MUCH lower laser power, so it only very lightly scores the surface.
* these are added by Slicer to aid assembly, but topographical maps are easy to put together because the shapes are all unique and there are no overhangs, so you don't need them.
Step 4: Laser Cut and Assemble


Send your files to the laser cutter (or service). Free all of the pieces from the sheet and lay them out in numbered order.
Assembly is easy and quite fun for simpler maps. Just glue each layer one at a time (you did lay them out in order, right?), using the scored lines as a guide. You pretty much can't go wrong provided you're careful to line everything up.
The example in the video is Mt Taranaki, a beautiful Fuji-esque volcano on the west coast of New Zealand's North Island, rendered in corrugated cardboard. The vertical scale is slightly exaggerated. This glue-up took me 10 minutes. The time lapse was recorded using my orbiting time lapse rig.
Use the appropriate glue for your material. A glue stick is fine for cardboard.
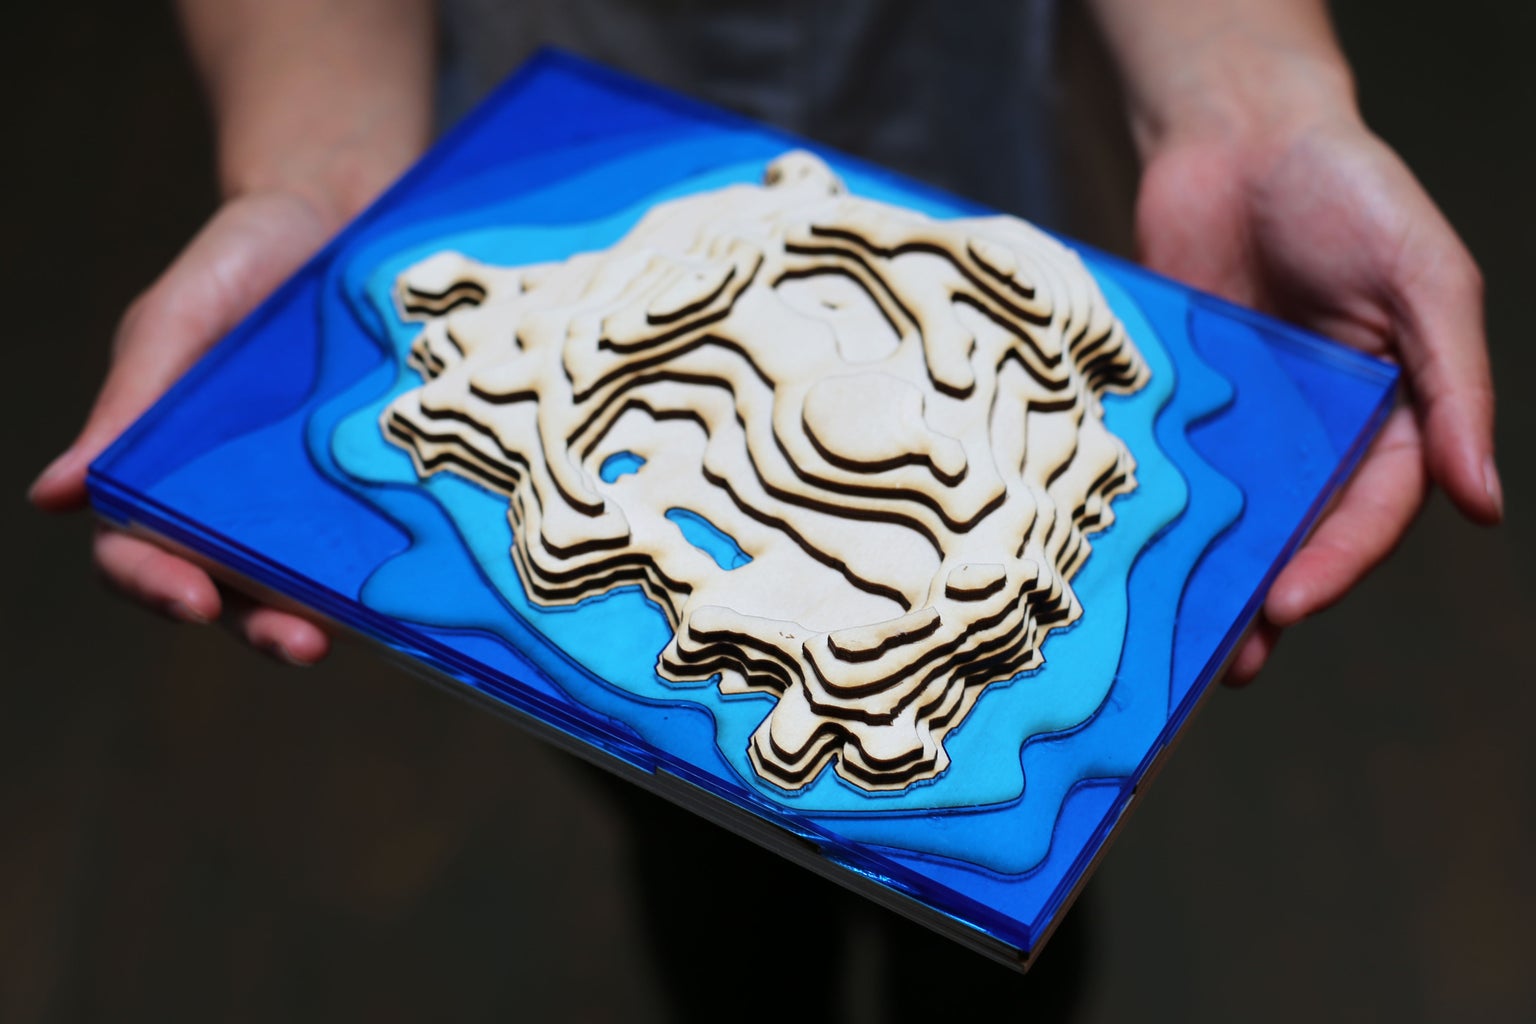
Step 5: Add Water
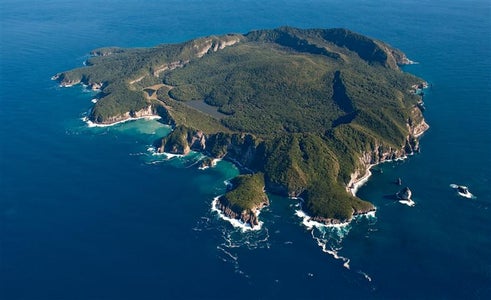


I really wanted a version with water that showed depth, so I got some pale blue transparent acrylic and used it to represent water. Terrain2STL does not provide bathymetric data (which would be cool!),* but for the effect you want it doesn't really need to be super-accurate. I just looked up a bathymetric map and eyeballed a few layers. You will need to cut the underwater land (I hope that makes sense) out of plywood (or whatever) and the water out of acrylic. Use more than one layer for best effect. This example was done with Tuhua (Mayor Island), a dormant volcano off the coast of New Zealand near where I grew up. It's far enough off shore that it is sometimes lost in the haze, but big enough that when it does emerge it looms enigmatically on the horizon. It's spectacular; the hiking and fishing and snorkeling are all world class.
I liked the look of the island in its raw plywood + blue acrylic form, so didn't bother finishing it.
* I've corresponded with the author of Terrain2STL on this topic and got this reply "As for bathymetry - do you know of a good global bathymetry data set? I've looked into it a bit in the past but I haven't found a good, global map for ocean depth. Do you know of any? I'd definitely be interested in looking into adding it to the site if we can find a good dataset." Anyone?
Step 6: Experimenting With Finishes


I tried making the area around where I live (Saanich, BC) out of green stained plywood and one layer of acrylic for the water. This map was really fussy to make, and I strongly advise starting with something simpler. All those tiny islands were a pain in the neck. If you end up with too complex a map, consider smoothing it in Fusion 360 before slicing it, or simply delete the smaller features altogether.


