

Introduction: Easy Flatbread Recipe


In this Instructable, we will bet talking about a slightly different kind of bread, flatbread! This recipe doesn't use any yeast leavening, but instead a small amount of baking powder to leaven the bread quickly as it cooks.
This recipe is cooked on the stove, just like my English Muffin recipe. Air pockets are created by steam expanding out from the heating flour, to create billowy and chewy flatbread. These kind of bread are great for wraps, or even just for snacking on with dips.
Be sure to check out even more glutenous goodness in my Bread Class!

The best part about this bread is how fast it is to make it. My aunt who showed me how to make this flatbread mixes the dough before she starts cooking dinner, lets it bench rest while preparing dinner, then quickly forms and cooks the bread just before we eat. NOM!
This recipe makes 12 flatbread rounds.
Step 1: Tools and Ingredients
To follow along in this lesson, you will need the tools and ingredients listed below.
Tools
- Scale
- Mixing bowls
- Rolling pin
- Cast iron skillet, or a thick bottomed pan
- Spatula
Ingredients
- 400 g cups all-purpose or bread flour, bread flour will be chewier and AP flour will be more crusty
- 8 cloves garlic, minced
- 6 g baking powder
- 7 g salt
- 75 grams plain Greek yogurt
- 2 tablespoons olive oil
- 280 grams milk

For a vegan version, try this recipe with coconut yogurt and unsweetened coconut almond milk. It comes out just as good, maybe slightly less tangy.
Step 2:


In a large bowl, combine flour, baking powder and salt together. In another small bowl, combine yogurt, milk, oil, and garlic.

Make a well in the dry ingredient mixture then add the yogurt, oil, and milk to the well.


Knead and mix with your hands or a bowl scraper until a supple dough is formed. The dough should start to ever so slightly stick to your fingers.

Cover the mixing bowl with wrap, and set aside for 30-45 minutes.
Step 3: Forming


Flour a cutting board or work surface with a light coating of flour. Divide dough in half, then divide those 2 pieces into 3 equal-sized pieces each creating 6 pieces. tThen cut those 6 pieces in half, leaving you with 12 pieces in total. Form the twelve in balls and let rest for a few minutes uncovered on your worksurface.
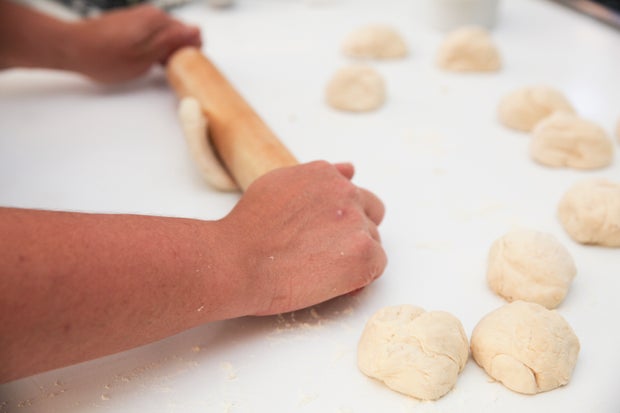

One by one, flatten the rounds into discs with your hands, then roll with a rolling pin until they are between 1/16th and 1/8th inch thick. If you like them a little doughier leave them a little thicker, but you get better air pockets when they are thinner.

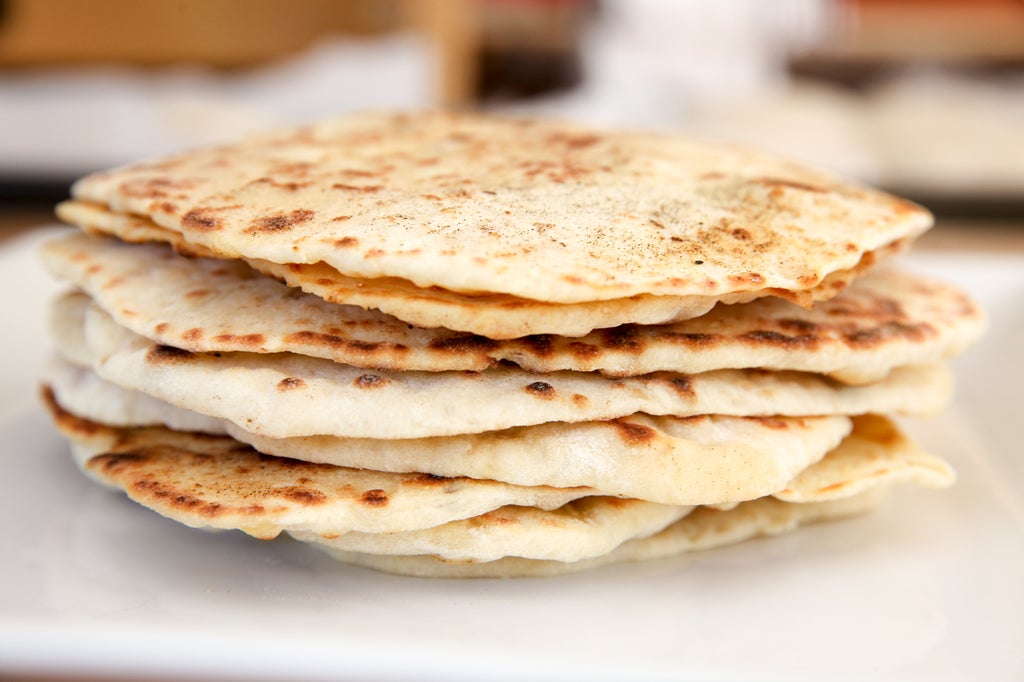
Step 4: Cooking
Lightly season a cast iron skillet with cooking oil spray over medium heat. Cook these as you are rolling the next ones, so that they don't shrink and become thick again.


I've made these 3 at a time on a griddle as well, use any thick bottomed pan you like, just as long as they don't overlap and stick to one another. They take about 3 minutes per side. Spray the top of the bread with oil before flipping. You can let them cool on a rack when they are done cooking, but they cool so fast you may as well just put them on your serving dish instead.
Step 5: Eating and Storing

To serve on their own, spritz or brush oil over the surface of the flatbreads. These rounds also make great wraps for veggies, meats, spreads and cheeses. I'm not trying to say it replaces a tortilla, but they are delicious with some crunchy lettuce, diced tomatoes, chicken, and rice.
These flatbreads store well and will have a shelf life of one week in a bag in the pantry. If you want to keep them longer, wrap them in foil, then plastic, and put them in the freezer.
That's a wrap!
For more delicious bread recipes check out this collection, and if you're completely new to the world breadmaking and the wonder of gluten, be sure to enroll in my Bread Class!


