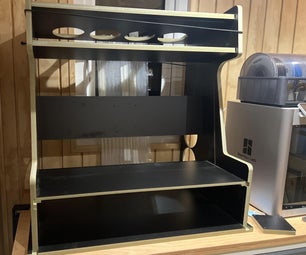
Introduction: Easy Edge Finding +/-0.001'' (25um) on the Othermill
Edge finding is one of the most important steps in any complex milling project. Edge finding allows you to very accurately locate the position of your workpiece after it's been mounted on the stage. This is absolutely essential if you need to accurately mill features between re-homing, for locating backside features, or when modifying an existing part.
In large milling machines edge finding is done using a special tool called, you guessed it, an Edge Finder! Unfortunately it's pretty rare to find an edge finder that will fit in the Othermill. See the wikipedia article on Edge finders: http://en.wikipedia.org/wiki/Wiggler_%28tool%29
While Otherplan has locating feature for getting pretty close it's very hard to much more accurate than a few thousandths of an inch. I still use the built-in edge finding for locating a new rough material within the mill.
Step 1: Find Your Tools!
Things you need:
A good dry erase marker
A bit with a precise 1/8" shank, a broken bit is fine, as long as the shank is in good shape. I would recommend a bit you don't care too much about, e.g. a carbide bit is way too easy to break when mounting as a probe.
Optional: a caliper or external micrometer to verify the 1/8th tool shank.
A mill of some kind, but I expect if you have a mill other than the Othermill, you likely already have an edge finder ;)
Step 2: Mount Your Tooling
Using the standard Othermill tool change procedure:
Mount your bit in the collet upside down making sure that the shank engages at least 1/4'' (~6mm) into the collet
Select tool type 0.125'' probe
Step 3: Mark Your Tool
While spinning the spindle with your finger lightly mark the end of exposed tool with the dry-erase marker. The goal is to keep the ink thin but uniform.
Step 4: Index the Corner!
Using the manual controls in Otherplan, move near the edge you would like to index. In this case I am indexing the Y edge of the work piece.
Slowly step closer by progressively using 1mm then 0.1mm. But don't get close enough to contact the piece!
Step 5: Touchoff!
When you can just barely see through the gap, start stepping by 0.01mm, and turn the spindle with your finger, watching for any change in the dry-erase mark. It's likely that you will see one side or corner of the shaft wipe clean first. This is okay, it just means that there is a slight amount of run-out in the shank and spindle assembly. The thin layer of dry-erase ink is much thiner than 0.001'' and quickly shows even the most insignificant run-out.
Protip:
For ultra precision write down Otherplan read out of the axis location that you are edge finding. You can use this later to average the edge location.
Step 6: Full Contact
With a couple more clicks of the 0.01mm while manually spinning the spindle the rest of the dry erase mark should be completely removed.
Write down the tool location in Otherplan for the axis which you are locating.
Step 7: A Tiny Bit of Math!
Now you have a few numbers to think about!
In short, the number that represents the y-axis origin of your work is half the the probe diameter plus the current location in Otherplan.
If you took down the number from the initial touch off average that number with the current axis location, then add half your probe diameter to that!
Step 8: Set Material Origin!
Now in 'Setup Material' you can set the true y-axis edge of your workpiece!
Now take a look at the tool from Otherplan via the top-down view. If you zoom way in, the tool should appear to be just touching the material block.
Now you have one axis edge-found. I'll leave the other one up to you!
NB! This assumes that your work is already square within the mill, e.g. work piece y-axis is parallel to machine y, and x-axis is parallel to machine x. Keeping things square is a bit harder. Planing ahead by machining known flat external dimensions, and keeping your Othermill tooling square and true, really helps getting things located and lined up when you need to make something more complex!
Happy Othermilling!


