

Introduction: Easy Wooden Boat Cleats


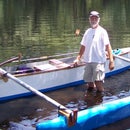

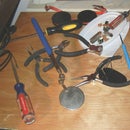

I built a Polynesian outrigger canoe last year, and seems like I am always coming up with modifications for it. This week the mods are for more cleats to be able to tie things down. I could buy cleats at the marine store, but that is too easy (and expensive). So I built some. I started with some scraps of very old southern yellow pine that was left over from a remodeling project. Hard, straight grained, and water resistant. The wood was some 1x material, nominally 3/4 inch thick. I used a belt sander to remove paint and clean up edges. The second picture shows after the longer piece has been ripped in half to give me a pair of 2/4 x 3/4 strips. The exact dimensions are not important. The shorter piece was split into several 2x2-ish pieces. This dimension is twice the height of the "stand-off" portion of the cleat.
Step 1: Assemble and Glue

I laid out pencil lines on the long strips to align the standoffs. The idea is to make a doubled row of cleats that can be sliced up later. I wanted 1.25" on each side of the standoff for the finished cleat, so each standoff was positioned 2.5" apart. Arrange the wood so that you are not gluing end grain. This will make the cleat stringer. Use lots of clamps.
Step 2: Mass Production


Be sure to use waterproof glue. After the glue has set I used a router with a round-over to bit to smooth all exposed edges. It is much faster to do this on the glue-up, rather than finishing each piece individually. After routing I did some finish sanding. Again, easier with it as one large construction. Run the big piece through the table saw to rip the standoffs in half and make two longer strips.
Finally I used a chop saw to separate the individual cleats.
Step 3: Finishing

At this point I have about ten minutes of actual elapsed time invested. Wood was scrap and the glue is minimal. Finishing is where the time is spent. I am not a perfectionist, but these steps can only be done once. Take your time and do it right! I sanded each of the cut edges. I used a belt sander sitting upside down, like a bench sander. Each edge was relieved to give it a rounded edge. Any stray splinters were sanded and/or removed. Final sanding is by hand. Make sure everything is smooth to the touch. A little extra time here is warranted. It will save your lines (ropes) later. I got a gallon of wood sealer at Habitat for Humanity years ago for $3. I use it liberally before painting or varnishing. It is thin and really soaks into the wood. This will make parts like these last much longer. (The picture is before sanding). I have applied one coat now. A light sanding and another coat before spar varnish is applied.
Step 4: Attachment

I am not sure exactly where the cleats are going yet. They will probably be screwed in from the underside. Drill a hole through the deck larger than the threads of a stainless steel screw. Drill a hole the size of the body of the screw (i.e. not including threads) into the cleat. That way the screw doesn't distort the deck, but does bite into the cleat. An alternative is a screw through the top of the cleat. Here the cleat hole is large and the deck hole is small. In this case I would drill a final 3/8 " hole in the top of the cleat to recess the screw. Fill this hole with a decorative plug glued in place. Use sealer on the cleat before gluing the plug. This will keep glue from staining the cleat. Cut the plug flush, sand, seal. A little time in finish work will give you a result that will make you proud. I hate it when I have to say "That was a rush job, I should have ...".
I made a few larger ones that will be used on my skinny boat (see that instructable). This time I drilled a hole through the top and through the leg when I glued them up. A carriage bolt in each one functioned as a clamp while the glue dried. It will be part of the mounting when they are attached to the boat.

Participated in the
Green Living & Technology Challenge


