

Introduction: Electrical Box Extender


I am working of finishing a portion of my basement, and ran into a bit of an issue. the wood covering on the walls was thicker than the electrical boxes were installed for. I know that you can buy extenders at the hardware store, but i have had limited success with these, and still needed to add shims.
I drew up a quick box extender that can be 3D printed
Step 1: Printing the Extension
The extensions were printed on low resolution with 3 shells and 10% infill. My files have an overall height of .5", you can customize the height of the part in your printer software by using the scale function just be sure to uncheck the "scale uniformly" button.
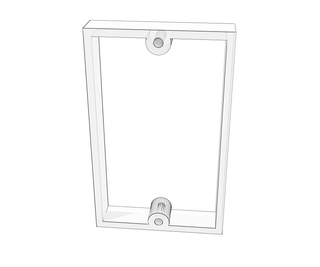

Step 2: Install the Extender


I printed this one out of red filament so it would show better in the photos. The rest of them are printed in blue that is as close to the box color as possible.
Start by turning off the breaker to the outlet, my first time I was showing my wife how to do this and received a shock. This earned me mild disapproval from my wife.
- Begin by removing the screws that hold the outlet to the box
- The screws will likely be too short, unless the extender is small, you will need to find replacement screws. i cheated with small wood screws
- Pull the outlet from the wall a bit, try not to put too much force on the wires
- Drop the extender over the outlet and wires
- Press the extender back against the box and press the outlet back against it
- Replace the screws and snug things down
Step 3: Finishing Up


You can now install the plastic cover over the outlet.
A few final notes:
- Make sure your power is turned off before you work in the outlet.
- Be careful Line voltage hurts a lot and can kill you
- I make no claims or warranty on this design, i am also not an electrician or code enforcement officer. Installing things that are home built may cause an increased risk of fire or shock.
- Use common sense, be careful.

Participated in the
3D Printing Contest


