

Introduction: Electrostatic Polarity Detector


This instructable is for an electrostatic polarity detector that can be used to help determine if an object has a positive or negative charge
Attachments

Step 1: Materials Needed
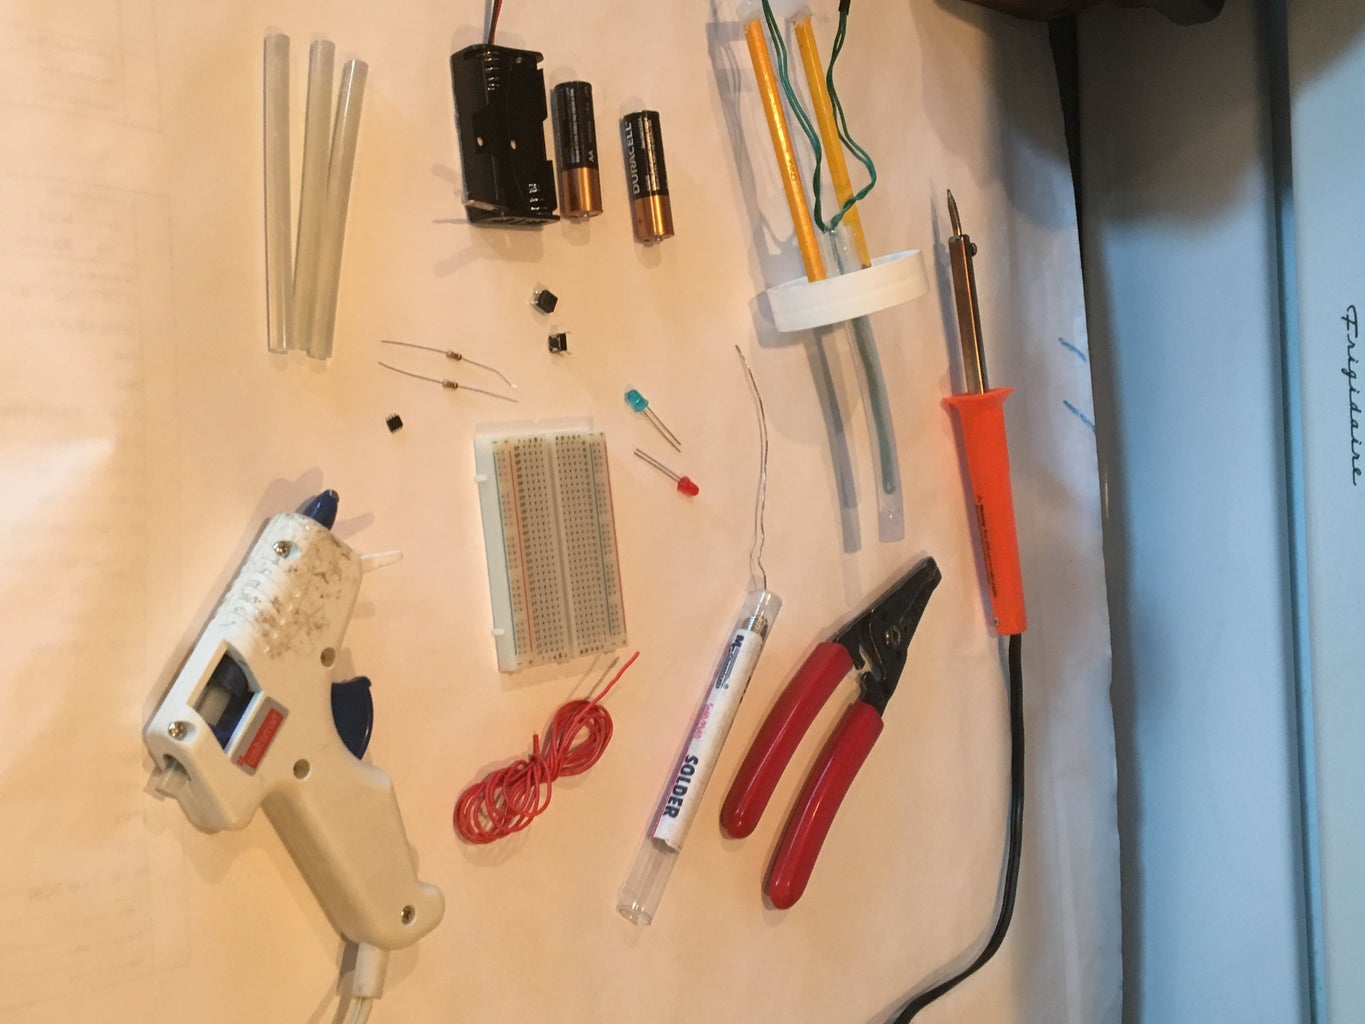


2 AA batteries
jumper wires
2 push buttons
FDS8958A Chip
Chip adapter: SMT breakout OPCB for SOIC-8, MSOP-8 or TSSOP-8
blue LED
red LED
2 - 100 ohms resistor (if you are using 9v batteries use 1 kilo ohms resistors)
Plastic bottle w/ cap
plastic tubing
hot glue gun and glue sticks
solder and soldering iron
Step 2: Solder Chip

Match dot on chip(pin 1) with 1 on chip adapter.
Pins go in counterclockwise order 1-8 on chip.
On the adapter pins 1-4 are on the bottom from left to right and 5-8 are on the top from right to left.
Micro chip can be soldered in place by first tinning the terminals on the chip adapter
Then the chip can be placed on top of the chip adapter and carefully soldered into place. Use an object to hold it in place while soldering.
Step 3: Attach Chip Adapter, LEDs, Push Buttons and Wires to Protoboard


Solder male pins to chip adapter.
***Before soldering to protoboard, I would recommend you look at schematics and wire on breadboard to save you time from having to rewire and resolder.
After you are familiar with how you will wire it all then proceed to solder:
Solder chip adapter to protoboard.
Solder LEDs, push buttons and wires to protoboard according to schematic
Step 4: Assemble and Hot Glue


Once we have wired everything correctly and soldering into place then we can start to hot glue it all together
For the bottle you drill a hole in the center of the cap big enough to fit tubing through it.
Fit tubing through whole and leave enough on the below cap to glue 4 more plieces of tubing.Hot glue tip of center tube to close it. leave end below cap open to fit wires through.
2 pieces will be small(they are for spacing) will be attached to sides of center tube from cap.
And 2 longer tubes (but not too long for the bottle) . ***Note*** We ran out of tubing so we used 2 broken pencils instead of tubing.
Finally one small tubing for the bottom to hold the 2 long tubes in place.
Once this completed you can fit the detector wires through the center tube.
Hot glue protoboard and battery holder in place.
Step 5: Words of Advice or Options


If you can use a bottle with a bigger opening or a mini breadboard so you can do it all on a breadboard. It will save you lots of time.
Please look at the wiring sketch and prewire everything before soldering. We didn't and it took us a while to figure out why and we had to resolder some wires.


