

Introduction: Ember Printer Swatchbook: Textures and Finishing for SLA DLP Printers


Understanding what's possible is a crucial component of creation. When exploring uncharted territory, occasionally it helps to have glimpses of what you may discover along the way. With this in mind, I had the pleasure of working on a swatchbook of possible textures, finishes and materials that can be created with Autodesk's Ember 3D printer. With luck, Ember explorers and pioneers will be able to use these textures, material and orientation explorations to create the unexpected!
With a focus on achieving surface textures, volumetric effects, surface finishes and mechanical material properties, the outcome of researching using Autodesk's new SLA DLP printer manifested as three collections of 3D printed swatches. Throughout this Instructable, we'll explore methodology and outcomes for further exploring what's possible!
Main tools:
CREATING FILES*:
- Processing (for surface texture manipulation)
- Terminal (Tarball creation)
- Illustrator (rasterized image creation)
3D PRINTING:
- Ember SLA 3D printer (printing!)
- Autodesk's PR48 - Standard printing resin
- Isopropyl (cleaning prints)
FINISHING
- Lacquer (clear nail polish for exposing textures)
- Cyanoacrylate (super glue for assembly)
* For the majority of file creation, I used PNG stacks sent directly to the printer. I'll explain this workflow more in depth here.
All files can be downloaded on my Github
Step 1: Surface 1 : Matte Finish


Introduction:
This exploration in print possibilities all started with trying to achieve matte surface finishes for prints without post processing. By manipulating a border of 1x1 ellipse shaped pixels along the edge of prints, we can get a more matte or textured outcome! The Tarball is attached to print matte surface finish bricks. Each print creates a regular surface for control and a textured surface.
Pixel Shape:
I found the most optically satisfying results to come from using ellipse shaped pixels to create matte surfaces. It seems as though the way the projector translates pixels into the resin tray may have something to do with this (to learn more, see Appendix 5 on Resolution). Square pixels will also create surface noise, so either technique works. It all depends on your optical preference
Projection & Alaising:
The image on the computer screen is of a slice for a print that has ellipses with 4px diameters connected directly to the TI projector that lives inside of the Ember printer. You'll notice that the ellipses aren't smoothed or anti-aliased. In trying different prints and pixel sizes, it seems as though aliased files print best.
Attachments

Step 2: Surface 2 : Matte Variation


There seems to be a bevy of options when it comes to creating interesting matte surfaces by manipulating pixels in different ways! Regularity in pixels creates a striated result, and randomness with pixel size creates a deeper looking surface. Below are two methods I included in the swatchbook, but there is certainly more to see! Attached are the tarballs used to print these files if you'd like to create some of your own.
MATTE GRADIENT
The Matte gradient swatch features a surface texture ranging from 5px to 1px. Something like this seems useful for gradating the surface's light diffusion around a specific texture or geometry.
2PX MATTE
The 2px Matte swatch features a nubbier 2px surface texture throughout the print.
Step 3: Surface 3: Matte Variation 2


The more the merrier! The Matte variations continue conically.
Curved surfaces often have striations along the curved surface. In an attempt to create a more visually uniform surface, we applied 1px and 2px textures to these semi-conical structures.
Step 4: Surface 4 : Fuzz


The Ember printer prints at 10micron resolution. A human hair is about 40-50microns and a pixel prints to be about 50 microns. This means that printing fuzzy and hairlike surfaces are quite possible. For each of these fuzzy prints, individual strands taper from 8px wide on the base to 4px wide near the tip. The concentric fuzz print has circular hairs while the grid fuzz has square hairs.
Learn more about creating hair and fur on Arian's Instructable.
Step 5: Volumetric 1: Watermarking


Brian, chief chemist for the Ember printer, discovered that one could watermark a print by using greyscale images volumetrically. I tried this with both the spark logo and with an image of shattered glass. It seems as though about 75% opacity for greyscale images create defined watermarks that don't create holes.
Step 6: Volumetric 2: Perforation


While reviewing prints, Eric, Instructables founder and head of the Ember printing team, suggested trying internal perforation throughout prints. There's so much to play with within this concept that I barely broke away from gridded structures! 4px is about the minimal internal perforation size to create any sort of volumetric effect.
Gradient
The moving gradient is a stack of files that change each layer. It's a bit hard to view the interior layer pixels, but it does make for an interesting exterior effect.
Static Grid:
This grid of 4px perforations can be seen pretty clearly throughout the print.
Step 7: Volumetric 3 : Weaving


Typically for textiles, we weave fibers past one other to lock them together because they aren't self-adhesive. However, with 3D printing, "fibers" adhere to other fibers in the process of printing. With this in mind, I was curious as to what might emerge if attempting to create different woven structures with Ember.
Woven Image
Using a greyscale image of a woven structure, I created a PNG stack. Bumping up contrast created deep indentations in the print. With more time to experiment, I think that this could make a very subtle and interesting volumetric effect.
Vector Weave
By rendering orthogonal lines in illustrator, I created a stack of PNGS that had alternating layers of 3 consecutive layers of "warp" and hen 3 consecutive layers of "weft". This print had interesting mechanical properties and is quite visually unique from a solid print.
Step 8: Material 1: Black Resin

This is a simple print using Maker Juice's G+ black resin. As you can see, there's quite a bit of distortion in the print. It's still unclear if this is a function of the printer, resin, PDMS or any number of other variables.
The attached files are for printing hybrid matte and shiny bricks. The HybridMatteShinyOverlift.tar.gz file has a high Z overlift and slow RPM, which is useful for extra viscous resins.
Step 9: Material 2 : Flexible Resin

Form 1 - Very viscous and tricky to print, even with a low cross section print like this lattice. However, the outcome is quite nice, being both soft and flexible.
FS Labs - Much less viscous and only resulted in a bit of jamming on this lattice print. The outcome is comparable to the Form 1 labs resin in terms of flexibility and texture.
Attachments

Step 10: Material 3: Metal Molding


Resin Print:
The print used as a "mold" was created in illustrator with random pixel distribution for 10 layers on the surface.
Metal:
Standard copper tape (or any metallic tape) molded on top of the textured print. I would imagine that it's possible to create an arrangement of textures in metal tape by printing in resin and then molding metal on top.
Step 11: Finishing - 1: Sandpaper

After lacquer in the form of nail polish was successful, I thought I would try another nail treatment. A 4 way nail buffing block makes for a more uniform surface while 320 Sand Paper (discovered to be effective by Dan Porter) creates for a rougher surface. It seems as though the resin particles buffed off stick to the print after sanding, creating a fogged surface.
4 Way Nail file / 4 Step Buffing block - Here
*Error on swatch tab - Sandpaper is 320 not 32*
Step 12: Finishing 2 : UV Protection

Shalom, UX and Jewelry designer on the Ember team suggested trying a few UV protectant surfaces. The two sampled are UV curing nail gel polish and car paint sealant.
UV curing Nail Polish
The UV curing nail polish needs to sit under UV light for about 30 min for each coat to make a stable surface. This can cause crazing and heating within the print.
Car Paint Sealant
The effects of this treatment will be clearer over time. We'll see how the print ages when exposed to UV light over the next few weeks!
Step 13: Finishing 3: Nailpolish

Nails and Resin
It seems as though anything that makes a nail look nice will have a similar effect on resin prints.
Nails are made up primarily of the protein Keratin and are about 7%-12% water (depending on your bodily composition during nail production). So why is this relevant? If we find that finishing resin is similar to "finishing" nails, perhaps we can create stronger prints and better surfaces. This is still fairly inconclusive, but one thing is for sure, nail polish looks great on Ember prints.
Step 14: Finishing 4: Dye

RIT dye is best used for synthetic textiles, but I was curious as to what outcomes we may achieve from attempting to dye cured resin without any sort of stripping agent. The result is a greenish tinted print that looks slightly like dark sea glass.
This swatch tab is be continued with a spray painted piece to come someday in the future.
Step 15: Finishing 5: Paper Underlay

Curious to see if I could make a Tor Browser print into an earring, I whipped up a PNG stack of the Tor Globe (as the onion is copyrighted). Without iconic green and purple hues, the Tor globe looks like a standard representation of the world and that simply will not do. By applying a paper underlay, the print looks both textured and colored to look closer to the Tor Browser globe as we know it.
Step 16: Appendix 1: Negative Space Study


A wise man once asked, " What point in a print can one create negative space?"
Through an epic self-journey, it was discovered that about 16 pixels will take you through a void from once side of the print to the other. With 1px printing to be about 50 microns, that makes a hole that's about 800microns x 800microns. For context, that about .03 inches.
The swatch pixel distribution is as follows:
A- 16px
B- 14px
C- 12px
D- 10px
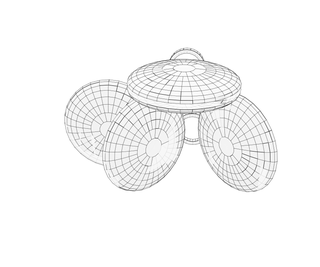
Step 17: Appendix 2: Print Orientation Study


Orienting yourself if a matter of knowing which direction you're headed, but orienting prints is a matter of understanding where each direction may take you!
Rantcedote (random antecodes) aside, the orientation of your model does create a "grain" of sorts in the resulting print. The swatches included in the sample are as follows:
A.) 90 Degrees from print head
B.) 45 Degrees from print head
Isolated Print - Flat on print head
The file included will print a bevy of discs for running your own orientation tests.
In addition to creating a grain on prints, orientation can also affect print accuracy.
Attachments
Step 18: Appendix 3: Layer Height Study


Unfortunately, this print had a bit of an accident that I wasn't able to repair before photography. However, the concept of layer height still communicates. As the layer height approaches 100 microns, the print becomes more fragile due to the deep cavities in the original PNG stack files. There's a fantastic Instructables on layer height, resolution and print time by Andreas Bastian if you'd like to take a deeper dive into layer height.
Step 19: Appendix 4 & 5: Resolution Studies


Different resins achieve different resolution and different stroke sizes for rasterized images create better or worse resolved prints.
Appendix 4:
Appendix 4 looks at resolution using PNG stacks. This 3 layer voronoi diagram features elements ranging from 8px to 20 pixels across. 8px in general seems to be the minimum pixel size for getting a reliable print from a PNG stack. This can taper down in size as with the fuzzy surface prints, but attempting to print anything below 8px as a structural element didn't resolve well.
Appendix 5:
Vorex resin is about 150mps for viscosity while Autodesk's standard prototyping resin is at about 300mps for viscosity. Combined with varying chemical makeup, one can see the different in resolution between resins used. With the orange Vorex resin, it's even possible to see the individual pixels projected into the resin bed.
Step 20: Tips & Tricks


Creating Image Stacks:
I wrote a quick Processing sketch that will help you save stacks of images rendered in Illustrator or any other program. This sketch is called SavingImageStacks and you can grab it on Github.
In order to upload a file to the sketch, you need to save the image in the "images" folder of the sketch. You will get a dialog box (pictured above) that will let you select an image and it should fill the background the sketch. The number of images saved is hard coded, so you can sub in any number of images.
Just as a note, my scripts aren't well commented/ aren't the most elegant. Please feel free to alter and toy with as you need!
Aliasing:
Anti-aliasing is often used on fonts to improve human perception of items on a digital screen. However, for scripts that generate rasterized images to print, it seems best to turn off any anti-aliasing. In processing, this can be written as noSmooth();
Finishing Prints:
A list of useful materials for finishing prints can be seen above. To create segmented finishes, I found that painter's tape worked quite well!
Step 21: Code Readme
Just to help navigate through the processing sketches (if you would like to use them), here's a breakdown of functionalities.
Again, they can all be downloaded here.
BookMatteSwatch (Surface 1 - Matte)
-Prints two bricks. One is Matte, one is standard
BookMatteSwatch2 (Testing finishes and materials)
-Creates hybrid prints that are half matte and half standard
Concentric Hairball (Surface 4 - Fuzz)
-Creates concentric fuzz
Ellipses (Surface 3 - Conical)
-Creates a conical shape with matte surface noise
Gradient (Volumetric 2 - Perferation)
-Creates a moving gradient over the volume of the print that has various sized cavities for a perforated interior
GradientMatte (Surface 2 - Matte Variation)
-Creates a Matte print where pixels go from 5px to 1px throughout the print.
GradientStatic (Volumetric 2 - Perferation)
-Creates a static gradient of internal cavities for a perforated interior
Hairball(Surface 4 - Fuzz)
-Creates a grid fuzzy print
Saving Image Stacks (Rasterized image prints like Volumetric 1 - Watermarking & Volumetric-3 Weaving )
-Allows you to upload .PNG files and output as numbered slices
Step 22: Making the Swatchbook


Aside from prints, assembly of the swatch book required the following materials:
0.) 3 - 3" binder rings
1.) Laser Cutter
2.) 12"x12"x 1/8" White opaque acrylic
3.) 12"x12"x 1/8" Clear acrylic
4.) Cyanoacrolate (Krazy glue)
5.)Standard Printer (for inserts)
6.) Paintbrush
7.) Patience (I hear you can purchase this at the local virtue shop)
---
Assembly itself is fairly simple. Laser cut the final.ai files to create the top tabs of the swatchbook using standard acrylic settings.
Resin print specs:
PRINTING FLAT TO THE BUILD HEAD:
750px x 350px x 128 - 50 micron layers
PRINTING ALONG THE Z-AXIS
150px x 750px x 350 - 50 micron layers
Attachments

Step 23: QUESTIONS TO PONDER
In exploring and discovering the offerings of printing with Ember, I thought of a few concepts that I ran out of time to execute. I'd be curious to see what you discover through exploring Ember!
0.) Is it possible to engineer folding mechanisms that can be expanded off the bed (4D printing/ nervous systems style)?
1.) Is it possible to make a velcro fastener by creating two hairlike structures of hooks and loops? If the tray is switched mid-print could this have a flexible backing and a standard prototyping resin detail?
2.)Is it possible to make conductive resin using nanoparticles like carbon nanotubes?
3.) Could we print galvanic cell batteries as embedded parts of small systems? How many cells must be connected to create wattage for an LED? Will amperage be the main bottleneck to this?
4.)What would it be like to create cavities inside of prints to replicate fogged glass?
5.) What happens when we mix resins together to create marbling patterns (e.g black maker juice and standard prototyping resin)?
7.) What happens if we use Noise() instead of Random() to achieve psuedorandom pixel placement for matte surfaces?
Have fun discovering new possibilities and feel free to send a message, email, smoke signal, binary breakdown, or a Semaphore Flag signal if you have any questions or ambient thoughts! Thanks for reading!


