

Introduction: Epic Treehouse


Build an epic Treehouse (almost) all by yourself!
I built this treehouse in about 6 months armed with a bunch of power tools, clamps (essential) and after watching countless youtube videos. Depending on who you ask, the treehouse was built for my 9- and 7-year old daughters, my entire family, or as a man cave for me. This instructable is designed to help you build a treehouse (almost) all by yourself.
Step 1: Select Tree(s)


I had two large hackberry trees near my property line that are about 13 feet apart. After getting permission from my neighbor (a horse farm!), and consulting an arborist, I decided these trees would be perfect hosts for my treehouse. I’d recommend consulting a tree expert to help determine if the trees are healthy and strong enough to support your treehouse.
Step 2: Designing the Treehouse

Thinking of how you and your family would like to use the treehouse is the first step in designing your custom treehouse. My family wanted it easily accessible for kids and grandparents alike, big enough to house a birthday sleepover, lots of windows to enjoy the view of the horse pasture and of the host trees, a deck to enjoy being outside in the trees, and places to relax and read.
After thinking about the plans for hours and getting my family’s input (sorry, 7-year old, no tv in the treehouse), I sketched my design (on a napkin). My family was on board so I started planning each wall to get a materials list. I found it easiest to get my list from my rough sketches, as opposed to creating more formal drawings.
Tip: Order at least 10-20% extra lumber, and MANY more screws than you think. I generally used coated screws for the entire project instead of nails, as the movement of the treehouse may cause the nails to pop out over time. For a treehouse about this size, I’d say to buy a 25 lb box of 3” screws, which is much less expensive than buying five 5 lb boxes.
Also, it’s a good idea to mulch around the trees to prevent their roots from being crushed from the weight of people, tools, and materials during the build and during use.
Step 3: Installing the Treehouse Attachment Bolts (TABs)


As the installation of the TABs is the most critical part of building a treehouse, I decided to hire an expert. Django Kroner of The Canopy Crew selected and installed the necessary TABs (based on the expected load of the treehouse). Django also installed the two support beams (each of the two supports beams are two pressure treated (PT) 2x12x20s bolted and glued together.
My decision to hire a professional for this part was because the TABs themselves are expensive, the tools/bits necessary to install the TABs are expensive, and messing up the drilling of the holes (e.g., not perpendicular to the tree, an incorrect depth, not level with each other, the wrong part of the tree) would likely be irreversible. The weight and size of the support beams made it much easier to have Django’s help installing them.
Step 4: Laying Out and Installing the Joists


The 2x8 PT floor joists are generally spaced 16 inches apart (on center), but I ensured that no joist was within 6 inches of the tree trunks to allow the trees to grow and, more importantly, to allow the treehouse to move with respect to the tree (on windy days) without contacting the tree. The large nuts on the ends of the TABs dictate the limits the treehouse can move along the TABs, which, in my case, was less than 6 inches. I marked one of the support beams (the “first beam”) where I planned to position each joist; I did not mark the second support beam as the two beams are not exactly parallel to each other.
Also, as noted below, I planned to use different material for the deck boards and the floor of the house part of the treehouse. Since I didn’t want to screw the deck boards and the plywood floor into a single joist, I used two joists spaced fairly close together (3 inches) at the intersection of the deck and house (I added these extra joists after these pictures were taken).
Tip: To determine this space between these two closely-spaced joists, you should account for the thickness of the sheathing and siding (including corner pieces) if plan to have a post (supporting a railing) next to the house. I wound up changing to a thicker siding material during the build, so I had to trim the corners of the siding to fit behind the post.
To install the joists, I cut each joist to the same length (16 feet), marked the location of the joist I wanted to line up with the first beam (about 5 feet from the edge), and positioned the joist across the two support beams based on the marked location on the first beam and the marked location on each joist. To temporarily secure the joist to the beam, I screwed the joist down at an angle into the first beam. I then squared each joist to the first beam using a 2-foot square, and screwed each joist into the second beam. Since there are many forces acting on the joists, including upward force from wind and as a result of the cantilever design I’m using, after temporarily securing each joist, I secured each joist to each support beam with a hurricane strap using structural screws. I generally used the longest structural screw possible for maximum strength.
After all the joists were secured, I added bracing between the joists to help stabilize the joists, and to help prevent movement of one joist with respect to each other.
Step 5: Adding Fascia Board


For aesthetic and structural reasons, I decided to install 2X8 PT fascia board on both the front side and back side across all the joists. The fascia board effectively secures all joists to each other, thus creating a robust frame for the deck and floor.
Before positioning the fascia board in place, I glued the face of each joist with liquid nails to further the robustness of the connection.
To help ensure the top of the fascia board was flush with the top of each joist, and to help support the fascia board during installation, I temporarily screwed a 2x4 to the top edge of the fascia. I was then able to lift the fascia (with 2x4 attached) and position the 2x4 on top of the joists, thereby aligning the top of fascia with the top of the joists. After clamping the fascia to the joists, I screwed the fascia into each joist with 2-3 screws per joist (and then removed the 2x4 from the fascia). I wound up using two fascia boards for each of the front and back, mitered where the fascia boards met each other, and positioned the mitered edges on the same joist.
For the spaces in front of and behind the trees, I secured a 2x8 perpendicularly between two adjacent joists using joist hangers and structural screws, and added additional joists between these 2x8s and the fascia board. I made sure to leave at least 6 inches between any joist and the tree to allow for tree growth and movement of the platform with respect to the tree (e.g., in response to wind).
Step 6: Installing the Floor


After the joists are installed it’s easier to see (and measure) exactly how much space there is between and beneath the trees and limbs, so now is when I finalized the design of the floor, deck and house.
For the decking, I used typical PT deck boards; for the floor, I used ¾” tongue and groove plywood. I opted not to use pressure treated wood for the floor because the floor wouldn’t be exposed to weather.
After cutting the plywood to size, the challenging part was lifting the 8x4 sheets onto the joists. I wound up making a ramp by leaning two pieces of lumber between the ground and the fascia board. I positioned my ladder between the lumber, and pushed the plywood up the ramp while climbing the ladder. Success.
I used liquid nails (for subfloors), and 3-3 ½” deck screws to glue and screw the plywood into place. I also staggered the seams of the different pieces of plywood.
Step 7: Installing the Posts and Rails


I used 4x4 PT posts for the posts, and ¾” conduit for horizontal rails between the posts. The conduit was inexpensive, each to install, and would preserve our view. The conduit was also fairly easy (and fun!) to bend, which came in handy for the ladder railing, and an interior railing around the loft ladder opening.
Before installing the deck boards, I installed the posts since I still had access to the joists. Prior to installing the posts, I cut each post to about 58” long, and marked each post exactly 48” from the top. I would line up this mark with the top of the joist that the post secured to to ensure the tops of each post would line up with each other. I then drilled holes in each post for the rails. Using the 48” mark, I evenly spaced five holes and drilled them using a guide to ensure they were perpendicular to the face of the post. The guide also let me set the depth of each hole, which I set to just under half the thickness of the post. To accommodate ¾ conduit for the railings, the diameter of the holes was slightly larger than the outer diameter of the conduit. Depending on where the posts were to be positioned on the platform, I drilled the holes in one face, two parallel faces, or on perpendicular faces of the posts.
I decided to secure each post to a joist, where the joist meets the fascia; I opted not to secure the posts to the fascia so I could achieve a nice, clean look (without seeing bolt heads randomly positioned along the fascia), and because the joists were able to bear more of a load than the fascia. I used two galvanized bolts, washers, nuts and lock washers to secure each post to the joist. Before I drilled the holes in the posts and joists, I positioned the posts exactly where I wanted them.
To help hold the posts in place while positioning and leveling them, I temporarily screwed a 2x4 brace to the post so that its bottom edge was flush with the 48” mark. I then laid the 2x4 on the joist to gently hold it in place, leveled the post (clamped the level to the post to keep both my hands free), and clamped the post the joist with a heavy-duty ratchet clamp. When the post was plumb and securely clamped, I drilled through the post and joist to accommodate passage of the bolt. Using a ratchet, I secured each bolt in place and then removed the 2x4 brace.
To install the rails, I cut them with a sawzall about 1-2” longer than the space between adjacent posts, and was able to slide the first end in one post, and slide/push the second end in the other post. I wanted the rails just short enough (to maximize their lengths) to fit, which often required a few trial-and-error-cuts per rail. The rails are also relatively easily removable, in case I want them off the facilitate access to materials. In the future, I may add some caulk where each rail meets each post for a more permanent connection.
(During the building process, after I knew I wouldn’t need further access, and when my wife wanted extra safety, I added top rails made from extra deck boards. I also ripped a few boards on my table saw, screwed them to the upper portions of each post, and just below the top rails.)
Step 8: Installing the Deck Boards


I chose to use traditional PT deck boards as they were readily available, and they were available 20’ lengths, which was the longest length I’d need. The installation of the deck boards was quite similar to installing a traditional deck, apart from the tress going through it. If you look at the edge of each deck board, you’ll see that the grain is curved in one direction – it’s curved to the bark (or where the bark used to be). I decided to install all the boards bark-up (curved side up), so as they flatten over time the center of the board is pushed down. I also paid attention to the ink stamping on the boards and either installed them all face down (when possible based on my bark-up installation) or cut off the stamped portions (they are usually close to the ends). During installation, I aligned all the edges that were adjacent the plywood (using about a 1.5” spacer; depending on how you’ll finish the treehouse), and intentionally left the other edges (adjacent the end of the deck) long, as I would later snap a chalk line and cut off all the edges at once to give me a nice finished look (and to save time with precise measuring).
Since most deck boards are not totally straight, I screwed one end of the board to the joist below using two 3” (coated) deck screws, and I used clamps to push or pull the other end of the board into a straight line, using nails as spacers, and then continued to screw the rest of the deck board into each joist with two screws.
When the deck boards were close to the trees, I roughly cut them prior to installing them so they would be about 1” or so away from the tree. Once all the boards were around the tree, I drew a line on the deck boards all the way around the tree about 2-3” from the tree. I used my jigsaw to cut along this line, and sanded any rough edges. This space between the deck and the tree would allow for movement and growth of the tree. Also, in the future if the tree trunk gets significantly larger, I’ll be able to easy cut more of the decking out away from the tree using the same method.
Step 9: Building and Installing the Ladder


While the idea of a rope ladder to access a treehouse always intrigued me, I wanted easier access to this treehouse so the young and old can both enjoy it. I decided a strong ladder would fit the bill. I made the ladder after the decking was installed so I could position the top of the ladder on top of the decking.
I used PT 2x8s for the stringers, and PT 2x8s for the steps. While I didn’t ask my wife too many questions during the build, I did want her input on the angle of the ladder. Before making any cuts in the lumber, I leaned one 2x8 from the ground up against the edge of the deck until it was at the perfect, wife-approved angle. In this position, I used a level to mark vertical and horizontal lines. After making a horizontal cut on the bottom of the stringer, I positioned it flat on the ground and leaned up against the top of the edge of the deck, and marked where the stringer should be cut on top; I essentially traced the profile of the deck board and joist on the stringer. I wanted the ladder to rest on top of the decking, instead of screwing the ladder to the posts, for example, so the platform could move with respect to the ladder. This would also allow me to temporarily remove the ladder, if necessary.
I used a jigsaw to cut the top part of the stringer, including the rounded profile of the deck boards. After the first stringer was cut, I traced it onto the second stringer and cut that out.
I might have done more work than necessary installing the steps, but I think it was worth the effort. I grooved each stringer to accept and support the ends of 2x8 PT steps. I marked up the first stringer using the horizontal and vertical lines previously made and used 10” spacing between most steps, which left about 8” between the ground and the first step. I then marked up the second stringer, using a mirror image of the lines on made on the first stringer. To make the grooves, I set the depth of my miter saw to ¾” (half the thickness of the stringer), put blocking between the fence and the stringer to set the length of the cut (as I didn’t want the groove to extend the full width of the stringer), and set the miter angle based on my marks to ensure horizontal steps. Slowly but surely, I made about 20-25 passes with the saw to create each groove. I used a scrap 2x to test the thickness of the groove and ensured the fit wasn’t too tight to allow for expansion/contraction of the wood. It was a pretty time-consuming and dust-making process. (I would recommend wearing a mask when cutting PT wood, especially when making about 500 cuts!)
I cut the steps to length accounting for ¾” in each stringer, and positioned the stringers and steps in place against the platform. With the steps in the lowest position within the grooves, I added two screws through each stringer and each step to secure the steps in place. Having the ladder installed made accessing the platform (for me and the materials) much easier.
Step 10: Building the House


Building the actual house part of the treehouse is quite similar to building a shed or another small wooden structure, and the design of every treehouse is dictated by the size and location of the trunks and limbs, so I won’t go into too much detail with this step, but I’ll try to provide some helpful hints and lots of pictures.
Since I wanted the house to be weatherproof, I used real windows and a real door. I positioned the windows to maximize the view of the horse pasture, and of the trees themselves. I even added one window to the design while I was up on a ladder on the platform looking at a cool intersection between three large limbs that would have otherwise never been seen. The result was 12 windows.
I used a few windows and a door that were removed from my real (non-tree) house during various renovation projects, and found a few windows on clearance at Home Depot, and some at a local Habitat for Humanity Restore. I also had a few dozen used 2x6s from another project that I used to frame the walls and ceiling, which saved money but added weight (vs. 2x4s).
Since my platform was large enough, and since I was working alone, I decided to build each wall section on the platform, instead of building them on the ground and then hoisting them up.
I built the walls, one section at a time, flat on the plywood using screws to fasten the studs from beneath the bottom plate and screws from above the top plate. After each wall section was built (and after the plywood was dry – once with the help of a hair dryer), I put a bead of liquid nails on the perimeter of the plywood where the wall would sit, and lifted the wall section from lying flat into its upright position (the first wall was quite heavy and a good workout!). I temporarily secured the wall in the upright position by clamping a 2x4 to a stud and to a post on the deck. The clamps enabled fine adjustment of the walls to get them plumb. I then bolted the bottom plate through the plywood and into a joist to further secure the walls, and thus prevent the walls from detaching from the floor in response to upward forces (e.g., wind) that aren’t too common for ground-dwelling structures. I repeated this process for each of the four wall sections, and then screwed each section to both adjacent sections.
I used a single pitch roof structure made from salvage 2x6s, including an overhang of about 1 foot in the front and back, and about 8 inches per side. Instead of making fairly complicated calculations (and awkward measurements) to determine the length of each roof rafter and position/size of the bird’s mouth notches, I used an intentionally too long 2x6, marked 1 foot from the top edge (for the upper overhang), and screwed the edge of a scrap 2x4 to the 2x6 along the 1 foot mark. I was then able to position the 2x6 over the high wall and the low wall, with the scrap 2x4 against the outer edge of the high wall, thus holding the 2x6 in place. I then marked on the 2x6 where the 2x6 would sit on the top wall (i.e., the location of the bird’s mouth), and where the outer edge of the low wall met the 2x6 (from where I’d measure 1 foot for the lower overhang). After removing the 2x6, I cut it to size, and cut out the bird’s mouth – about ¾” wide by ¾” deep. I duplicated this rafter size and profile for all 6 rafters, and used hurricane straps with structural screws to secure the rafters to the high wall and the low wall.
I decided to add the sheathing to the walls after the roof framing was in place because the lack of sheathing made accessing the hurricane straps easier. In addition to screwing the sheathing to the wall framing, I also used nails (for the first time) in several locations for added shear strength.
Step 11: Installing the Roof


I chose to use a metal roof for the treehouse mainly due to its light weight, relatively quick installation, and its appearance as we’d be seeing a the entire roof from our (non-tree) house and virtually our entire backyard. Before adding the metal roof, I screwed 1x2s every two feet perpendicular to the rafters; I would screw the roof to these 1x2s. Initially, I installed a drip edge on these 1x2s.
This is the first time since the installation of the TABs that I needed help. I tried attaching old clothesline wire to the roof panels with clamps, positioning the wire over the top of the loft wall, and pulling the panels into position, but the panels were too unstable and heavy for my solo-system to work. It turns out that even if I did get the panels in place, I was too short to reach across the 4’ panels, while on top of a ladder, to screw them into place. Luckily, I have a good, handy friend who is about 6’4” and who was willing to help.
To achieve a nice, uniform screw pattern, I decided to pre-drill each panel while they were on the ground. I measured where the panel would be with respect to the 1x2s, and marked this location in each valley of the roof panel. This made the roof installation much easier, provided a nice finish, and prevented drill bits or screws scratching the metal (as would have surely occurred when trying to drill/screw at an angle when the panels were on the roof).
To lift the pre-drilled panels onto the roof, my friend and I actually used the same system I unsuccessfully tried on my own. This system worked well with on person lifting the bottom on the panel while climbing the ladder, and the other person in the treehouse pulling the wires to move the top part of the panel. Once properly positioned, we used special metal roof screws including rubber gaskets to fasten each roof panel onto the 1x2s.
After the first three panels were secured on the roof, we measured to see exactly how wide the final panel should be. To cut the metal panel, I first tried using large sheers, which did not work well at all. I would up using a jigsaw with a metal blade to cut the metal. I wasn’t worried too much about making a perfectly straight cut because the gable panels would be installed over the cut edge. After the final panel was installed, we installed the gable panels on each edge, and a ridge panel covering the top edge of the panels. The roof was complete (and the tarp was history)!
Step 12: Siding and Soffits


I wanted to side the treehouse with a weather resistant wood that didn’t need much maintenance. A local lumberyard had a sale on random width, 1” thick hemlock boards, and 3” wide by ½” thick hemlock battens. After researching the properties of hemlock and how it weathers over time, I thought this was a perfect choice.
When installing the boards I used 3” coated deck screws, and I tried to make sure that they were screwed into the framing of the treehouse, so no screw tips would be inside the treehouse. While the framing around all the windows and doors made this a bit easier, I had to add some extra framing to accommodate all the screws. For boards 8" wide and narrower, I used a single screw at the top and a single screw at the bottom (and sometimes in the middle); for boards over 8" wide, I used two screws at the top and two at the bottom. I didn’t worry too much about installing the boards exactly level, as level battens would hide non-level board imperfections.
For my one window with a curved top, I found it helpful to trace the curve of the window onto cardboard before I installed the window. This traced window made cutting the curves of the boards (and sheathing) much easier.
After all the boards were installed, I installed the battens between the boards. I leveled the battens and used a nail gun with 2” finish nails to fasten them to the sheathing. I secured the battens to the sheathing and not directly to the boards to enable the boards to expand and contract.
I also used the battens for the soffits. The 3” width of the battens and the fact that they were light (and thus easier to lift all the way up beneath the roof) made them a good option for me. I also had a lot of battens left over, as the amount of battens was difficult to calculate (based on the random width boards).
To vent the soffits, I drilled MANY hole in the soffit battens before I installed them. During installation, these holes also allowed me to see exactly where the joists were so I was easily able to screw the battens into the joists through these holes.
TIP: Don’t wait too long to install the soffits (like I did) or an animal such as a squirrel may try to make a nest (and have babies) in a small cavity under the roof.
Step 13: Fun Features


Here are some fun features I included in my treehouse to make it even cooler, more fun and safer.
Since my treehouse has a sleeping loft, I needed a way to get up. Unlike the ladder to access the treehouse from the ground, this loft ladder didn’t have to be easy to climb. I also didn’t want the loft ladder to take up too much floor space in the treehouse, so I decided on a 90 degree ladder, using tree limbs and rungs. I mainly used firewood as my source, but also was able to salvage the one limb I had to cut from a host tree to use as a ladder rung. It took quite awhile to cut the wood on my table saw including a flat top edge to step on, and to notch the sides to fit into corresponding notches sawed into each 2x6 stringer. But I think the unique result was worth the effort. I also cut the profile of a horse’s head on the top of one of the stringers. This detail didn’t take too much time, and it is a conversation piece (for those who make it to the top). To help climbing to the loft, and especially getting down from the loft, I added four playground-type handles.
After climbing up the ladder several times, I realized that I wasn’t able to take anything up to the loft with me since I needed both hands to climb the steep ladder. How would my kids be able to take a flashlight or a book to the loft? A basket-pulley system was the answer. I always envisioned my treehouse have a basket-pulley system, but since the ladder from the ground was easy to climb, I didn’t really need one. I was happy to be able to install the basket-pulley in the treehouse, as it satisfies both form and function. My kids love this feature and enjoy sending messages and books up to each other.
When building the loft and installing the roof, I hit my head countless times on the bottom of the rafters. (The highest ceiling in the loft area is 5’.) Not wanting my kids or their friends to hurt their heads, and to add color to the inside of the treehouse, I decided to attach pool noodles to the bottom of each rafter. I bought the noodles in bulk from Oriental Trading Company, and they luckily came in my kids’ favorite colors. After cutting out a small notch (along the length of the noodle) in each needle on my table saw, the noodles fit nice and snugly on the rafters. I did have to go back and tape the ends of the noodles as the friction fit only held up for so long after kids get their hands on them.
Perhaps my favorite part of the treehouse is the loft net. The net functions to prevent people from falling off the loft, provide additional sleeping (and napping) space, and allow visual access between the first floor and the loft. It’s also super comfortable! I ordered a custom size cargo net from treehousesupplies.com for less than $200. The size of my opening was 8’ x 4’ (give or take one or two inches), and I ordered an 8’x4’ net, knowing the net would stretch and sag. If anything, the net sags a bit too much (it’s too big), but installing a smaller net would have been quite difficult. I installed eye bolts around the perimeter of the opening – one eye bolt for each grommet in the net, and used a carabineer to attach each grommet in the net to the corresponding eye bolt. The most heavy-duty carabineers were positioned in the corners, and generally evenly distributed around the rest of the net. A challenge when installing the eye bolts was that the grommets were not evenly spaced around the perimeter of the net. To overcome this, I installed the corner eye-bolts first, then saw where the other grommets were positioned, and marked and drilled holes for the remaining eye bolts. Getting in and out of the net wasn’t too easy, especially after it started to sag, so I installed handles (left over pieces of the conduit) between ceiling rafters, which are actually quite helpful. The net is a favorite place for sleepovers, naps, and reading, and it’s strong enough to support the four of us with ease.
The back deck of the treehouse sits between large limbs of each tree and couldn’t be more perfect for a hammock. Another way to relax and enjoy being in the trees.
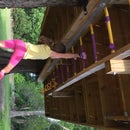
I also felt that the underside of the treehouse was under-utilized and needed some love. Wanting my kids to be able to get some exercise when playing outside, I built a set of monkey bars and attached them to the joists. I used leftover lumber for each side of the bars, and used leftover 4x4 posts and hardware to secure the monkey bars to the joists. I also drilled extra holes in the 4x4 posts to make the height (and slope) of the monkey adjustable. A tree stump makes a nice stool for the little ones to access the monkey bars.
With all of these places to hang and being in such close proximity to the horse pasture, we’ve named the treehouse “The Horseshoe Hangout.”

Grand Prize in the
Outdoor Structures


