

Introduction: Everything I Know About Stencils


(Note- I recently started writing notes about stencil techniques for a workshop at our maker space. When I saw the Paint contest and the Epilog Laser contest, I decided to do a short Instructable about stencils, since I use a variety of paints to create them and a laser cutter would help me take my stencil art to the next level. What started as a short how to turned into a full week of designing, cutting, painting and writing about stencils. Turns out I knew a lot more than I thought I did!)
I learned to make simple symmetrical stencils in 5th grade. I was amazed that I could fold a piece of paper, draw half of a spider, cut it out and trace it with a marker. Stars, hearts, rocket ships, people- my bilateral stencil empire grew rapidly. I moved on to other artistic pursuits, but stencils remained a part of my graphic arsenal. My interest was rekindled in the early 90's when a friend acquired a broken KISS pinball machine. He realized that the pictures of the band members on the side panel of the machine were stenciled on. He copied the stencils and soon Ybor City's alleys were populated by Gene Simmons and crew. A few of us jumped on the bandwagon and the seeds of Tampa's hipster street art scene were planted.
Fast forward to the early 2000's and I was living in Waikiki doing multicolor stencils onto full sized adhesive labels and putting them up around town. I made 'friends' in the street sticker scene. I'd put up a sticker and then someone else would put one next to it. I began to recognize tags and styles and even perceived rivalries by the placement of other artist's work in relation to mine. One guy would always cover my stuff and leave others alone. It became a surreptitious social network of people I never actually met, all linked by stencils and street art.
I like stencils because they are repeatable but unique. Due to slight variations in alignment, over/under spray and shading, no two stencils are exactly the same. This gives stencil art and posters a chaotic and primitive feel.
Stencils are great for posters, invitations, t shirts, art, advertising, packaging and anywhere else you want repeatable art or images.
This is a comprehensive overview of how I use stencils, spray paint and common household materials to create bold art and posters. I'll cover everything from image selection and processing to alignment and painting techniques. We'll start by creating a few stencils and then we'll learn cool ways to apply them and other techniques.
You will need a few basic supplies to get started-
-a hobby knife- I find the standard Xacto knife to be ideal for cutting stencils. Keep plenty of sharp blades on hand. Blades don't have to be disposable! A cheap set of sharpening stones from Harbor Freight and a can of oil will save you a lot of money down the road.
-a cutting board- I use old scraps of mat board from my friend's frame shop. The purpose of a cutting board is to protect the work surface and to protect the blade. A hard surface will quickly break the point of your knife. A piece of cardboard on top of a stiff board is good for a start.
-stencil material- My favorite stencil material is x ray film. I used to work in a hospital and stocked up on used films from the recycling bin, but with modern technology, actual film is getting harder to come by. I also use acetate film for larger pieces, but it can be expensive. Over time your paint will build up on your stencil. It can get so bad that it clogs smaller holes and details. One of the main advantages of plastic stencils is that the built up paint will flake and peel off if you flex the stencil. To get started, manilla file folders, cereal boxes, standard printer card stock or any thin, flat, easily cut material will work.
-masking tape- I like the green Frog tape from Home Depot if I'm taping a painted surface and 3M Blue tape for everything else, but most any masking tape will work.
-paint- While you can adapt almost any paint or pigment to use with stencils, I prefer to work with spray paint. I use a variety of paints ranging in price from $1-12 per can. I suggest starting out with mid- quality paint like Rustoleum Painter's Choice from Home Depot as it has good coverage and a wide variety of fun colors. Krylon is another good option, but I prefer the spay tips on the Rustoleum paint. Start off with white, black, grey and a few basic colors. There's nothing wrong with the cheap off brand paint from discount stores, they just don't offer the coverage or variety of colors that Rusto or Krylon offer. Eventually you will want to try every brand and type of paint you can find. Spray paint is a good way to start but I'll also explain how to use other pigments and tools later.
-newspaper- Use it to cover work surfaces, mask areas you don't want to paint, sop up spills and many other uses.
-texture and pattern materials- We'll go into more detail later, but these are things like lace, screen, net, mesh and anything with a pattern of holes or cut out shapes that I use to create patterns when spraying paint
.-letters and shapes- I use craft foam adhesive letters and shapes for painting letters and simple images.
-basic tools- screwdrivers, hammer, stapler, marker, pencil, ruler, tape measure, etc. Nothing fancy, but a CNC laser cutter would save you a lot of time (so please vote for me in the Epilog laser contest!).
-common household products- We'll use a few common items like dish soap, salt, glue and recycled materials that you may have lying around or are easily obtainable.
-eye and lung protection- Always wear some kind of mask when you are spraying paint. Safety glasses are a good idea also if you are doing a lot of spraying.
You don't need to spend a lot of money and you probably already have most of what you need (or a suitable substitute). This is about concepts and ideas, not exact formulas or rules.Check out each section and be sure to read the notes on the photos. Mostly just have fun!
Step 1: What Is a Stencil and How Do I Get Started?


What is a stencil? Basically, stenciling is a printing technique. Instead of using a cut image to put ink onto a surface like a stamp, we use a cut image to selectively block ink or paint being sprayed onto a surface. Some of the earliest human art was created by people placing their hands on a cave wall with their fingers spread and blowing natural ground pigments onto the walls. The urge to use stencils to create graffiti is an ancient instinct!
What we think of as a stencil these days is the opposite of what our caveman ancestors did. Instead of using the 'stencil' (a caveman hand) to block the image letting the 'paint' define the negative space, modern stencils have the image cut out of a flat sheet so the the paint defines the positive space of the image. We will cover some specific concepts in the next step when we create a simple one color stencil silhouette.
Stenciling takes many cues from the world of printmaking. Like other printing techniques, stenciling allows for an image or message to be reproduced many times. Stenciling also allows for multicolor images to be painted with several stencils sprayed in order. Multicolor stencils need to be aligned, or registered, to insure that the separate color layers line up. Like with traditional printmaking, stenciling requires a clean work space and a well planned assembly line process to allow for creating and drying multiple prints.
The best way to learn what stencils are and what they can do is by playing around with them.
Setting up a Work Space
I can cut stencils almost anywhere. I use a 24"x18" Masonite board with poster board or mat board taped to the top. I usually prop it in my lap leaned against the edge of my workbench or some other convenient surface. I keep an old coffee can handy to throw the cut out pieces in. When you start doing detailed stencils it can get really messy with little bits of paper or film all over the place. Adopt clean work practices early to avoid messes! When you're just starting out, a desk, coffee table or kitchen table will work fine. Just be careful not to ruin the surface! Keep your work space free of clutter. Make sure there is enough room to rotate the stencil and cutting board to any position. Remember- it's much easier to rotate the work to match the angle that you can comfortably hold the knife than to contort your hand to cut an odd angle. When I'm cutting fine details I rest my elbow on the cutting board for stability. I use my fingers and wrist to move the knife. I move and rotate the film while my hand stays reasonably still. Having my elbow on the work surface reduces wrist strain quite a bit. When i cut longer lines I hold my hand above the work with my pinkie finger dragging the surface for stability. I make the cuts with one fluid motion of the arm and wrist. Find what's comfortable and safe for you. Always be aware of where the knife would go if it suddenly had no resistance (i.e. slipping off of the paper or if the tip breaks). If it would end up in you change your grip or your body position to avoid the danger. I'm somewhat ambidextrous and can cut and paint with either hand. Try it- it saves a lot of time not having to reposition the film as much. Planning your cuts also saves time. When I'm cutting text or geometric designs where I have lots of straight lines to cut, I'll use a steel ruler and do every cut on the x axis then rotate the film and do all the y axis cuts. Work smart- not hard!
For painting, find a well ventilated space with a table or flat work surface. Your surface should have room for the piece you are painting as well as your paint cans, rags and other tools. I use an old drafting table that has the advantage of being tiltable. I also have a few folding side tables to hold tools and other materials so my main work space doesn't get cluttered. I keep my paint in milk crates sorted by color- blues. greens, reds, yellows and browns, pinks and purples, black and whites and specialty paints. I also have a number of flat pieces of mesh, expanded metal, screen, perforated sheet metal and other flat panels for creating spray patterns and textures. I keep these leaning in stacks against the wall for when I need them. If you are doing more than a few prints you will need to consider space for drying. I like the Rubber Maid white plastic covered wire shelving. It comes in 10' sections and a variety of widths. I use three shelving sections placed across two standard metal folding chairs- one across the rungs, one across the seats and one across the backrests. This gives me 30' of drying area that stacks out of the way when I'm not using it. Another option is a clothesline and clothes pins. Make sure your drying area is far enough away from your paint area that you don't get over spray on your drying prints, but close enough that it doesn't interrupt your work flow. Stenciling can get messy. Use plenty of newspaper and change it frequently to reduce paint accumulation. Be careful not to set prints or spray cans in wet paint. Wear old clothes and shoes, wear a hat or bandana and keep some rags around to wipe your hands. I use GoJo hand cleaner and Scotch Brite scouring pads to clean my hands but my hands are scarred and calloused anyway. A thin layer of Vaseline rubbed into the hands before spraying will keep paint from sticking, but it makes your hands a little greasy. The best soap for spray paint is time. I always have a little paint on my hands somewhere. I consider it my artist's union card.
Step 2: Let's Make a Simple One Color Sillhouette Stencil.


Here I will use a photograph of a bird to create a decorative silhouette stencil. Rather than give step-by-step instructions I'll just give an overview of what steps I take with image processing software to create a stencil-ready image. The specific commands may vary from platform to platform but the basic ideas carry over from Gimp to Photoshop to Paint.
This is a great way to create simple decorative stencils for textiles, furnishings and interior design. These techniques can be used to create any single color image or even text. When you've mastered silhouettes you can try more complex single color images by adjusting the brightness/contrast on more complex images. Also experiment with 'posterize' and 'cutout' effects. With patience you can get a lot of detail from a single color stencil.
Image Selection
Image selection is important. Of course you can feel free to draw something, but I will focus on working from photographs and computer based imaging. While we can use software to manipulate an image, it's easiest to start with something close to what you want your stencil to look like. In this case a pelican flies with the sun behind him making him very dark against a bright sky. This gives me a lot of contrast to work with.
Another thing to avoid is 'islands'. On this stencil the dark part of the image will be cut out of the stencil material. The bright part will be the part that is covered by the stencil material. An island is what we call it when a bright area is completely surrounded by the darker color. This means a piece of stencil material that is not connected to the main body of the stencil. This can be addressed in one of four ways- either the island is left out of the final image or 'bridges' are added to the image to connect the bright spot to the rest of the main stencil. If neither of those solutions is acceptable you could always create another layer- we'll get into that later. Finally, for images where an island is necessary and the other methods won't work, risers can be attached to the island and the main body of the stencil and connected above the paint surface with thin, stiff wire that won't leave a visible bridge.For this first stencil it's probably a good idea to just choose an image without any islands.
Computer Bits
First open the image in your software of choice. Crop it down to the general size of the final stencil.
If you are starting with a nice dark image on a bright background, a quick brightness/contrast adjustment is all we'll need. Convert your image mode to greyscale. Now adjust the contrast all the way up so you have a black and white image. Now adjust the brightness until your image looks good. Click OK and save the image.
You could also use tools like magnetic lasso or the wand to select an area for your silhouette and the paint bucket to fill it in if the contrast method doesn't work for you. The work path isn't important- we just want a sharp black and white image to print or trace.
Trace and Cut
Now that the image is ready we can cut the stencil. There are many options available, so use what fits your needs and resources best. What I do is I paint an x ray film with a quick coat of Kilz spray primer. After this dries I tape the stencil to the wall and use a cheap digital projector to project the image onto the primed film. I use a Sharpie to trace the stencil and cut it out with an Xacto knife. A projector comes in really handy later when we do multicolor stencils and it allows us to make large stencils.
Another technique is to print the image onto card stock and cut it out with a hobby knife. This is a cheap and quick way to get a stencil but the paper doesn't last as long as film. You can also print the image onto overhead projector transparency sheets. This material holds up a bit better and accumulated paint comes off easily but it is an expensive option and you're limited to standard desktop printer sizes. The price of a case of transparencies will cover a used low resolution projector. If you have an old overhead projector the film can be used to project your image onto larger sized materials, but aligning the image by hand is almost impossible if you are using multiple colors. I did it for years and I don't miss it at all. I absolutely love my digital projector and won't go back to cave man tools ever again.
Just for contrast here's what I did in my pre-computer days. Blah Blah White Out, Xerox... Sharpie, hand-drawn, yadda-yadda, Olpha, rubylith, CARBON PAPER !@#@- being limited to images from books and magazines, making friends with people just because they had a copier, Geotype rub off letters- you get the point. That's the over 40 graphic artist's version of walking to school in the snow uphill both ways. Long story short- computers are awesome!
Paint It
Now that we have a stencil let's paint. Find a place outside where a little over spray or dripping won't matter. Avoid windy spots. Make sure your paint only goes where you want it to go. Find something flat to make a test spray on. I use scrap paper and packaging when I'm testing out a new stencil. These no use wasting good materials until we're sure we like the image. Lay a piece of newspaper under your work area and change it often to keep your work clean. The first rule of stencils is that what you think is enough paint is probably way too much! Go light on the paint. Do your test stencils on light colored backgrounds. Remember- when you see the stencil image as you are spraying it you are seeing it by itself. When you remove the stencil you will see the image color in contrast to your background color. This makes it appear much more even and filled in. Keep the can moving when you're painting so it doesn't pool or run. When filling larger areas it's a good practice to move back and forth in even lines moving down 1/2 the width of the spray on each pass. Practice spraying an even coat until you get the feel of it. Keep in mind also that pigment settles so shake your can well and often (make sure to keep your paint mixed, too;)). Cheap paint has less pigment so you may require two coats to get a good cover. Experiment until you are happy with your results. Keep in mind that part of the charm of the stencil esthetic is the slight variations and imperfections inherent in the process.
When you are happy with your image spray it onto something. Decorate an old dresser, make a personalized gift box, make a set of unique thank you cards, make a border in the bathroom- whatever you can imagine. If you are stenciling an item that's bigger than your stencil you will have to mask it to protect the surface from over spray. Lay a piece of news paper along one edge of your stencil and attach it with masking tape. Add paper to each side until the rest of the item to be painted is protected. This makes your final product much neater and professional looking.
Whenever you use spray paint wear appropriate breathing and eye protection. Don't skimp on safety gear. If you are only using spray paint occasionally a disposable dust mask in a well ventilated area will suffice but if you plan to use spray paint frequently buy a respirator mask. Make sure you get a mask that's rated for organic solvents and change the filters regularly.
Step 3: Let's Make a Multicolor Stencil


I like old advertising characters. I've done stencils based on the Morton Salt girl, Mr. Spray (an old brand of spray paint), Hello Kitty, Care Bears and other pop culture mascots. This style is defined by bold line work balancing with solid fields of color. It creates a cartoonish look. I often alter the images in some way to create a visual jokeor thematic juxtaposition.
Image Selection
For this project I chose to make a stencil of the mascot 'Rocky' from the Durham's Water Putty package. He has a classic look with bold black outlines and solid colors. This stencil will be done in five layers in order to accommodate all the colors and details. I will not use the words on his chest so his tank top will be solid red.
Notice that the tan, red and white areas make nice, solid blocks of color. These will be easy to cut as stencils.
(A note to the fine folks at Durham's Rock Hard Water Putty- I am a long time user of your product for casting aculptures and filling gaps. My use of this logo is for non-commercial artistic and educational purposes only.)
Computer Bits
Processing this image is just a matter of opening it in your software, isolating the image from the background, using your wand tool to select each color individually and using the fill tool to save each color to a separate layer. The first layer will be black and it will be the entire area of the figure, or the entire positive space of the image. Use the lasso tool to cut the background out of the image. As you will see below, I will also save the facial features and muscle bulges on his legs as a separate layer. By creating another layer that is solid white, we can change the layer order and display only one color layer at a time for printing or projecting.
In order to get the black outlines, we will make the black layer first. This layer will be the entire shape of the image, or the positive space, and we will paint it black. The color layers will be painted on top of this black layer one at a time, leaving the black edges as an outline. For the tan, red and white layers I created a new layer for each color. Using the wand tool I highlighted each color and used the paint bucket to fill in the area on a new layer. Name each layer 'layer 1 black', 'layer 2 tan' etc. to keep everything organized. That covers the first four layers but what else is there?
If we look closely at the character's face and legs we'll see that there are islands created by his muscle bulges and features. In this case creating bridges would look weird so I'll just make another black layer that has the facial features and bulges. Since his teeth are surrounded by his black lips, we'll save the white layer for last. This image will be painted black, then tan, then a second black, red and finally white.
Line It Up
That's the easy part. How do we keep all those layers straight while we print, trace, draw, cut and/or spray them? Alignment, or registration, is the most important issue with a multicolor stencil. There are two points in the process where registration is critical- when tracing the image onto the stencil material and when spraying the individual layers.
If you are using a printer all of your layers should line up nicely. If you are using a projector you will have to do this yourself. Here's what I do. First I prime enough sheets of x ray film for each color layer. The film comes in standard sizes so lining it up is easy. I tape the first layer to the wall and align the projector until the image is centered on the sheet of film. At this point it is very important that the projector is in a place where it won't be moved or bumped until all the layers are done being traced! Drag your white layer to the top and then bring the first color layer on top of it, in this case the black outline of the entire image. Carefully trace it. Now align a new sheet of film over the first sheet. When it is lined up exactly tape it down firmly. Now in your software, drag the first layer behind the white layer and drag color layer two to the top. Repeat these steps until each color layer is traced in a nice lined up stack. Now that the edges all line up we can take them apart and cut them knowing that they will line up again later.
Cut It
Cut your first layer. You will quickly find the most comfortable way to hold the knife and pull your cuts. Work gently like a surgeon to avoid hand strain, errant cuts and injuries. Never 'force' the knife, let the blade do the work. When the first layer is done take it out to your paint area for a test print. Be very careful with the hobby knife! Always be aware of where it is pointed and replace the cap when you're not using it. I once had an uncapped hobby knife roll off my workbench and land blade down in my foot, sticking straight up.
Use a cutting board and a mat. This protects your work surface from scratches and prolongs the life of your blades. Cut with just enough force to go through the stencil material and into the mat just slightly. Excessive force will dull the blades quicker and risk snapping the tip of the blade.
Paint It
We want to do test prints as we go to see how each layer lines up and to make any adjustments. Find a scrap board or piece of stiff cardboard that is larger than the stencil area. Lay your first stencil layer on the board. I use a thin strip of scrap mat board and tape it to the board along the left edge of the image. I tape another strip to the board along the bottom edge of the stencil. These two strips of mat board make aligning each layer as easy as laying it down and sliding into place along the edge of the strips. When your strips are in place, align a sheet of paper with the strips and lay the first stencil on top. Line it up and spray the black layer. Wait about thirty seconds and carefully remove the stencil without dragging it through the fresh paint. This takes some practice. Removing the stencil before the paint is dry prevents the paint from gluing the paper and the stencil together as it dries. The thirty second waiting time isn't hammered in granite, so paint brand, humidity, temperature and paint thickness all play a role. Experiment and be patient and it will make sense eventually. Also keep in mind that minor flaws and imperfections are part of the charm of stencils- if it looks too perfect you may as well have printed it!
Since the mat board strips align the paper as well as the stencil, we can remove the paper and paint another sheet. Set the first test print aside on a flat surface and print a few more sheets.It's a good rule of thumb to have a separate test print for each color layer. If a mistake or a change is made, you'll want to make a new test on a fresh sheet. After you have painted the test sheets go cut the next layer while they dry.
Repeat the above registration procedure for each layer aligning the paper and the stencil to the mat board strip carefully. Make sure your prints and your stencils have plenty of room to dry. I have a clothes line and pins along the side of my shop to hang wet stencils. Make sure they are dried completely before you stack them. Since they get sprayed each time you use them they build up a lot of paint and therefore take a longer time to dry. Take good care of them and they will last a long time. I have stencils on film stored flat in pizza boxes that are over ten years old.
So What's Next?
In the next section we'll see how to turn this stencil into a cool textile pattern.
Step 4: Creating a Decorative Pattern With Stencils


OK so now we have a cool stencil, but what do we do now? If you thought 'Textile pattern!' then you're right (and a little weird). A textile pattern is one that repeats regularly, usually printed on fabric or wallpaper. Do an image search for 'William Morris' to see some great examples of repeating textile patterns. Morris was a genius who's influence is still felt today. While not nearly as ornate as his work, by using a little bit of geometry we can turn our muscle man into a wall of muscle men that can be stenciled on fabric or paper or even directly to a wall!
The first step in creating a textile pattern is to determine how you will arrange your stencil or stencils. Take another look at William Morris' work, paying special attention to how and where his patterns repeat for some ideas. I decided to arrange the stencils so that the guys in one row were standing on the upraised hands of the row below and holding up the row above. In order to keep the stencils aligned I determined the points at which the stencils would touch and plotted a grid that would describe these points. Since my wall of Rockys will touch left foot to right hand, and right foot to left hand diagonally, I decided to use the point of the left boot and the crook of the right hand as a connection point. I sprayed one stencil in the center of the paper and after it dried I drew a line that intersected the tip of the left boot and the crook of the right hand continuing on to the edge of the paper in either direction. For this demonstration I drew the line with a Sharpie, but for any real project I would want an 'erasable' line. This is when I use a chalkline. A chalkline consists of a spool of string in a box of colored chalk powder. When the string is unrolled and stretched out along a straight line and gently 'snapped' with the fingertips it leaves a bright line of chalk dust on the surface being marked. This dust can be painted over and any unpainted chalk can be easily wiped off later. This line will be my guide for a diagonal row of 'Rockys'. I sprayed another Rocky on the upper right of the one I just painted. His left toe was carefully aligned with the crook of the previous stencil's hand and the crook of his right hand was align with the guide line. I sprayed another stencil to the lower left of the original creating a row of three Rockys.
Next I created a new guide line perpendicular to the first by making a line that intersects the tip of Rocky's right toe and the crook of his left hand and continuing to the edges of the paper. Spray new stencils to the upper left and lower right corners of the first stencil. Now you can fill in the rest of the space by aligning new stencils with existing stencils and guide lines.This method works fine for medium sized areas but for larger areas you will need to construct a full grid to insure alignment.
Once you master this method try making some curtains, a custom tabletop or a unique picnic blanket.
Step 5: Creating Stencils From Photographs


Silhouettes and cartoon mascots are cool but what about photos? In this section I'll show you how I make stencils from photographs. This is a great way to make a memorable gift from a cherished snapshot.
Image Selection
With photo based stencils image selection is vital. You want to select an image that has plenty of contrast and a good balance of light and dark areas. Also, consider the composition of the final stencil image. Let's look at an example. Up top you'll find a picture of my dog, Monkey. I took this snapshot and cropped out everything but his face using the lasso tool. This creates an esthetically pleasing triangle shape. (There's the big secret- throw implied triangles into your art and people will love it. Shhh.) When doing facial portraits I try to find a source image that has a defined 'line' between the face and the neck. In this case the dog's chin and jaw line create a natural edge for the bottom of the image. Simply cutting the image and leaving a neck stump makes a portrait look like a severed head. Make your images look natural and avoid neck stumps.
Next I convert the image to greyscale and adjust the brightness and contrast. I'm doing this in three shades- dark, medium and light. This allows us to paint the stencil in any color range as I'll demonstrate later. Think of your stencil as a black and white photo. Some areas will be black, some will be grey and some will be white. In this image most of the dog's head will be in the light shade, the darker areas will be the medium shade and the dark shade will be used to define details. You can design your stencil with as many shades as you want. I've done paintings with friskets using black, white and 8 shades of grey!
I'd also like to point out that the amount of detail is proportional to the size of the stencil. Small stencils need to be simpler just because smaller details are much harder to cut and because natural under spray will destroy details if they are too small. Look closely at the lines created by the edge of your stenciled image. You will notice that it may vary from a reasonably sharp line to a very fuzzy line. This is due to paint mist getting under the stencil through tiny gaps. With very fine details this under spray makes the image hard to see. Sometimes small weights (coins, washers, fishing sinkers, etc.) can be placed around the edge of the 'hole' in your stencil to close any gaps and create a sharper image, but I like my stencils to be kind of raw so I rarely use them.
Computer Bits
I opened the image in my software, cropped and resized it. Next I cut out Monkey's head with the lasso and eraser tools. Then I converted the image to greyscale and adjusted the brightness and contrast. Next we want to convert the image into three separate color layers. There are several ways to accomplish this. The simplest way is to use the posterize settings in you image editor. You may have to readjust the brightness/contrast a few times until you get satisfying results. For a little more control of the final image you can use the cutout filter or something similar. For the best results and highest detail I create each layer individually with adjustments to the brightness/contrast settings across multiple layers and edit them together.
I made three copies of the greyscale image to start. Since the majority of the image is the lighter shade, I made the first layer white. Like layer 1 in the previous section, this stencil will include all of the positive space of this image.The second layer will be the medium shade. I pulled one of the greyscale images to the top, opened the brightness/contrast controls and played with the settings until I had something looked good. The midtone image is good for defining contours and dimensionality of your image. Here it defines the snout and eyes a little better and gives the ear some depth. There were some islands, but I decided to draw in some bridges. I also ran the layer through cutout to smooth it.
The third layer is black and contains most of the detail. I pulled up a fresh version of the greyscale image and adjusted the brightness/contrast as usual but I ran into a problem. I got really good eye detail at one setting, but the nose wasn't very defined. When I adjusted it to bring the nose into 'focus' the eye detail faded. The only solution was to create two separate layers and cut and edit them together.
To preview my stencil, first I created a duplicate image. I converted it to an RGB color image. I created a new layer in red. I brought layer 1 to the top and colored it white. Next I brought layer 2 to the top. I colored it grey and cut the rest of the image. Now I had the white dog head outline with the grey area on a red backgound. Next I brought the third layer to the top, selected the black parts and cut the rest. This provided a preview of how the final stencil would look and allowed me to make any adjustments.
Tracing, Cutting and Painting
Tracing, cutting and painting are pretty much the same as before. I used a projector to trace the layers. I used mat board strips as alignment guides. The main difference here is in the color selection. Although I used the colors black, grey and white as an example, what I really did was create shades. Instead of using black, grey and white you could use three shades of a color, like sky blue, medium blue and deep blue. See the above examples. This allows us a great deal of creative freedom.
What's Next?
Try incorporating several elements into the same stencil with different color ranges. Try a portrait of a friend. Mix it up with odd color combos. Combine this technique with the frisket technique in the next section to create detailed art images. Have fun and explore!
Step 6: Let's Get Frisky With Friskets!


Friskets are basically adhesive stencils. They have their pros and cons, but for some applications they are the best approach. Friskets are a bit more advanced than the previous techniques we've covered so we'll have a bit more background before we get to the actual project.
First let's look at the good points of friskets-
-Friskets give a sharp, bold line. Since the frisket is adhesive, it gently sticks to the surface so there is less chance for gaps or underspray. Friskets are good for commercial signage or anywhere that a clean, 'professional' look is desired.
-Friskets give far more detail than a standard stencil. Since there is no underspray, fine details remain sharp. -Friskets allow islands. Since the material is adhesive the stencil doesn't have to be in one piece. This allows for greater detail and a more realistic approach.
-Friskets give a very smooth finish. Friskets are great for adding graphics to smooth surfaces like auto finishes, instruments or glass.
-Friskets can be borderless. Since friskets don't rely on the stencil itself for support, A frisket can be made of many disconnected pieces. This allows you to do detailed scenes that cover an entire surface. This allows for very realistic effects.
-Friskets are ideal for precise designs. The sharp lines, fine detail and ease of cutting makes the frisket process great for geometric and precise work. I use adhesives for laying out maze designs, checkerboards and even text.
-Friskets allow for a wider variety of paints and techniques. Acrylic paint applied with rollers, craft paints applied with stencil brushes, water colors dabbed with sponges, acids and oxidants applied with a damp rag and even adhesive rubber masks and a sandblaster- friskets apply to a wide variety of pigments, tools and processes.
And now the bad news about friskets-
-Friskets are single use. Since they are adhesive and usually quite detailed, friskets are almost impossible to reuse. All the extra work may not be justified for the project you have planned. I tend to save friskets for 'fine art' applications or for special circumstances such as sign work or back painting glass.
-Friskets give a sharp, bold line. Wait a minute, I thought that was a pro? Well, it is when you want a sharp line. Part of the charm of stencils is the imperfection of the process. The sharpness of friskets also calls for more developed knife skills. The bold lines amplify imperfections.
-Friskets are much harder to register. The work cycle for a frisket is apply film, draw, cut, weed, paint, dry, peel, reapply film, draw next layer, cut, etc. etc.The frisket process is often done on material that makes traditional registration techniques difficult. If you use a projector it must remain set up and undisturbed for a long period, increasing the chance of accidental bumps. The greater detail possible with friskets also requires much tighter registration. Keep these issues in mind when designing a frisket project.
-Friskets require much more planning. Due to the nature of the frisket process there isn't much room for error. You need to have all of your ducks in a row before you pick up your knife. Have all of your supplies and colors at hand. Make sure you have enough time to complete the project without rushing.
-Friskets are time consuming. Between the detailed cutting and longer drying times friskets take forever. Make sure the extra work is worth it before you start. I have abandoned frisket projects half way through out of sheer boredom and frustration.
Materials
Frisket material needs to be sticky enough to stay in place while it's cut and painted but still easily removable. It should be waterproof and easy to cut.
My favorite material for cutting friskets on smooth surfaces is called Glad Press-n-Seal wrap. It has some high tech adhesive gimmick that sticks to a variety of surfaces and materials without leaving any schmutz or residue, all while blocking paint very well. It cuts easily with very little pressure so there's a low risk of scratching the work surface. It actually cuts a little too easily. There's no resistance against the blade and the work surface is often hard and slick so it takes a little practice. It's also cheap and easily available. The only real drawback is that it's only about 12" wide so if your piece is wider you need to plan a seam. The outside 1/8" of the film doesn't have the adhesive, so to get a continuous seal it must be carefully folded back and creased before the second sheet is attached. That's a small price to pay for such an awesome material. When you spray the Press-n-Seal material it may wrinkle or buckle slightly. Just smooth it down gently before spraying another coat. Insider secret- every year at the end of December the holiday themed Press-n-Seal goes on sale super cheap. It works just as good with snowmen and holly printed on it.
For heavy duty jobs I use Contact shelving paper. It comes in many patterns, colors and textures but the most useful ones are plain white and frosted clear. The white stuff is good for drawing and the clear lets you see the layer underneath for better registration. The frosted surface reflects projected light better than the clear version. Shelf liner is a bit harder to cut than other options, but it's heavy duty and stands up to more abuse. There's a similar product that's sold as a carpet protector for when you're doing home improvements. It comes in a roll about 3 feet wide and it's a bit thinner than shelf liner.
Another valuable adhesive stencil material is masking tape. I keep several rolls of 3M blue tape in different widths. If I'm laying out designs with straight lines or big, blocky text I often just project the image and 'trace' it with tape. I use masking paper and tape to cover large area and spray it as is. I also use tape to create bold geometric patterns, mazes and backgrounds.
Early in my exploration of friskets I used full-sheet printable paper labels. The advantage of these sheets is that you can print the image directly onto the frisket and then apply it. The cons are that it's really hard to register, it's limited to 8.5x11" and it can leave sticky residue that must be removed before it's painted.
A final possibility is to have vinyl friskets custom made. Find a local sign shop with a Gerber vinyl cutting machine. This machine can make large custom cut vinyl stickers with a clear adhesive cover sheet that hold everything in place while you install it. They make special 'low adhesive' vinyl for use in masking and frisket processes, although it might take some searching to find someone who has the materials, knows how to handle them and is willing to do smaller orders. To use it you spray a smooth surface with slightly soapy water. Lay the cover sheet and vinyl frisket on the surface. The soapy water prevents the adhesive from sticking and allows you to slide the frisket into position. When it's in the right place you carefully squeegee out the water and air bubbles, making the vinyl stick to the work surface. With the vinyl in place gently pull the cover sheet back at a sharp angle and it will leave the vinyl behind on the work surface. Clean the soap residue, let it dry and paint it. This is a great way to do friskets but it's expensive. Save it for when your good enough to charge for it.
Process
Here's what I do to create a frisket-
-Apply the frisket material. Friskets work best on smooth surfaces. Spread your material lightly across the surface. I use a soft silicone spatula to gently smooth out the material and work out the air bubbles. When it's all smoothed out I go over it with a Speedball brayer, a hard rubber roller used in printmaking. This makes the frisket material stick very well.
-Draw your art. Draw or trace your design onto the frisket material. Ultra fine Sharpies work good with most materials and allow for higher detail. If you are backpainting, be sure to reverse your image.
-Cut it out. Use a very soft touch when cutting friskets. You want to cut through the frisket material without marring the surface underneath or sliding off of the line. Channel your inner surgeon. Keep your blade extra sharp.
-Weed it. Since the frisket material is adhesive, we have to remove the cut out parts of the design. This is called 'weeding'. I use a thin, flexible palate knife to gently peel the excess frisket material from the work surface. Be very careful when weeding a frisket! Make sure you are removing the right parts- it can get confusing and it's easy to ruin a layer at this stage. Be patient and alert.
-Paint it. Give the piece a final check for loose edges. Take it to the paint area and give it a light coat. Don't worry about covering it completely- you'll want to do this in 2-3 thin coats.
-Peel it. When the paint is dry completely I carefully remove the rest of the frisket material. I find the palate knife to be quite useful here. Be careful. Paint can build up at the edges of the frisket material and make it hard to peel up, potentially marring the piece. When painting friskets, it's important to use the least amount of paint possible to avoid excess build up and ensure a smooth finish.
-Rinse and repeat. Apply another layer of frisket material and repeat the draw/cut/weed/paint process. Using a frosted clear frisket material makes registration a lot easier. Adapt the principles of registration and alignment that we've already covered to the material and piece you're painting.
Image Selection
I have an image I made from a holiday snapshot I took in Hawaii. After a few days on Waikiki beach I became disappointed by the lack of frosty tropical drinks served in a pineapple shell. I decided I had to have one, so we went to Star Market for pineapples, rum, juice and crazy straws. We made our drinks, garnished them with plumerias from the hotel and went down to the jetty for sunset. I was super stoked when some of the other tourists asked us where we got the cool drinks. DIY or die! Anyway when we got back to the hotel we took turns posing with the remaining pineapples for some pinup shots. This is one of my favorite stencils ever!
I used this image as a frisket with some stenciled plumerias in the background on canvas board. This makes the image sharp while the background is softer.
Computer Bits
Blah, blah, blah... contrast/brightness... yadda yadda yadda. You know the drill.
Trace, Cut and Paint
See above. You know all this stuff by now. Just keep in mind that excess paint build up may cause peeling when you remove the frisket material. Use thin coats and let it dry completely between colors. Keep a light knife hand, weed carefully and everything will work out fine.
What's Next?
Go try more friskets. Put your name on a book bag, add a decorative element to your window or do a custom motorcycle tank. Go nuts!
Step 7: Paint and Tools


There is a mind boggling variety of paints and application tools available. Here's an overview of the ones I've used and how I've used them. Your mileage may vary.
Spray Paint
Most of my stencil work is done with common spray paint. I use Rustoleum Painter's Choice mostly with a few specialty paints thrown in. Spray paint has a lot going for it- large color palate, quick drying time, ease of use, wide availability, low price and versatility. You can get smooth fades and gradients, grainy effects and dirty speckled finishes. Modern spray paint is durable and doesn't fade or flake. Breathing protection is a must when you're using spray paint! Get a decent respirator if you get serious about stencils. The biggest drawback to spay paint is the empty cans. They can't be placed in curbside recycling. the only way to get rid of them is to throw them in the regular trash or completely empty them, cut them up and take them to a scrap dealer.
Water Based Paints
Water based paints can also be used for stencils and friskets. There are special stencil brushes available, but I use cheaper alternatives. Basically a stencil brush is wide and stubby. It's used to dab the paint through the stencil. One of my favorites is an old fat round makeup brush that my wife gave me. It was a little too soft at first but it got stiffer the more I used it. Another way to apply water based paints is with a roller. This works especially well with friskets to produce a smooth finish. Special rollers can be bought or made to create textures as they roll. Water based paints can be thinned and sprayed through spray guns, but I find it less than ideal. Diluting water based paints affects their adhesion and finish. Water based paints are super easy to clean up and abundant. The main drawback to water based paints is that they tend to soak into paper and make it warp and sag. I use it mostly on board and walls.
Acrylic paints can be mixed with textile medium for washable stencils on fabric. After it dries it can be set with a hot iron for a high quality garment.
Water Colors
Water colors can be used with stencils and friskets in several ways. They can be thinned and sprayed through an airbrush for detailed shading. It can be applied with small pump sprayers for mist effects. It can also be applied lightly with sponges and rags as well as dry brushed for all kinds of textural effects. It can also be applied and then sprinkled with salt for cool marbling effects. Water colors are good for subtle effects and soft, muted colors. The main drawbacks of water colors is that the colors don't mix well on the canvas (they work best when colors are mixed on the palate) and they take a while to dry.
Lacquers and Oil Based Paints
Lacquers and oil based paints are the choice for metal and automotive work. There are many high tech finishes out there, but for most of us DIYers these will cover all our needs. Lacquers and oils work best when sprayed onto properly prepped and primed surfaces. Like spray paint, these are harmful if inhaled in excess so breathing protection is a must. Solvents are needed to clean tools and spray equipment. Oils and lacquers are messy but they come in a wide variety of colors and finishes and give awesome results.
Inks and Dyes
I don't use inks and dyes much, but if your working with fabric, sprayable inks and dyes designed for airbrushing give permanent, vivid colors. Check out the line from Createx- they've been around forever.
Chemistry For The Win!
There's more to stencil art than just paint and pigments. Here are a few other ideas to get your creativity flowing-
-You can stencil with bleach. Use standard laundry bleach in a pump sprayer with a stencil on dark fabric. Try gelled bleach applied with a roller or squeegee with friskets. Bleach pens are great for accents and details. Bleach stencils on black t shirts have a cool, organic look. Bleach takes some experimentation to get the timing down. If the bleach isn't rinsed in time it can burn holes through a t shirt!
-When metal reacts with oxygen it rusts. When we block the oxygen from the metal surface, we protect it from rusting, or oxidizing. By using a waterproof frisket material on fresh metal and dipping it in salt water or vinegar we can create images in rust. If you use stronger acids they will actually eat away the exposed metal to create a raised design. This is how printing plates are made and also how the copper designs are etched on a circuit board.
-UV rays make soft woods turn silver over time. Attach a foil stencil to a piece of fresh, light colored fir or pine and leave it in a window sill where it can get plenty of sun. Forget about it for as long as possible. With enough time the stencil image will appear lightly in the wood.
-A thin metal stencil can also be used with a blow torch as a heat shield on soft wood to burn an image. Make a Jesus or Mary stencil, singe it lightly into some publicly visible wooden surface or some random toast and watch the circus.
-You can also make a solution of the stuff they clean soldering irons with to chemically burn images in soft woods. It evaporates under a heat gun and leaves behind an acid that burns the wood. Google it.
-There are all kinds of fun and creative uses for Rustoleum's NevrWet hygrophobic finish. Make messages that only show up in the rain. Use tape or a frisket to create a maze on a piece of acrylic. Paint it with NevrWet and tilt it back and forth to move a drop of water through the maze.
-There's a DIY electroluminescence kit that contains conductive paint, dialectric and phosphor coating to create DIY glowing displays on a metal substrate. I'm eager to try this to make glowing stencils.
-It's not really chemistry (unless you're using an old camera), but tiny stencils taped over your camera lens will cause all unfocused light in the shot to create tiny, glowing versions of the stencil. Google 'bokeh lens' for more info.
-Finally, try using stencils for making temporary body art. Small stencils or shapes placed on your skin before laying in the sun will 'tan' an image into your skin, like reverse branding. Want a tramp stamp? Try it before you buy it!
Tools and Useful Things
Let's look at some tools and gear that may be useful. Since we're focusing on spray paint I'd be remiss if I didn't mention the pistol grip spray can handles made by Zinzer and Rustoleum. These plastic handles snap onto a spray can to provide a convenient grip and trigger to control the paint. They allow better pressure control and may be more comfortable for you than just holding a can.
Spray tips can get clogged so always save a few spares from empty cans. They sell fancy tips through art suppliers that produce different widths of spray, from fine lines to wide fills. I keep a few on hand to use once in a while, but I don't find them particularly necessary.
When you're using water based paints you'll want a collection of brushes, rollers and other tools. I use foam covered 6" rollers for smooth finishes. These foam rollers can also be carved to produce interesting textures. My stencil brushes are nothing fancy. I use old makeup brushes, disposable chip brushes, foam brushes and old art brushes. I also have a collection of sea sponges for creating textures. I keep a few old kitchen spatulas. Syringes are useful for measuring and transferring small amounts of paint. You will also need masking tape, newspaper, plastic bags and mixing cups.
Small pump spray bottles are also useful. Spraying solvent from a polyethylene pump bottle onto a wet spray painted surface will cause it to run and sag. Water colors can be thinned and misted onto paper for subtle coloration. One of my favorites is called the Misto. It's designed for spraying herb infused oils onto food. It's like a little reusable low pressure spray paint can. It can be filled with a liquid and sealed. There's a built in pump that allows you to pressurize the contents. When you press the spray button on top it atomizes and sprays the liquid. It's great for spraying water colors, water soluble inks and dyes.
Spray guns are sometimes useful for stenciling. They come in different sizes for various applications. On the small end there are airbrushes. Airbrushes are good for painting smaller areas and details. Airbrushes use interchangeable paint cups, so switching colors on the fly is simple. There are even multi-gun units that allow you to work with several colors simultaneously. Airbrushes are affordable and can be used with a small compressor, a refillable tank or even 'canned' air, which comes in disposable aerosol containers. Airbrushes are a good way to experiment with spray equipment on the cheap.
Next we have detail guns. These are used in the auto body industry for painting small areas. A detail gun needs more air pressure and volume, meaning a larger compressor, but it will also spray a larger volume of paint covering the work quicker than an airbrush. It's a good compromise between an airbrush and a larger spray gun.
Larger spray guns can cover a large area quickly and evenly. They require even more pressure and volume so larger compressors are required. They hold more paint so they need to be refilled less often. They're also harder to clean and switch colors quickly.
Airbrushes and spray guns both have their place in a well stocked shop. The beginner will find the airbrush easy to use and clean. Since colors can be switched out quickly and stored until they are needed they are almost as convenient as spray cans. Spray guns, on the other hand, can't be switched as quickly. When doing one stencil at a time this can be a pain but if you're producing many prints at a time it's not a problem. The main advantage of all spray equipment is that it gives you more control over color selection and paint formula than commercial spray cans.
Compressors come in all sizes. The small tankless compressors are the simplest and cheapest, but they don't produce much pressure or volume. They're not useful for much more than small airbrushes. Larger compressors with tanks up to 5 gallons are reasonably cheap. They'll produce enough pressure for airbrushes and detail guns and even intermittent use of larger spray guns. Big shop compressors with tanks up to 50 gallons are great and will produce enough pressure and volume for all your painting needs but they're expensive and take up space. Shop sized compressors can be used for a variety of non-paint tools as well such as nail guns, sanders, air drills, die grinders, blow guns, plasma cutters, drills and cutters. Compressors present a noise issue. There are quiet compressors available, but they are pricey. Keep noise in mind when setting up your work area and position your compressor with courtesy in mind.
If you are considering spray equipment, another useful air tool is the 'air eraser'. This is basically an airbrush sized sand blaster. When used in conjunction with rubber friskets it can be used to etch polished metal, stone and glass. This is a scaled down version of the way they make stone grave markers.
Whatever tools you end up getting, you don't have to spend a lot. Pawn shops and yard sales are great sources for tools. All of my spray guns came from Harbor Freight. They are good spray guns and they were super cheap. Shop around and save your money for paint- you can never have enough.
If It's Flat Paint It
Masonite, plywood, paper, fabric, glass, metal, concrete, walls, floors, furniture, books- the possibilities are endless. You can be fancy and paint on stretched canvas or paint on a piece of scrap wood. For commissions and 'nice' paintings I like to use canvas boards. I first cut a piece of Masonite or thin plywood to the size needed and sand the edges. next I cut a piece of thin canvas or musilin that's about 2-3" larger than the board all the way around. I paint the entire front of the board with a decent coat of thinned down white glue and carefully apply the canvas, being careful to smooth out any wrinkles and air pockets. Smooth the canvas completely and let it dry. Next, roll the edges of the canvas around the back and carefully glue it down, pay particular attention to making the corners neat. When all the glue has dried apply a couple of coats of primer and let it dry. These canvas boards look good and they provide a good surface for the paint to stick to. For frisket work, canvas coated board makes for a slightly softer work surface. This makes the cutting easier. On the other hand, stretched canvas is the worst material for applying friskets as the canvas is too easily cut and damaged.
Try different materials and see what works best for you. Don't be fooled by the higher price=better quality mind set. awesome result can be achieved with dollar store paint and salvaged boards- it's all about the image.
Step 8: Creating Textures


In this section I'll show you how to create textures for backgrounds and such. Check out the pictures above and read the notes for more details. One of the simplest textures is a gradient where one color gently fades into another. This is an important skill and should be practiced until you get the hang of it.
Another cool texture is a crackle effect. This happens when two different paints are applied one on top of the other. If the top layer is a paint formulation that dries faster than the bottom layer it shrinks and lets the bottom color show through the cracks. One way I accomplish this is to spray a good coat of regular paint and then put a quick, even layer of Rustoleum Flourescent over top and put it in front of the fan. If everything works out, the flourescent paint dries and cracks exposing the bottom layer. Spend some time playing with your paint and see what happens- you'll discover all sorts of cool effects and reactions.
A silicone basting brush is great for dragging, texturing, swirling and mixing spray paint on the work surface. These brushes clean easily- just let the paint dry and stretch the silicone a little bit. The dried paint will fall right off. I have a few of these brushes. A flat rectangular brush is good for dragging waves and grain into paint. I have a round one that's good for stabbing and swirling paint. On every drug store toy aisle they sell kinky looking silicone inflatable toys and such with little tentacles all over them. Aside from being a little embarrassing for a grown man to buy, they make really cool paint brushes capable of creating cool textures. Play with stuff and see what happens!
Marble like effects can be achieved by spraying a coat of paint on a surface and letting it dry completely. Next spray a new layer with a different color and quickly cover it with a loosely draped plastic bag. Gently smooth down the plastic and then peel it off. Try variations of pressure, paint thickness or other parameters for different effects.
I create textures and patterns with things like mesh, lace, expanded metal, grates and other flat materials with holes in them. By spraying through something flat with holes, the pattern of the holes is transferred to the surface.
3d effects can be created by spraying paint from two different flat angles. The edge of the stencil shields the work surface to let whatever color is below to show through. This technique will come in handy when we play with text later.
One of my favorite effects is speckles. By barely pressing the spray button the paint will spit out droplets rather than a fine mist. By spraying many layers of speckles in a variety of colors, a cool 'static' effect is created. This is a messy process. Since the paint comes out at a lower pressure it doesn't atomize properly and tends to build up around the nozzle. If you don't wipe it regularly it will drip on your surface and ruin your work.
If you're ever at an art fair and you see a crew of guys doing 'space art' with spray cans stick around and take notes. These guys do some awesome stuff. Above I share a little bit of what I've learned from watching them to create a space scene with a planet made with a stencil and some plastic bags.
Play with stuff and use your imagination. Look around your house with fresh eyes and see what you can find to experiment with. Make something- even if it's just a mess.
Step 9: Text Techniques to Get the Word Out.


Now we'll look at some ways to add text to your stencils. This comes in handy for making signs, cards, personalized items and many other wordy projects. Text can be hand cut as a stencil or a frisket. Choose your font carefully for ease of cutting and readability. There are plenty of stencil ready fonts available and many others can be easily modified to work as stencils. Sometimes you may want to use a font that has unavoidable islands. In this case I cut the stencil as normal and then carefully position the island. I use scraps of foam core to build up a riser on the island and a few on the main stencil. I use stiff wire to connect the island to the rest of the stencil across the tops of the risers. This allows the spray to flow around the wire and not affect the image. Outlines and drop shadow effects look really good. Create your text. Use the wand tool to select the text. Now create a new layer. Use the stroke setting to create an outline shape that is larger than the original text. Adjust the stroke settings until you get something cool looking. To create a drop shadow effect, drag the outline layer slightly down and to the side. This adds a dimension to the text. Trace and cut the outline layer and text layer onto separate sheets of film and spray like usual.
Another way to create text in your stencil projects is to affix premade craft letter to a layer of tightly stretched mesh. I use adhesive foam letter from Michael's. they come in different sizes and fonts and they're reasonably cheap. Another bonus is that they're kind of thick, so if they're sprayed at two different angles you can get really cool drop shadows and highlights. One drawback with foam letters is that spray paint tends to shrink slightly as it dries. On a solid surface this slight shrinking insures a smooth finish. On foam letters it causes them to curl after a few uses.
There are a wide variety of premade sticker letters available for scrap bookers and paper crafters. They can be affixed to stretched mesh just like foam letters. Sticker letters are stiffer and don't tend to curl like foam letters. They can be made a bit more permanent with a drop or two of glue on the mesh side.
Adhesive frisket material or tape can be affixed to the mesh and gently rolled with a roller for a reusable,low tech screen print set up. Tape is particularly effective for creating bold fonts with straight lines. This is great for making small runs of T-shirts for bands or events.
Another fun text effect can be achieved with uncooked alphabet pasta. To create a jumble of letters, first paint your surface black. When it is completely dry, scatter a handful of the pasta across the surface. Arrange it until it looks good. Now gently spray the entire surface with a contrasting color. Hold the can farther away as you paint so the pressure from the spray doesn't disturb the pasta. When all the visible black paint is covered, let the piece dry and then gently remove the pasta. This creates a cool random text effect.
As long as we're talking about text I'll just add that traditional Sharpie pens and markers don't work well on spray painted surfaces but the new Sharpie paint pens are super awesome. They're great for signing your work on top of a wide variety of materials. Elmer's Painters paint pens are also decent and cheap.
Go make a statement!
Step 10: Putting It All Together- Design Ideas


Each technique and trick you learn or develop is like another color in your box of crayons. You could draw an entire world in one color like Harold and his purple crayon or you could use the whole box at once. Tastefully combining techniques can add a lot to the composition of an image. Every skill is another 'word' in the artistic vocabulary you use to express yourself.
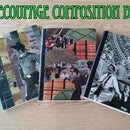
Back before the recession I had a large studio. I decided that while I had the space I'd make a limited edition folio of original stencil designs. I went through my stencil collection and selected my favorites. I planned the design for each page and took notes and made sketches to reproduce each page layout. I ended up with 40 total pages. I wanted 10 copies so I planned for 15 to allow room for mistakes. I planned out an assembly line process and started painting. It took 7 days of working and sleeping at the studio, but I ended up with 13 signed and numbered folios of my stencil work.
Above you'll find pics of the pages from my folio with brief explanations of how I created the image. Have fun with stencils and everything else you do. The future is bright!

Finalist in the
Paint It! Sponsored by Olympic Paint

Participated in the
Epilog Challenge VI


