

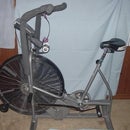
Introduction: Exercise Bike Upgrade - Saddle (Seat) Selection and Setup (AirDyne, DX900, XR-7, EX-1000, Etc.)


This is part of a compilation of MIY and DIY that came out of my “dusting off” the exercise bikes and looking at them from a renewed commitment standpoint. I had already done most of the modifications to the Airdyne over the last 20 or so years. However, in documenting the saddle replacement, I decided to address all of the modifications. I started out to make this a single Instructable, but broke it up into more manageable segments.
Fitting a saddle to an exercise bike is a little different than a road or street bike. It is closest to fitting a saddle to a cruiser with an XXS sized frame. I suspect exercise bikes are built on the XXS sized frame to save floor space
This Instrustable was written for the Schwinn AirDyne AD4 but it applies to any exercise bike with a 7/8-inch seatpost top. These are mostly "vintage" design like the Schwinn AirDyne AD, Schwinn XR-7, Schwinn DX900, Panasonic EX-1000, and others. Contemporary design seems to have gone to square (boxed) profile seatposts.
Step 1: Parts and Tools


Parts
Dual rail saddle
Saddle adapter
Brompton Adapter Pin (The Brompton Adapter Pin is for a 7/8" seat post (the ring) and a 7/8" saddle (the extension).
2018-05-15 ----------------------------------------------------------------------------
It looks like the Brompton Adapter Pin is no longer available, even from Brompton.
Originally, I was going to use a SR (SAKAE RINGYO) MTE-100 (https://www.instructables.com/id/SR-Sakae-Ringyo-MTE-100-Adjustable-Seatpost-Cleani/). Unfortunately, this approach required shimming and drilling and the Brompton Adapter Pin was the easier solution.
--------------------------------------------------------------------------------------- End edit
Tools
Adjustable wrench
5 mm hex (Allen) wrench
Disclaimer
I like this disclaimer from the author Samuel M. Goldwasser (http://www.repairfaq.org/sam/captest.htm) - “We will not be responsible for damage to equipment, your ego, blown parts, county wide power outages, spontaneously generated mini (or larger) black holes, planetary disruptions, or personal injury that may result from the use of this material.”
Add to that the usual admonitions to use safety equipment, be careful of hot, sharp, or rotating parts and equipment, and be cautious around electricity. Also, if you change it, and they can tell, it probably voids your warranty.
Step 2: Saddle Selection


Note: The photos show the significant variability in design of two saddles. The top is an ISM Berkeley and the bottom a Spiderflex REC. The Spiderflex saddle is on a custom fitted seatpost.
The OEM saddle was huge, overstuffed, and looked like it should be real comfy. That was not the case for me. The nose tried to do all of the bad things that have driven the development of nose-less (horn-less) saddles. It chaffed like crazy and my butt ached despite the padding. Replacing it started a two decade long search for a comfort saddle that was actually comfortable. Unfortunately, this isn’t unique to the Airdyne. My Panasonic EX-1000 flywheel bike had the same type of overstuffed saddle with the same problems.
I have used at least a dozen saddles over the years, Schwinn, Hobson, Spiderflex, and many that I have forgotten the makers. My favorite, by far, for the Airdyne is the ISM Berkeley saddle. I originally bought an ISM Touring for the AirDyne. But with my hands and feet all moving, the saddle needed to be a bit larger to provide more support. The ISM Touring was moved to the Panasonic and works great. I don’t have anything to do with ISM, I just like their saddles. My previous saddle was a Spiderflex Recreational saddle (REC).
You will probably buy a dual rail saddle and you are going to have to mount it on the seatpost. The OEM saddle clamped directly to the seatpost. The seatpost is steel, 28.6mm (1-1/8 inches) diameter, predrilled with 9.5mm (3/8 inch) holes spaced at 25mm (1 inch) intervals, and necks down to 7/8 inch diameter at the top. When you buy your saddle, also buy a saddle adapter to mount the saddle.
Query “comfort saddles” for bikes, read the reviews and if you can, try the saddle out at the bike shop. Just remember, you will be riding in an upright position. Think cruising not racing. Also think nose-less or horn-less. If where you buy the saddle takes returns, so much the better.
The Captain Obvious statement is that you are more likely to use the AirDyne for exercise than hanging laundry if the saddle is comfortable.
There is a more complex way of fitting the saddle than what I cover in this Instructable. It involves determining setback, determining height, finding a seatpost that will work, and accurately drilling the seatpost. I bought several different seatposts and I fitted one while I was working out the best way to approach fitting the saddle. It is a lot more work for only marginal improvement in fitting and I doubt most people would notice.
Step 3: Saddle Setup - Saddle Adapter


Note: As you can see in the second photo, the saddle adapter is to the back and the seat is at its limit. It cannot go back any further with this hardware.
The nuts on the saddle adapter are 14 mm so I just use an adjustable wrench. Disassemble the saddle adapter and remove the bolt. With the saddle rails facing up, slip the larger inner halves of the rail clamps over the inside of the rails and push the body in between them. Normally, the open end of the loop of the body will face the rear of the saddle with the body parallel to the saddle. Slip the bolt through the body and inner clamps, add the outer clamps, and thread on both nuts.
With the seatpost in the bike, slip the saddle adapter loop over the top of the seatpost and let it settle on the seatpost shoulder. Adjust the saddle tilt to level by pushing on the front or rear of the saddle. You will hear it click over the gear teeth. Adjust the saddle to the mid-point of the rails and tighten the nuts. If the nuts are not tight enough, the saddle will swivel on the seatpost as you ride.
Get on the AirDyne and do some riding and use your arms. Pay attention to if you feel that you are being pushed forward or if you feel you are having to pull yourself forward. For being pushed, move the saddle back. For needing to pull, slide the saddle forward. You may also want to adjust the tilt of the saddle slightly down in the front or slightly up in the front. It depends on what is most comfortable to you. Always tighten the bolts after an adjustment.
There are formulas for setting the height of the saddle. However, with one-inch fixed steps, they aren’t needed. Sit on the saddle and push the pedal to the lowest point. If your leg isn’t fully extended, raise or lower the saddle until your leg is fully extended. Check it with both legs. If one is shorter, use the shorter leg setting. If you can’t settle your butt on the seat while standing on a pedal, the seat is too high.
There are reams of discussion over “knees over pedal spindle” (KOPS) versus “center of gravity over axle” (COGOA, I guess) and all many other racing / road bike discussions. It doesn’t matter here. You are looking for comfortable pedaling and to make it easy on your knees.
Step 4: Saddle Setup - Saddle Adapter and Brompton Adapter Pin

If you run out of room sliding the saddle backwards (or forwards), you can buy a Brompton Adapter Pin (made for a folding bike). It is a bolt on accessory. From the wishbone of the frame, measure how far back the saddle is located. Loosen the saddle adapter and remove the saddle assembly. Turn the saddle adapter so the opening of the loop faces up. Align the Brompton Adapter Pin on the seatpost facing backwards and clamp the Brompton Adapter Pin (5 mm hex wrench). Slip the saddle adapter on to the Brompton, set the saddle tilt, move the saddle or saddle adapter back, and tighten. You may have to adjust the height. Ride and adjust until it is comfortable.
Brompton does not support the Adapter Pin being installed facing the rear of the bike. However one Brompton dealership said they had used it facing backwards up to 300 pounds with stronger seat post options and reinforcing the seat post. Of course it is up to you but a mitigating factor is that exercise bikes are not subjected to the outdoor riding stresses and forces. Additionally, the AirDyne seatpost is a robust 1-1/8 inches in diameter with a 2.77 mm wall. The Brompton clamp has a 2.3 mm wall and the extension has a 1.75 mm wall. It is doubtful that the AirDyne seatpost will go first.
If you want to set up a saddle and seatpost assembly to take to the gym, it only takes a 5 mm hex wrench, an adjustable wrench, and a few minutes to set it up. When you determine the saddle height, thread a Velcro strap through the holes above the ones you use and then wrap it around the seatpost. It makes for a really quick changeover. You are probably going to remove the seatpost bolt to adjust the height anyway, so pull theirs off and put yours on.


