

Introduction: Extension Cord Fix


broken extension cord? easy fixes to save money and reduce and reuse.
Step 1: Ingredients. First You Need Some Damaged or Broken Cords. and a Couple Tools.


you left your car plugged in and drove over the cord? pulled the end off? chewed it up in the snow blower? found some at the dump? construction site dumpsters can be a sweet spot for getting "no good cords" that have been thrown out. as those guys usually have long heavy duty cords. they will not repair cords or make 2 or 3 cords out of a long 50 or 75 foot cord. they need long cords and due to safety standards if they cut one they just throw if out.
usually a star or Phillips screwdriver, wire cutters and wire strippers is all you need.
Step 2: You Can See the Damage Here. EASY Fix. Don't Shy Away. You Can Do It.


I don't splice, as splicing isn't as secure and safe as a complete new end. just make 2 new cords. cut the injured section out. clean with a rag and run the cord through your hands and mark any spots . cut out the bad and have a couple good lengths just needing a new end. this will be the same easy fix for your vehicles block heater end perhaps.
Step 3: Male and Female Ends

when you see these on sale. pick a few up. you can get them for a few bucks each . no use paying top price at 7-9 bucks making it not really cost effective in some cases.
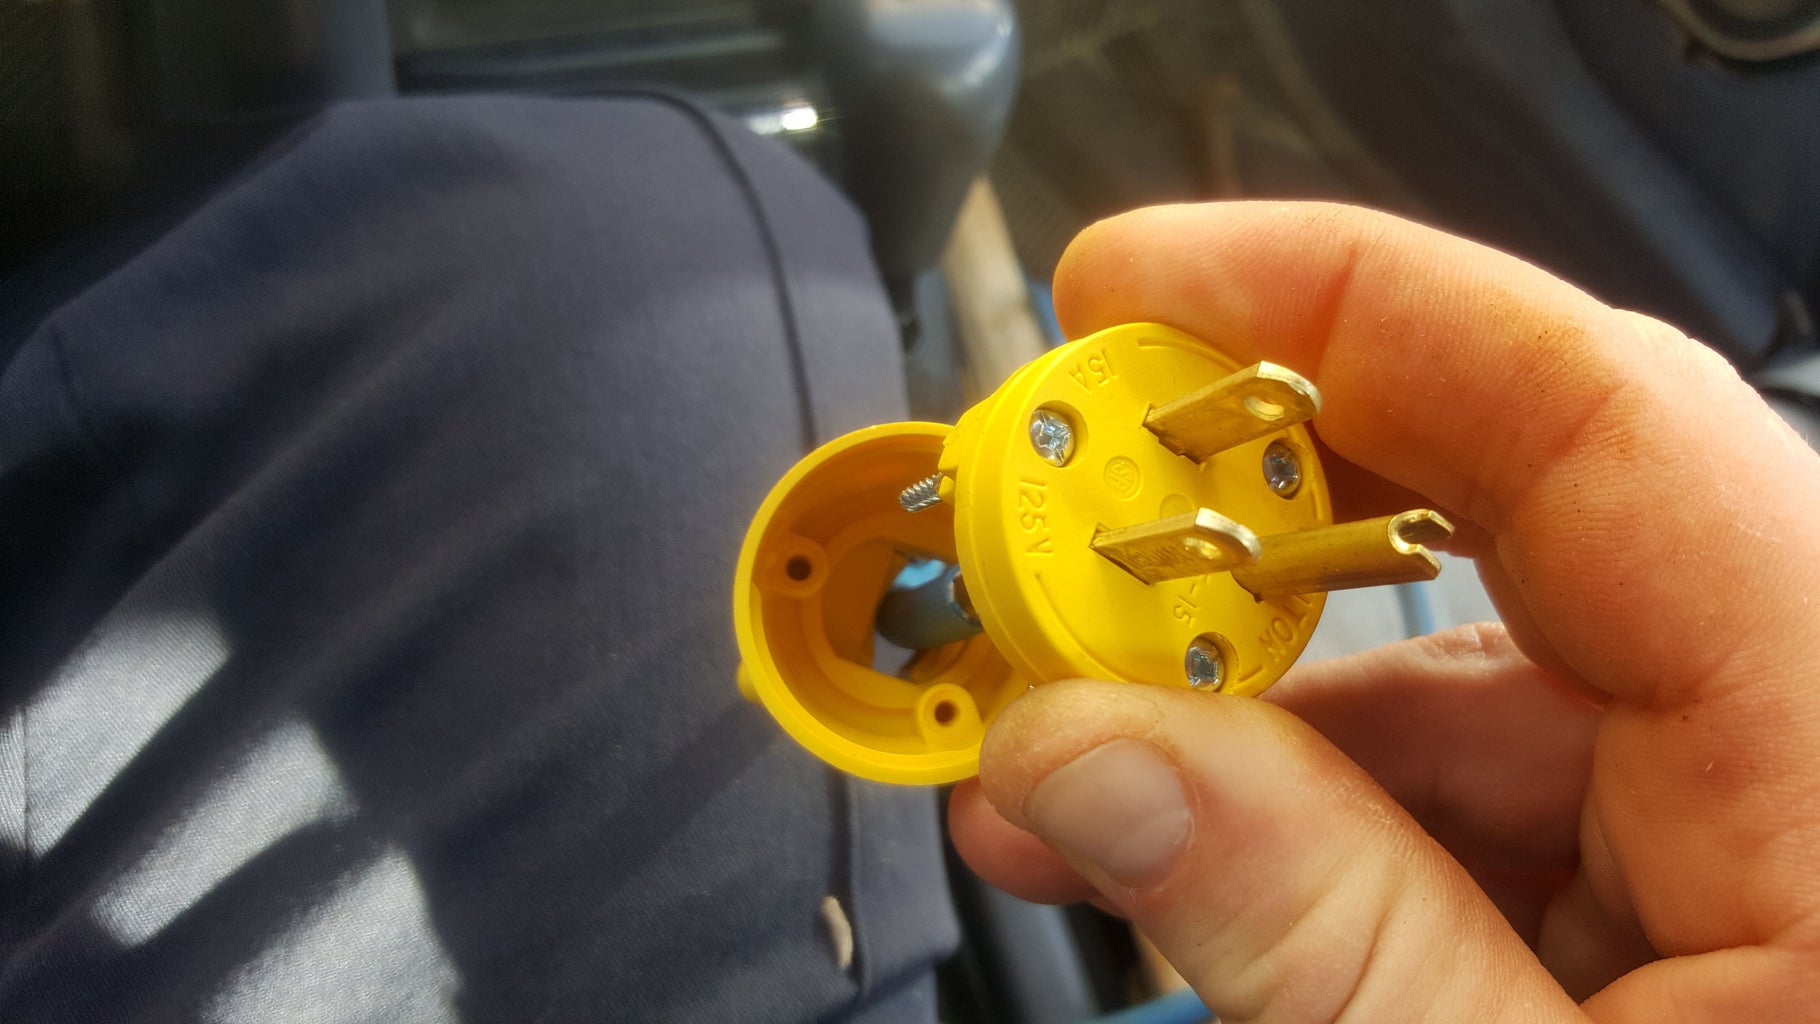
Step 4: Open the New End Put on Cord.


separate the new end and slide bottom on to cord. male or female ends are the same to connect and the process will be the same. you'll just need to keep the end that has the terminals.
Step 5: Prepare 3 Inner Wires. EASY!


cut the outer plastic covering and usually some insulation fibres. i go slow and cut gently and stretch a bit. keep making cuts till your through. you don't want to cut through into the other wires. 3 wires will be sticking out. tad more than an inch long . take a wire stripper and cut the outer covering off the 3 wires. just the ends tho about the length of that thumb nail you see. you'll trim excess later so don't worry. give a twist to wires to keep them tight and together.
note. don't use too small of a hole on the wire stripper and really push too hard on the wire stripper or you'll cut some of the fine individual copper wires. I apply gentle pressure and slowly cut and pull. start with a bigger hole first if unsure or don't have much experience.
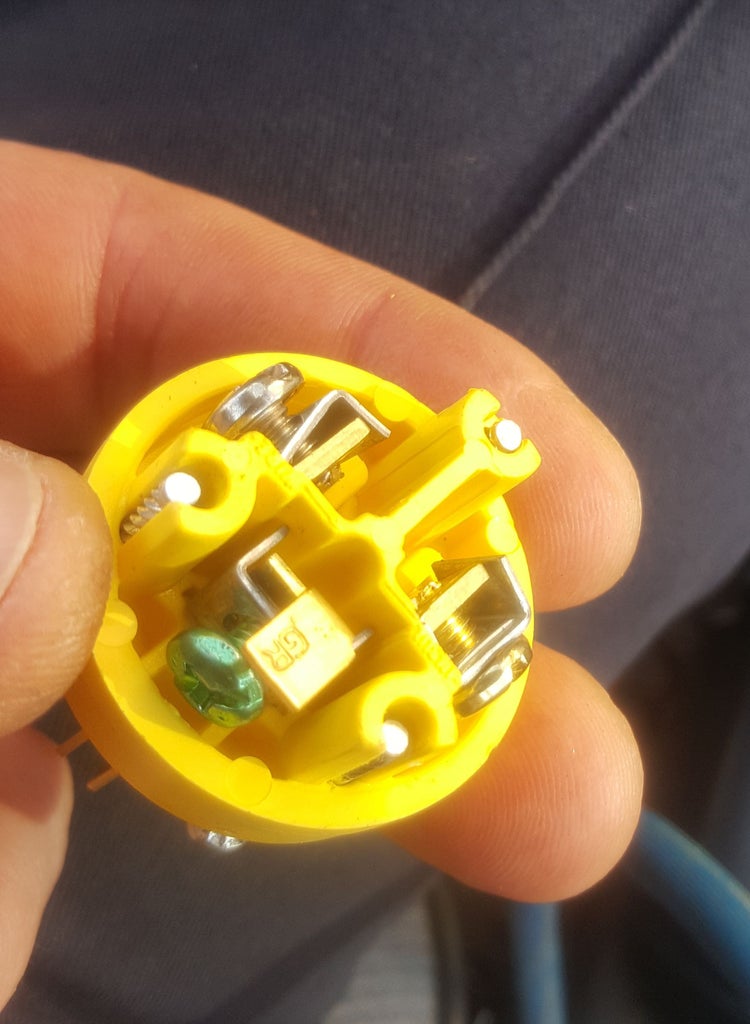
Step 6: Connect Green Wire to Green Clamp.


look at picture 1. i pointed out the sliding clamp that the screw will push and thus secure your wire. this clamp looks like a "staple" or "C" shape. first
trim your wire ends so they're about the same length as this clamp so you don't have a bunch extending out potentially touching other stuff. it'll look nice and neat. just dry fit it and either trim or fold over so it's the right length. do the green one first.
Step 7: Two Wires Left.


follow the rule and you're set.
The white wire goes on the silver screw.
And the black wire gets attached to the brass screw.
you've already done the green so it's the
gold or brass to black.
silver screw to white. you will see the different colours of the screws once you know there is a difference. hard to see in the pics but you'll be able to tell difference.
once all wires secure. put the top on and tighten it up. and tighten the bottom up .
Step 8: New Cords

i have the other ones in my vehicles. the good heavy duty duty yellow one has a minus 50 rating (think that means it'll be pliable to that temp.) and has a thicker more rubbery body. and heavier wires. it was a 75 foot construction cord I got from dumpster. they cost up to a hundred bucks. so the 3 new cords I have for the shop and vehicles should last a long time. hope you will tackle this easy fix.

Participated in the
Fix It Contest


