Introduction: From Bookcase to Workstation
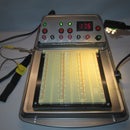
Hello everyone, today I am bringing you my latest creation and this time it has nothing to do with electronics. I don't have much space at my condo to have a work bench with all my tools and electronic equipment to build things, I've been working on my projects out of my desk and it's always a mess and disorganized . So one quite afternoon I looked over across the living room and saw the bookcase and I could not remember the last time I bought a book or took one out of the bookcase. I guess since I bought the kindle fire. Then it clicked, get rid of the books and make the bookcase useful, so I converted it into a workstation. Hell yeahhhhh.
Step 1: Material List
Material List
• 4’ x 8’ x ½” plywood sheet (1)
• 1” x 4’ x 8’ wood stud (4)
• 1” drywall screws
• ¾” wood screws
• “ L “ shape bracket medium (12)
• Wood stain
• Wood filler
• 1” x 8” Door trim
• Wood Glue
• Schlage 10 3/8”, 1” right-hand support hinge
• Schlage 10 3/8”, 1” left-hand support hinge
• Everbuilt 3 ½” oil-rubbed Bronze 5/8” Radius door hinges (4)
• Everbuilt 6” Zinc plated heavy-duty Tee hinge (2)
• Garage Door Handles
• Magnetic Door Catcher (2) single with strong magnet
• Pegboard ¼” holes 2’ x 4’ (1)
• ¼” pegs (do not get the ones that fit 1/8” holes, these fall off the pegboard when removing any tool from it)
• Pegboard accessories
• Under cabinet LED kit with Driver
• Rocker Switches (4)
• Power Pack
Step 2: Doors
Step A: Let's start by measuring the bookcase from side to side and from top to bottom.
Step B: Take the 4' x 8' x 1/2" plywood and cut to the measurements taken in step A, and then cut it right in the middle vertically. Now you have the two door panels (see pix 1 & 2).
Step C: Take the 1" x 4" x 8" studs and frame each door (see pix 3, 4 & 5), use the 1 1/4" wood screws.
Step D: Once you have framed both doors, cut some plywood pieces and cut them to fit the inside of the doors ( side to side) to make storage shelves. (see pix 7,8 & 9).
Step E: Now from the left over plywood cut (4) 1" wide x the inside of the doors in length ( see pix 10 & 11), These pieces would be installed behind each 1/4" pegboard, so you'll have at about 3/4" of clearance to install the pegs.
Now that both doors are assembled is time to sand them. Sand the inside and outside of the doors
clean them with a wet towel and they are ready to be stained. (color of choice).
Step 3: LED Lights & Folding Table
Step A: While the doors are drying , it's time to work on the bookcase. Let's start by installing the strips of LED Lights. One strip per shelf in this case 3 + 1 right under the top part of the bookcase (see pix 1,2 & 3). I've installed 4 rocket switches one per shelf (see pix 4,5 & 6).
Step B: Take the bottom shelf of the bookcase and place it at 30" from the floor. (This is the standard height of a desk. Secure each shelf using a " L " Shape bracket, Two per shelf one on each side (see pix 7, 8 & 9).
Step C: Cut a 31" x 20" piece of plywood, this would be the folding table (see pix 10, 11 & 12).
Now sand and stain table. (color of choice).
Step 4: Installing Doors,folding Table & Hardware
Step A: Start by installing the table, place the hinges 7 1/2" from each side and screw it on the table and then on the shelf(see pix 1 & 2). Now install the support brackets, one on each side (see pix 3).
Step B: Now install the door hinge on each door, 5 1/2" from the top of the door to the center of the hinge and 5 1/2" from the bottom of the door to the center of the hinge (see pix 4, 5 & 6). Now screw the doors to the bookcase. Now that the doors are hanged install the two magnetic door catcher on the top center of the shelf, these magnets will hold the doors close (see pix 7 &8).
Step C: Take the 1" thick strips cut in step 2 (step E) and place them behind the 24" apart vertically on the inside side of the door and then install the pegboard(see pix 9, 10 & 11)).
Step D: Last install the trim around the doors (see pix 12, 13 & 14), handles and a power strip for your equipment.
Step D: Install a strap, screw one end on top of the bookcase and screw the other end on the wall. (use a toggle bolt). This will keep the workstation from falling, doors will get heavy once finished(se pix 15 & 16).
Step 5: Conclusion
In conclusion this project is very practical when you do not have the space to build your projects or when you live in a condo or an apartment. I love it and I have plans to add a small screen, speakers and an electronic code keypad door opener. It was built to meet my needs. Thank you for viewing this instructable and good luck building your workstation.

Participated in the
Workshop Contest


